
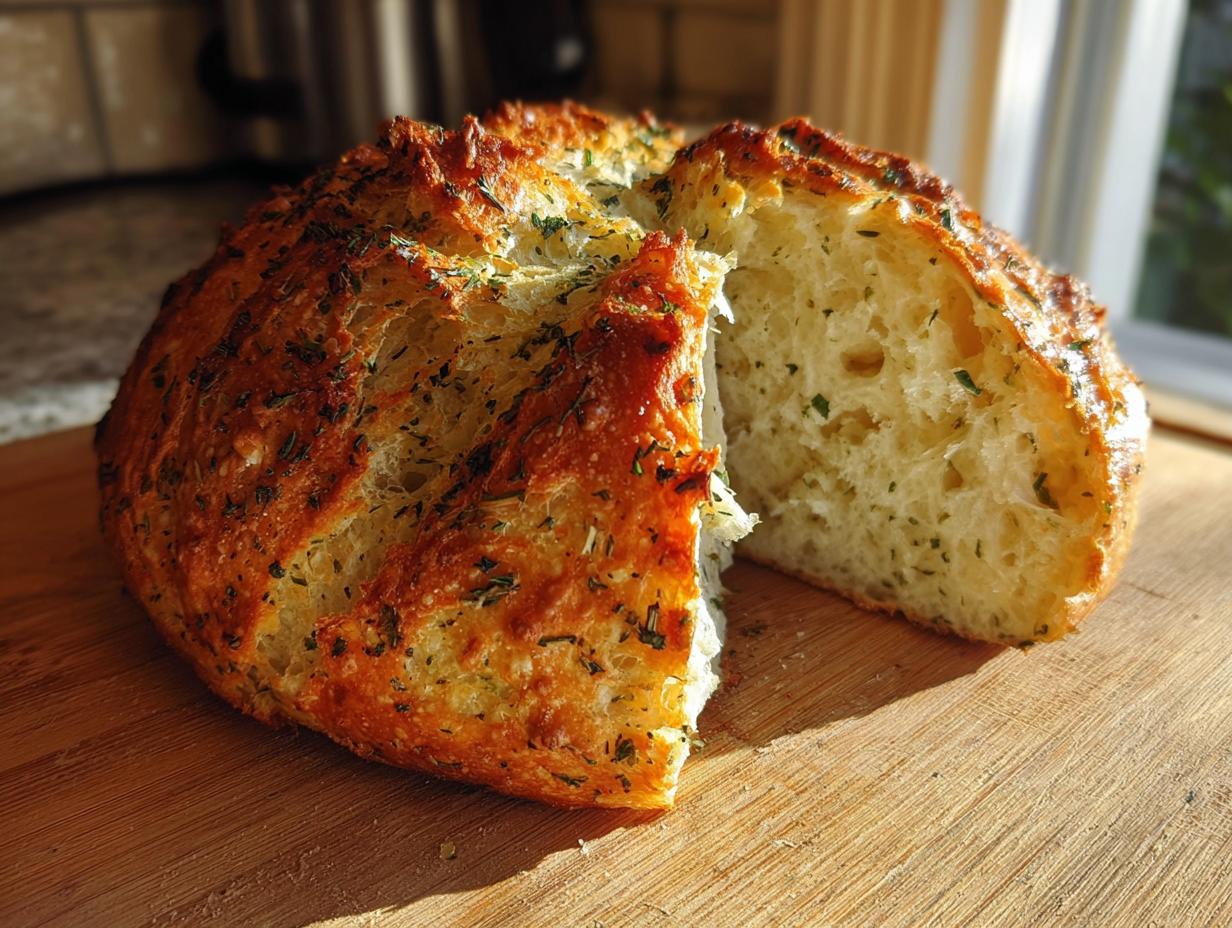
There’s something magical about the scent of Garlic Herb Dutch Oven Bread wafting through the kitchen, reminiscent of my grandmother’s cozy home on Sunday afternoons. As the bread bakes, the rich aroma of garlic and fresh herbs fills the air, wrapping you in warmth and comfort. This simple recipe is perfect for any gathering, easy enough for beginners, yet impressive enough to make everyone feel special. It’s the kind of bread that brings people together, creating cherished memories around the table.

What Is Garlic Herb Dutch Oven Bread?
Garlic Herb Dutch Oven Bread is a delightful homemade bread that combines the robust flavors of garlic and fresh herbs, all baked to perfection in a Dutch oven. This easy recipe yields a crusty exterior and a soft, airy interior, making it the ultimate comfort food.
- Prep Time: 15 minutes
- Cook Time: 45 minutes
- Total Time: 13 hours
- Servings: 1 loaf
Why You’ll Love Garlic Herb Dutch Oven Bread
- Quick Preparation: With just 15 minutes of hands-on time, you can set the stage for delicious homemade bread without a fuss.
- Simple Ingredients: Using basic pantry staples, this recipe allows you to create something extraordinary with ease.
- Beginner-Friendly Method: Perfect for novice bakers, the no-knead technique makes it approachable for all skill levels.
- Perfect for Gatherings: This bread is a crowd-pleaser that pairs beautifully with soups, salads, or simply enjoyed on its own.
- Make-Ahead Convenience: The long fermentation time means you can prepare it the night before, making it easy to serve fresh bread for brunch or dinner.
Ingredients You’ll Need
- 3 cups all-purpose flour
- 1 1/2 teaspoons salt
- 1/2 teaspoon instant yeast
- 1 1/2 cups warm water (not too hot to touch)
- 4 cloves garlic, minced (adjust for more or less flavor)
- 2 tablespoons fresh herbs (such as rosemary and thyme), chopped
- 1 tablespoon olive oil (for added richness)
Using fresh herbs will elevate the flavor of this bread, so don’t settle for dried! If you’re out of fresh herbs, dried ones can work in a pinch—just use about one-third of the amount. And if garlic isn’t your favorite, feel free to reduce it or substitute it with roasted garlic for a sweeter, milder taste. Always opt for high-quality flour for the best texture and flavor. For more information on the benefits of fresh herbs, check out this guide to growing herbs.
Step-by-Step Instructions
Preparing Ingredients
- Gather all your ingredients and measure them accurately to ensure the best results.
- Minced the garlic finely, so it distributes evenly throughout the bread.
- Chop your fresh herbs, ensuring they’re roughly the same size for even flavor.
- Warm your water until it feels comfortably warm to the touch, around 110°F (43°C).
Mixing the Dough
- In a large mixing bowl, combine the all-purpose flour, salt, and instant yeast. Stir until well mixed.
- In a separate bowl, combine the warm water, minced garlic, and chopped herbs.
- Pour the wet mixture into the dry ingredients. Using a wooden spoon or spatula, stir until just combined. The dough will be sticky and shaggy, which is perfectly normal.
- Cover the bowl tightly with plastic wrap and let it sit at room temperature for 12 to 18 hours. This long fermentation creates delicious flavor.
Shaping the Bread
- Once the dough has risen and appears bubbly, lightly flour a clean surface.
- Turn the dough out onto the floured surface. With floured hands, gently shape it into a ball, folding the edges towards the center.
- Let the dough rest for about 30 minutes, covered with a kitchen towel. This allows the gluten to relax for easier handling.
Baking the Bread
- Preheat your oven to 450°F (230°C) and place a Dutch oven inside to heat up.
- Carefully remove the hot Dutch oven from the oven (use oven mitts!).
- Place the shaped dough into the Dutch oven, cover it with the lid, and bake for 30 minutes.
- After 30 minutes, remove the lid and bake for an additional 15 minutes, or until the crust is golden brown and the bread sounds hollow when tapped.
Cooling
- Once baked, carefully remove the bread from the Dutch oven and place it on a wire rack.
- Let the bread cool for at least 30 minutes before slicing. This waiting period allows the steam to escape and improves the texture.
Variations
- Add cheese for a gooey, savory twist — try shredded cheddar or feta.
- Incorporate sun-dried tomatoes for a Mediterranean flair.
- Experiment with different herbs, like basil or oregano, based on the season.
- For a gluten-free option, substitute with a 1:1 gluten-free flour blend.
- Top with seeds such as sesame or poppy before baking for added crunch.
Serving and Storage Tips
Serving
Serve your Garlic Herb Dutch Oven Bread warm, sliced, and accompanied by a pat of butter or a drizzle of olive oil. It pairs beautifully with soups, stews, or fresh salads, making it a perfect addition to any meal or gathering.
Storage
Store leftovers in an airtight container at room temperature for up to 3 days. For longer storage, freeze slices in a freezer bag for up to 3 months. Reheat in the oven or toaster for a quick warm-up.
Common Mistakes
- Not measuring ingredients accurately: This can lead to improper dough consistency. Use a kitchen scale for best results.
- Skipping the fermentation time: Rushing this process can result in less flavorful bread. Allow the dough to rise for at least 12 hours.
- Not preheating the Dutch oven: This step is crucial for achieving a crispy crust. Always preheat before adding the dough.
- Cutting the bread too soon: Resist the urge to slice right away; letting it cool improves the texture.
Helpful Notes
- For a more intense flavor, try adding roasted garlic instead of fresh.
- If you want a softer crust, cover the bread with a kitchen towel after baking.
- Consider adding nuts like walnuts or pecans for a delightful crunch and nutty flavor.
- For an allergy-friendly option, ensure all ingredients are gluten-free and check the olive oil is pure.
Frequently Asked Questions
Can the recipe be frozen?
Yes, you can freeze Garlic Herb Dutch Oven Bread! After it has cooled completely, slice the bread and place it in a freezer bag. It can be frozen for up to 3 months. Just thaw it at room temperature when you’re ready to enjoy.
Can ingredients be substituted?
Absolutely! You can substitute the all-purpose flour with a 1:1 gluten-free flour blend if needed. Fresh herbs can be swapped for dried herbs (use about one-third of the amount), and you can adjust the garlic to suit your taste.
How to store leftovers?
Store any leftover bread in an airtight container at room temperature for up to 3 days. If you want to keep it longer, wrap it tightly in plastic wrap and place it in the freezer.
Can the recipe be made ahead?
Yes, the dough can be prepared the night before and left to rise for 12 to 18 hours. This makes it perfect for brunch or dinner, allowing you to enjoy fresh, homemade bread with minimal effort on the day of serving.
Final Thoughts
There’s nothing quite like the warmth of freshly baked Garlic Herb Dutch Oven Bread to create a cozy atmosphere in your home. I encourage you to give this recipe a try, whether it’s for a family gathering or a quiet evening at home. The delightful aroma, the soft, chewy interior, and that crispy crust will surely bring joy to your table. Share it with loved ones, and I promise it will become a cherished tradition in your kitchen, just like it is in mine.
Print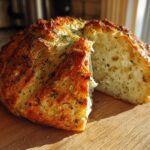
Garlic Herb Dutch Oven Bread
- Total Time: 13 hours
- Yield: 1 loaf 1x
- Diet: Vegetarian
Description
A simple recipe for Garlic Herb Dutch Oven Bread.
Ingredients
- 3 cups all-purpose flour
- 1 1/2 teaspoons salt
- 1/2 teaspoon instant yeast
- 1 1/2 cups warm water
- 4 cloves garlic, minced
- 2 tablespoons fresh herbs (such as rosemary and thyme), chopped
- 1 tablespoon olive oil
Instructions
- In a large bowl, combine flour, salt, and instant yeast.
- In another bowl, mix warm water, minced garlic, and chopped herbs.
- Pour the wet ingredients into the dry ingredients. Stir until combined.
- Cover the bowl with plastic wrap and let it sit for 12 to 18 hours at room temperature.
- Preheat your oven to 450°F (230°C) and place a Dutch oven inside to heat up.
- Once the dough has risen, turn it onto a floured surface and shape it into a ball.
- Carefully remove the hot Dutch oven, place the dough inside, and cover it.
- Bake for 30 minutes covered, then remove the lid and bake for an additional 15 minutes.
- Remove the bread from the oven and let it cool on a wire rack.
Notes
- Use fresh herbs for the best flavor.
- Adjust the garlic amount to your taste.
- This bread pairs well with soups and salads.
- Prep Time: 15 minutes
- Cook Time: 45 minutes
- Category: Baking
- Method: Dutch Oven
- Cuisine: American
Nutrition
- Serving Size: 1 slice
- Calories: 180
- Sugar: 0g
- Sodium: 200mg
- Fat: 3g
- Saturated Fat: 0g
- Unsaturated Fat: 2g
- Trans Fat: 0g
- Carbohydrates: 34g
- Fiber: 1g
- Protein: 5g
- Cholesterol: 0mg
Keywords: Garlic Herb Dutch Oven Bread, homemade bread, easy bread recipe
