
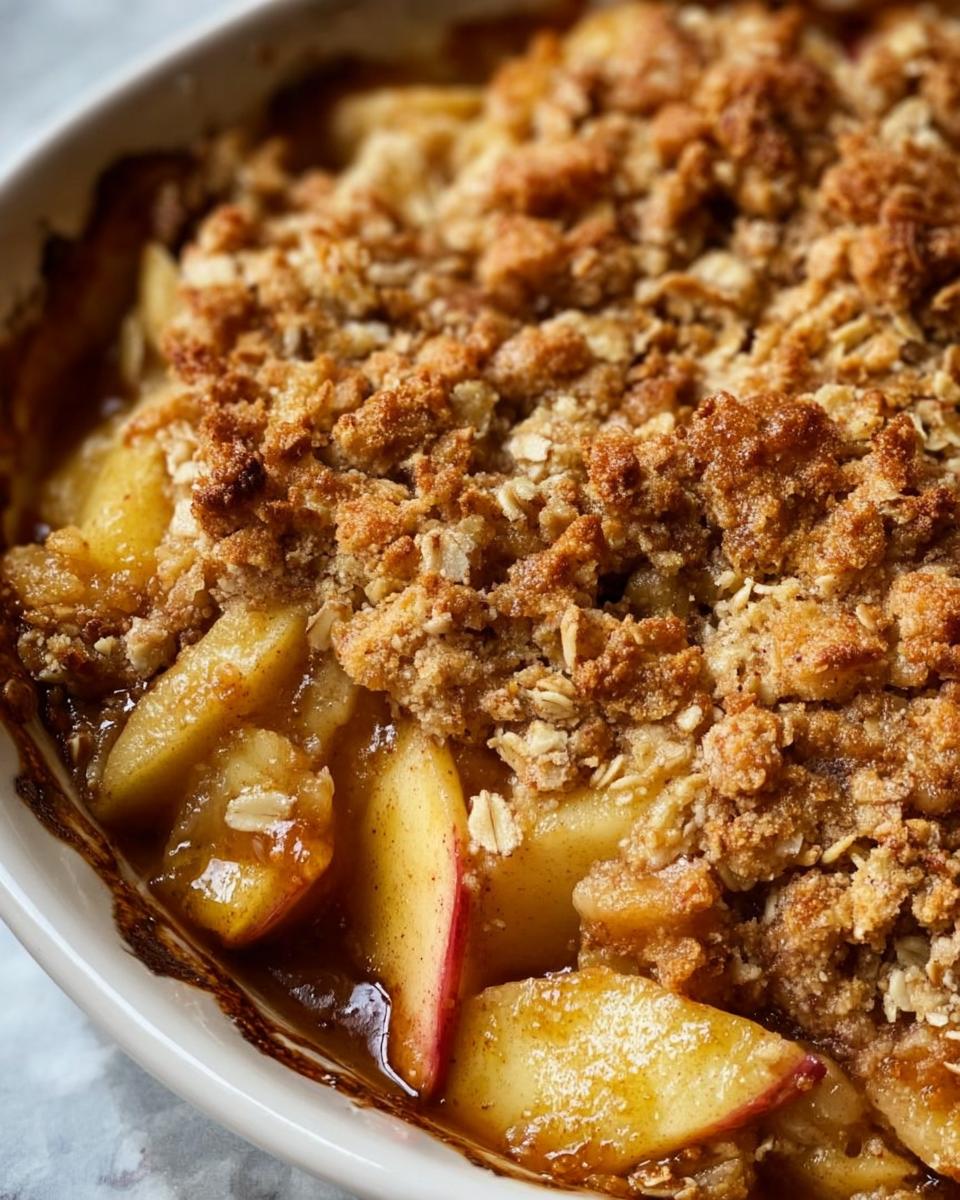
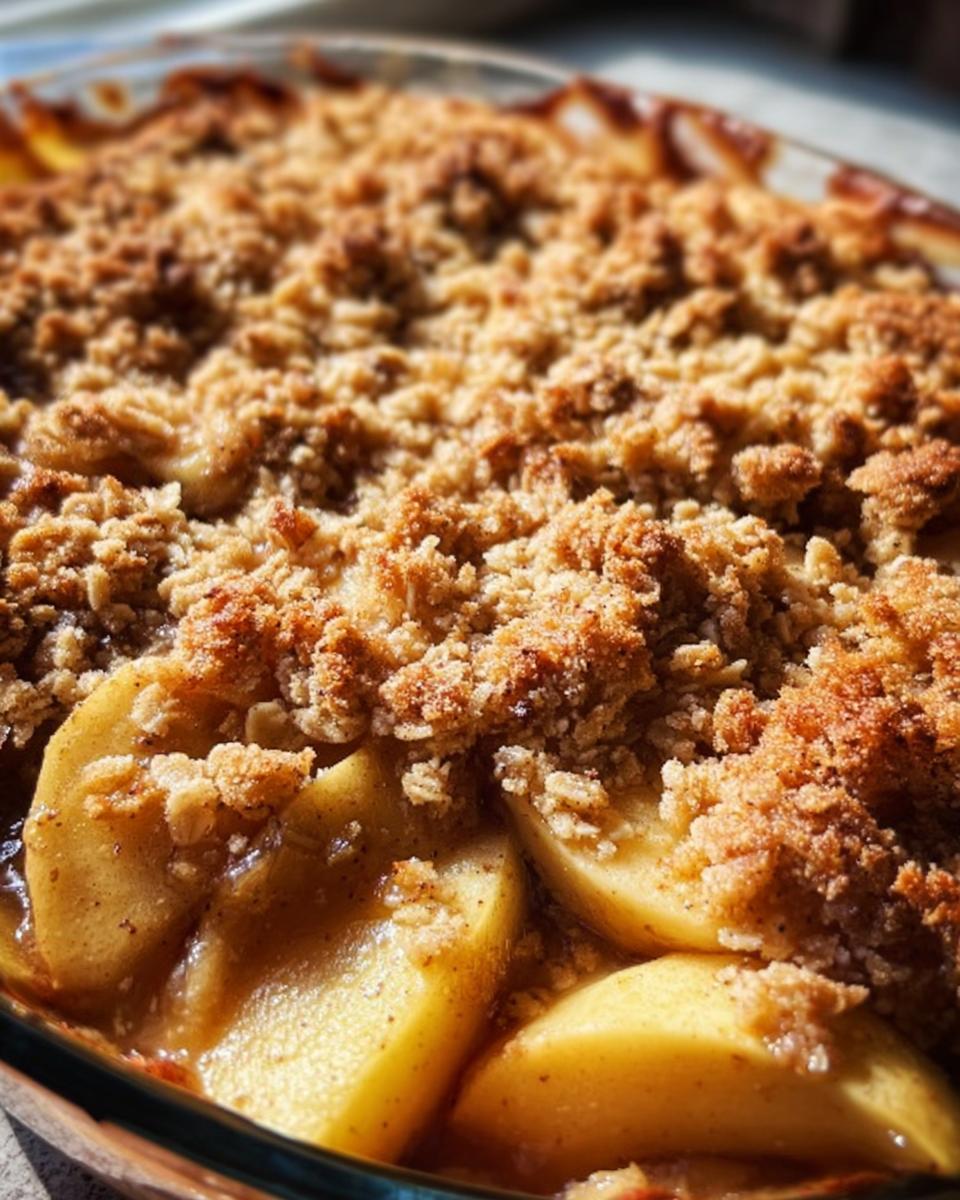
Oh my goodness, let me tell you about my absolute favorite dessert: Old Fashioned Apple Crisp! This delightful treat takes me back to my childhood, where I’d sit in my grandmother’s cozy kitchen, the aroma of sweet, spiced apples wafting through the air. There’s just something so comforting about warm, baked apples topped with a crunchy oat mixture that makes everything feel right in the world. Whether it’s a chilly autumn evening or a family gathering, this apple crisp is the perfect way to celebrate the season.
Not only is it wonderfully simple to whip up, but it also captures that nostalgic essence that we all crave. Imagine digging into a warm, bubbling dish of apple crisp, maybe with a scoop of vanilla ice cream melting on top! Trust me, you’re going to want to make this again and again!
Why You’ll Love Old Fashioned Apple Crisp
Oh, where do I even start? First of all, the flavor of Old Fashioned Apple Crisp is just out of this world. The combination of sweet and tart apples, along with warm spices like cinnamon, makes every bite a cozy hug for your taste buds. Plus, it’s super easy to prepare! You don’t need to be a master chef to whip this up. Just slice some apples, mix a few ingredients, and throw it in the oven. It’s really that simple!
And let’s not forget about its versatility! You can use any apples you have on hand—Granny Smith, Honeycrisp, or even a mix! You can also play around with the toppings, adding nuts or even a sprinkle of nutmeg for a little extra kick. This dessert is perfect for any occasion, whether it’s a holiday feast, a simple family dinner, or just a cozy night in. Trust me, once you try this classic recipe, it’ll become a staple in your kitchen. You’ll be craving it all year long!
Ingredients You’ll Need
Alright, let’s gather everything we need to make this scrumptious Old Fashioned Apple Crisp! You’re going to be amazed at how few ingredients are required for such a classic dessert. Here’s what you’ll need:
Essential Ingredients for the Filling
- 4 apples, thinly sliced (around 6 cups) – I love using a mix of Granny Smith for tartness and Honeycrisp for sweetness. Trust me, it makes a huge difference!
- 1/4 cup packed light brown sugar (for apples) – This adds that lovely caramelized flavor that pairs perfectly with the apples.
- 1/2 teaspoon ground cinnamon (for apples) – Because what’s an apple dessert without a sprinkle of cinnamon? It adds warmth and coziness.
Topping Ingredients
- 1/2 cup rolled oats – These are the star of the topping! They give that perfect crunch we all crave.
- 1/3 cup all-purpose flour – This helps bind the topping together and gives it that nice crumbly texture.
- 1/3 cup packed light brown sugar (for topping) – More sweetness and a touch of caramel flavor!
- 1/4 teaspoon salt – Just a pinch to balance all those lovely flavors.
- 1/2 teaspoon ground cinnamon (for topping) – Yes, more cinnamon! It makes the topping smell absolutely divine while baking.
- 1/4 cup unsalted butter, cold and cut into small pieces – This is what makes the topping rich and deliciously crumbly. Make sure it’s cold for the best texture!
Step-by-Step Instructions
Alright, let’s get our hands a little messy and dive into making this delightful Old Fashioned Apple Crisp! I promise, it’s going to be super fun and rewarding! Just follow these simple steps, and you’ll have a warm, bubbling dessert in no time.
Preparing the Apples
First things first, we need to get our apples ready! Start by preheating your oven to 350°F (175°C). This is crucial because we want the oven nice and hot by the time we’re ready to bake. While that heats up, grab your apples and give them a good wash. Peel them if you want, but honestly, I love leaving the skins on for extra texture and nutrients. Slice them thinly until you’ve got about 6 cups of apple slices.
Now, toss those beautiful apple slices into a large mixing bowl. Add in 1/4 cup of packed light brown sugar and 1/2 teaspoon of ground cinnamon. Give everything a good stir to coat the apples evenly. Oh, the smell of those apples mixed with cinnamon is just heavenly! Once they’re all mixed up, transfer the apple mixture into a greased baking dish, spreading it out evenly. This is where the magic starts!
Making the Topping
Now that our apples are prepped and sitting pretty in the baking dish, let’s move on to our topping! In a separate bowl, combine 1/2 cup of rolled oats, 1/3 cup of all-purpose flour, 1/3 cup of packed light brown sugar, 1/4 teaspoon of salt, and another 1/2 teaspoon of ground cinnamon. Mix it all together until it’s well combined. This topping is going to be the crowning glory of your apple crisp!
Next, it’s time to add the star ingredient: cold butter! Take your 1/4 cup of unsalted butter, cut it into small pieces, and toss it into the oat mixture. Now, the fun part! Using a pastry cutter, fork, or even your fingers, mix everything together until it becomes crumbly. You want it to resemble coarse crumbs. Don’t be afraid to get in there and have some fun! This step is what gives us that deliciously crunchy topping we all love.
Assembling and Baking
Alright, we’re almost there! With your apple filling ready and your topping all crumbly, it’s time to assemble. Sprinkle the topping evenly over the apples in the baking dish. Make sure to cover the apples well; we want every bite to have that crunchy goodness!
Now, pop the baking dish into your preheated oven and set your timer for 25-30 minutes. You’ll want to keep an eye on it as it bakes. The topping should turn a beautiful golden brown, and the apples will get all bubbly and delicious underneath. Trust me, your kitchen is about to smell amazing! Once it looks perfect, take it out and let it cool for just a few minutes before serving. You won’t be able to resist diving in!
Variations
The great thing about Old Fashioned Apple Crisp is how customizable it is! If you’re feeling adventurous, why not try swapping out the apples for other fruits? Pears, peaches, or even berries can create a delightful twist on the classic. Just keep in mind that different fruits may require slight adjustments in sugar and baking time.
If you want to spice things up a bit, consider adding a pinch of nutmeg or ginger to the filling for an extra layer of flavor. And for those of you with dietary preferences, you can easily make this dessert gluten-free by using almond flour or a gluten-free all-purpose blend in the topping. You can even switch to coconut oil instead of butter for a dairy-free version. There are so many possibilities to explore, so go ahead and make it your own!
Serving and Storage Tips
Now that you’ve made this delightful Old Fashioned Apple Crisp, let’s talk about how to serve it up and keep those leftovers fresh! I can’t stress enough how delicious this crisp is when it’s warm, straight out of the oven. It’s the perfect cozy dessert for chilly evenings. Serve it in individual bowls, and don’t forget to add a generous scoop of vanilla ice cream or a dollop of whipped cream on top. The cold creaminess melting into the warm apple crisp? Pure magic!
If you have any leftovers (which is rare in my house!), you can store them in the refrigerator for up to 3 days. Just make sure to cover the dish with plastic wrap or transfer it to an airtight container to keep it fresh. When you’re ready to enjoy it again, simply pop it in the oven at 350°F (175°C) for about 10-15 minutes to warm it up. You’ll get that lovely crunch back in the topping, and the apples will be just as delicious as the first time around!
Another fun idea is to enjoy your Old Fashioned Apple Crisp for breakfast! Yes, I said it! It’s like a fancy oatmeal, and who wouldn’t want that? Just warm it up and serve it with a splash of milk or some yogurt. Trust me, you’ll be starting your day on a sweet note!
Helpful Notes
Now, before you dive right into making your Old Fashioned Apple Crisp, here are some extra tips and tricks that’ll help you nail this recipe like a pro!
First off, let’s chat about apples. My absolute favorite combination is Granny Smith and Honeycrisp. The tartness of Granny Smith paired with the sweetness of Honeycrisp creates a delightful balance that makes each bite irresistible! But feel free to mix it up! Fuji apples or Braeburn can work well too. The key is to use a mix of sweet and tart apples for the most flavorful filling.
If you’re looking to cut down on sugar, you can reduce the amount of brown sugar in both the filling and topping by about a quarter without sacrificing much flavor. You could also try using a sugar substitute, like coconut sugar or stevia, if you’re watching your sugar intake. Just know that it may slightly alter the taste and texture, but hey, experimentation is part of the fun!
For those with dietary restrictions, this recipe is quite adaptable! If you need a gluten-free option, just swap out the all-purpose flour for a gluten-free blend. You can also use rolled oats that are certified gluten-free. And if you’re dairy-free, replacing the butter with coconut oil or a dairy-free butter substitute works like a charm. You’ll still get that delicious crumbly topping!
Lastly, don’t be shy about adding a personal touch! Toss in some chopped nuts like pecans or walnuts for an extra crunch, or add a handful of raisins or cranberries for a pop of color and flavor. The possibilities are endless, and it makes the recipe feel even more special when you add your unique spin!
Frequently Asked Questions
1. Can I freeze this Old Fashioned Apple Crisp?
Absolutely! If you want to make it ahead of time, you can freeze the unbaked apple crisp. Just assemble it in your baking dish, cover it tightly with plastic wrap or aluminum foil, and pop it in the freezer. When you’re ready to bake it, you can bake it straight from frozen; just add an extra 10-15 minutes to the baking time.
2. What if I don’t have light brown sugar?
No worries! You can substitute with granulated sugar if that’s what you have on hand. If you really want a close flavor match, you can mix granulated sugar with a bit of molasses (1 tablespoon of molasses for every cup of granulated sugar) to mimic that lovely brown sugar taste!
3. Can I use all-purpose flour for a gluten-free version?
For a gluten-free Old Fashioned Apple Crisp, you’ll want to swap out the all-purpose flour for a gluten-free all-purpose blend. There are some great options available that work perfectly as a substitute without compromising texture or flavor!
4. How do I know when the apple crisp is done baking?
Great question! You’ll know it’s done when the topping is beautifully golden brown and the apples are bubbling around the edges. The smell will be absolutely divine, too—your kitchen will feel like a cozy autumn day!
5. Can I make this recipe vegan?
Of course! To make this Old Fashioned Apple Crisp vegan, simply replace the butter with coconut oil or a vegan butter alternative. It’ll still be delicious, and you won’t miss the dairy at all!
Final Thoughts
So there you have it, my friends! The magic of Old Fashioned Apple Crisp laid out just for you. I can’t tell you how much joy this recipe brings, not just to my kitchen but to anyone lucky enough to dig in. It’s a timeless classic that warms the heart and fills the belly, perfect for sharing with family and friends or savoring all on your own (no judgment here!).
Don’t hesitate to give it a try—trust me, you won’t regret it! I’d love to hear how your apple crisp turns out. Did you add any fun twists or variations? What did you think of that first warm, gooey bite? Feel free to drop a comment and share your experiences! Happy baking, and may your kitchen always smell like cozy autumn days!
Print
Old Fashioned Apple Crisp
- Total Time: 45 minutes
- Yield: 8 servings 1x
- Diet: Vegetarian
Description
A classic dessert featuring baked apples topped with a crunchy oat mixture.
Ingredients
- 4 apples, thinly sliced (around 6 cups)
- 1/4 cup light brown sugar (for apples)
- 1/2 teaspoon cinnamon (for apples)
- 1/2 cup rolled oats
- 1/3 cup all-purpose flour
- 1/3 cup light brown sugar (for topping)
- 1/4 teaspoon salt
- 1/2 teaspoon ground cinnamon (for topping)
- 1/4 cup unsalted butter, cold and cut into small pieces
Instructions
- Preheat your oven to 350°F (175°C).
- In a large bowl, combine the sliced apples, 1/4 cup brown sugar, and 1/2 teaspoon cinnamon. Mix well.
- Transfer the apple mixture to a greased baking dish.
- In another bowl, mix the oats, flour, 1/3 cup brown sugar, salt, and 1/2 teaspoon cinnamon.
- Add the cold butter pieces to the oat mixture. Use a pastry cutter or your fingers to combine until crumbly.
- Sprinkle the topping evenly over the apples in the baking dish.
- Bake for 25-30 minutes, or until the topping is golden brown and the apples are bubbly.
- Let cool slightly before serving.
Notes
- Serve warm with ice cream or whipped cream.
- Use a mix of sweet and tart apples for better flavor.
- Store leftovers in the refrigerator for up to 3 days.
- Prep Time: 15 minutes
- Cook Time: 30 minutes
- Category: Dessert
- Method: Baking
- Cuisine: American
Nutrition
- Serving Size: 1 serving
- Calories: 210
- Sugar: 12g
- Sodium: 90mg
- Fat: 6g
- Saturated Fat: 3g
- Unsaturated Fat: 2g
- Trans Fat: 0g
- Carbohydrates: 36g
- Fiber: 3g
- Protein: 2g
- Cholesterol: 15mg
Keywords: Old Fashioned Apple Crisp
