
There’s something about the delightful crunch of Rice Krispies Protein Balls that takes me back to my childhood kitchen, where my mom would whip up quick snacks for us after school. The sweet aroma of nut butter and honey mingles with the toasted cereal, creating a comforting treat that’s both satisfying and nutritious. These little bites are the perfect fusion of simplicity and flavor, making them a favorite for family gatherings or a quick pick-me-up during busy days.
What Is Rice Krispies Protein Balls?
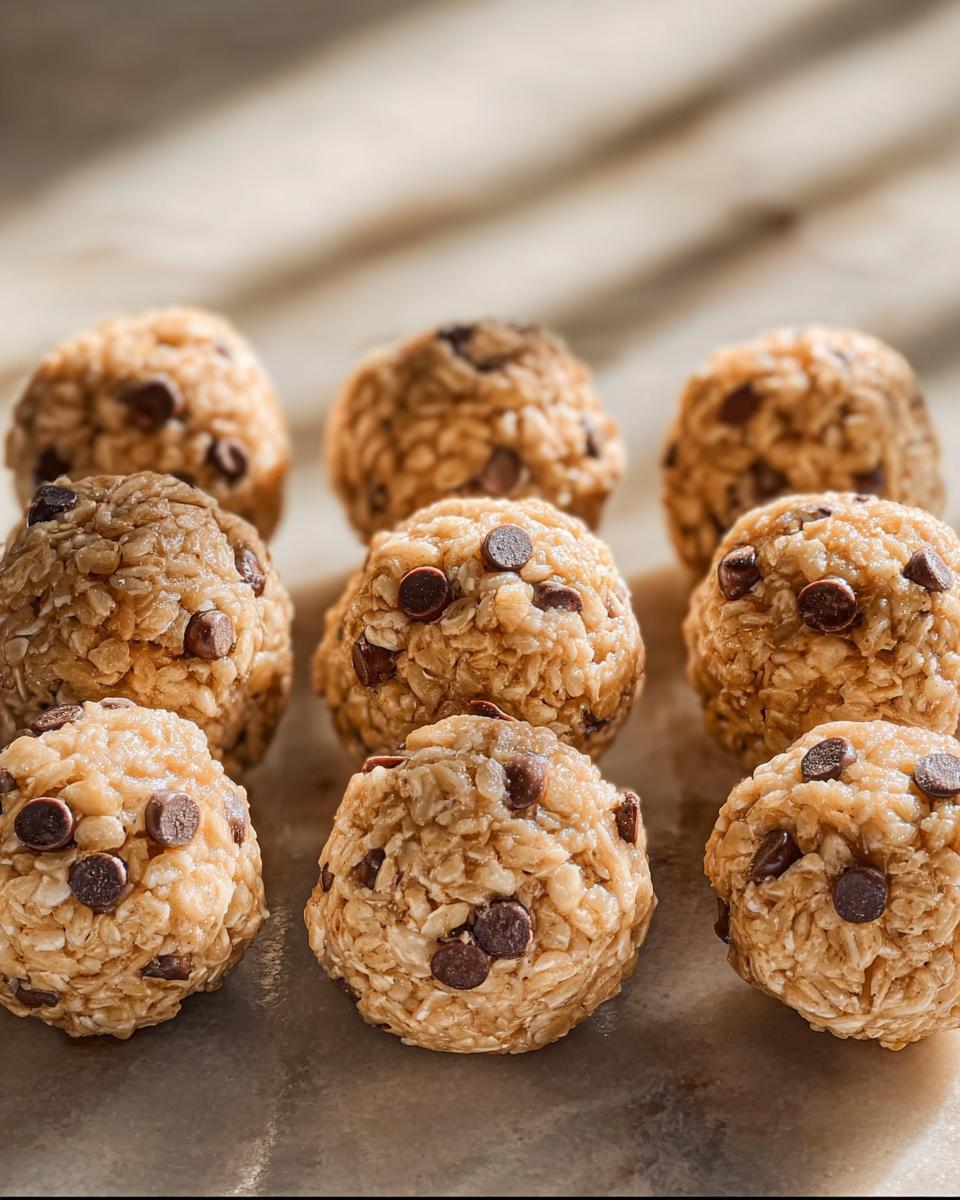
Rice Krispies Protein Balls are a delicious no-bake snack that combines the beloved crunch of Rice Krispies cereal with protein-packed ingredients for a nutritious treat. They are easy to make and perfect for any time of the day, offering both energy and satisfaction. With just a few simple ingredients, these tasty bites are sure to become a staple in your snack rotation.
- Prep Time: 10 minutes
- Cook Time: 0 minutes
- Total Time: 40 minutes (includes chilling time)
- Servings: 12
Why You’ll Love Rice Krispies Protein Balls
- Quick to prepare: Whip up a batch in just 10 minutes, perfect for busy days.
- Simple ingredients: Made with pantry staples, making it easy to create on a whim.
- Beginner-friendly: No baking required, making it a great recipe for novice cooks.
- Perfect for gatherings: These bites are a hit at parties, picnics, and holiday celebrations.
- Make-ahead convenience: Prepare in advance and store for a quick, healthy snack anytime.
Ingredients You’ll Need
- Rice Krispies Cereal (1 ½ cups) – For that signature crunch.
- Protein Powder (½ cup) – Choose your favorite flavor for variety.
- Nut Butter (½ cup) – Almond, peanut, or sunflower butter all work beautifully.
- Honey or Maple Syrup (¼ cup) – Sweetens the mixture; maple syrup adds a lovely depth.
- Mini Chocolate Chips (¼ cup, optional) – For a delightful chocolatey touch.
- Vanilla Extract (1 teaspoon) – Enhances the flavors, making them even more comforting.
For a nut-free version, consider using sunflower seed butter instead of nut butter. Always opt for natural nut butters that are smooth and creamy for the best texture. If you’re watching your sugar intake, feel free to reduce the honey or maple syrup slightly without compromising the delightful taste!
Step-by-Step Instructions
Preparing Ingredients
- Gather all your ingredients on a clean countertop for easy access.
- Measure 1 ½ cups of Rice Krispies cereal and place them in a large mixing bowl.
- In a separate bowl, measure out ½ cup of your preferred protein powder.
- Choose your nut butter (½ cup) and ensure it’s smooth; if it’s too thick, you can warm it slightly for easier mixing.
- Get your honey or maple syrup ready (¼ cup) and have your vanilla extract (1 teaspoon) on hand.
Mixing the Mixture
- In the bowl with the Rice Krispies, add the protein powder and nut butter.
- Pour in the honey or maple syrup and the vanilla extract.
- Using a spatula or wooden spoon, stir everything together until well combined; the mixture should feel sticky and cohesive.
- If you’re using mini chocolate chips, fold them in gently at this stage for an extra sweet touch.
- Pro Tip: If the mixture feels too dry, add a bit more nut butter or syrup until it holds together nicely.
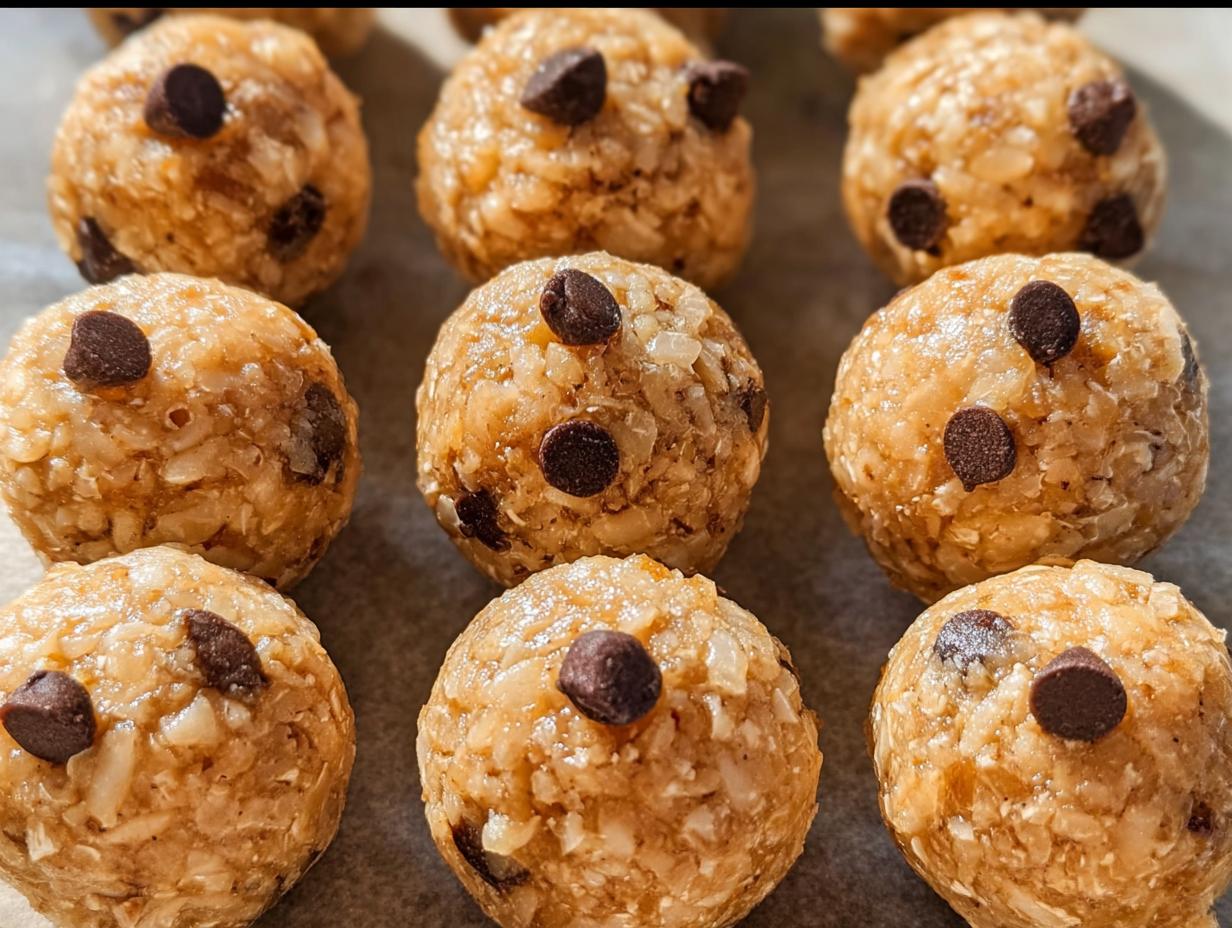
Shaping the Balls
- Line an 8×8 inch baking dish with parchment paper for easy removal.
- Transfer the mixture into the prepared baking dish and spread it out evenly.
- Use a spatula to press down firmly, ensuring the mixture is compact and holds together.
- For bite-sized snacks, you can also roll the mixture into small balls using your hands.
- Pro Tip: Wet your hands slightly to prevent the mixture from sticking while rolling.
Setting the Mixture
- Once shaped, place the baking dish in the refrigerator for at least 30 minutes to set.
- After chilling, remove from the fridge and lift the mixture out using the parchment paper.
- Cut into squares or roll into balls, depending on your preferred serving size.
- Enjoy your Rice Krispies Protein Balls right away or store them for later!
- Pro Tip: These treats can be kept in an airtight container in the fridge for up to one week, making them a perfect grab-and-go snack.
Variations
- Chocolate Peanut Butter: Use chocolate protein powder and add peanut butter for a richer flavor.
- Nut-Free Delight: Substitute nut butter with sunflower seed butter for a nut-free option.
- Seasonal Spices: Add a pinch of cinnamon or pumpkin spice for a cozy fall twist.
- Fruit & Nut: Incorporate dried fruits like cranberries or apricots and chopped nuts for added texture.
- Protein Boost: Mix in chia seeds or flaxseeds for an extra nutritional punch.
Serving and Storage Tips
Serving
Serve your Rice Krispies Protein Balls as a delightful snack for kids and adults alike. They’re perfect for lunchboxes, post-workout treats, or as a quick pick-me-up during the day. Pair them with a glass of milk or a warm cup of tea for a cozy moment.
Storage
Store the protein balls in an airtight container in the fridge for up to one week. For longer storage, you can freeze them for up to three months. Simply thaw in the fridge before enjoying!
Common Mistakes
- Using too much protein powder: This can make the mixture dry. Stick to the recommended amount for the best texture.
- Not pressing the mixture firmly: If the mixture isn’t compact, the balls may fall apart. Press down firmly to help them hold their shape.
- Skipping the chilling step: Chilling helps the balls set properly. Don’t rush this step for the best results.
- Using old cereal: Ensure your Rice Krispies are fresh for optimal crunch and flavor.
Helpful Notes
- For a vegan option, use maple syrup and a plant-based protein powder.
- Try adding a tablespoon of cocoa powder for a chocolatey flavor without the chips.
- If you prefer a softer texture, reduce the amount of Rice Krispies slightly.
- Add a pinch of sea salt to enhance the sweetness and flavor.
- These protein balls can also be made gluten-free by ensuring your Rice Krispies are certified gluten-free.
Frequently Asked Questions
Can the recipe be frozen?
Yes, absolutely! You can freeze the Rice Krispies Protein Balls for up to three months. Just place them in an airtight container or freezer bag, and thaw them in the fridge when you’re ready to enjoy.
Can ingredients be substituted?
Definitely! Feel free to swap out the nut butter for sunflower seed butter for a nut-free version. You can also use any flavor of protein powder you prefer, and honey can be replaced with agave syrup if needed.
How to store leftovers?
Store any leftover protein balls in an airtight container in the fridge for up to one week. This keeps them fresh and ready for snacking anytime.
Can the recipe be made ahead?
Yes, these protein balls are perfect for making ahead of time! Prepare them a few days in advance and store them in the fridge, so you always have a healthy snack on hand.
Final Thoughts
There’s something truly special about making Rice Krispies Protein Balls and sharing them with family and friends. They embody comfort and nostalgia, and they’re so easy to whip up that anyone can join in the fun. I encourage you to try this delightful recipe and savor the joy it brings. Whether you enjoy them as a quick snack or a sweet treat after dinner, these protein balls are sure to become a cherished part of your kitchen memories!
Print
Rice Krispies Protein Balls
- Total Time: 40 minutes
- Yield: 12 servings
- Diet: Vegetarian
Description
A simple and nutritious snack that combines the crunch of Rice Krispies with protein for a delicious treat.
Ingredients
- Rice Krispies Cereal (1 ½ cups)
- Protein Powder (½ cup)
- Nut Butter (½ cup)
- Honey or Maple Syrup (¼ cup)
- Mini Chocolate Chips (¼ cup, optional)
- Vanilla Extract (1 teaspoon)
Instructions
- In a large bowl, mix Rice Krispies, protein powder, and nut butter.
- Add honey or maple syrup and vanilla extract, stirring until combined.
- Fold in mini chocolate chips if using.
- Press the mixture into a lined baking dish.
- Refrigerate for at least 30 minutes to set.
- Cut into squares or balls and enjoy.
Notes
- Store in an airtight container in the fridge.
- Customize with your favorite protein powder flavor.
- Use different nut butters for variety.
- Prep Time: 10 minutes
- Cook Time: 0 minutes
- Category: Snack
- Method: No-bake
- Cuisine: American
Nutrition
- Serving Size: 1 ball
- Calories: 150
- Sugar: 5g
- Sodium: 50mg
- Fat: 7g
- Saturated Fat: 1g
- Unsaturated Fat: 6g
- Trans Fat: 0g
- Carbohydrates: 20g
- Fiber: 1g
- Protein: 6g
- Cholesterol: 0mg
Keywords: Rice Krispies Protein Balls, healthy snacks, no-bake protein bars
