
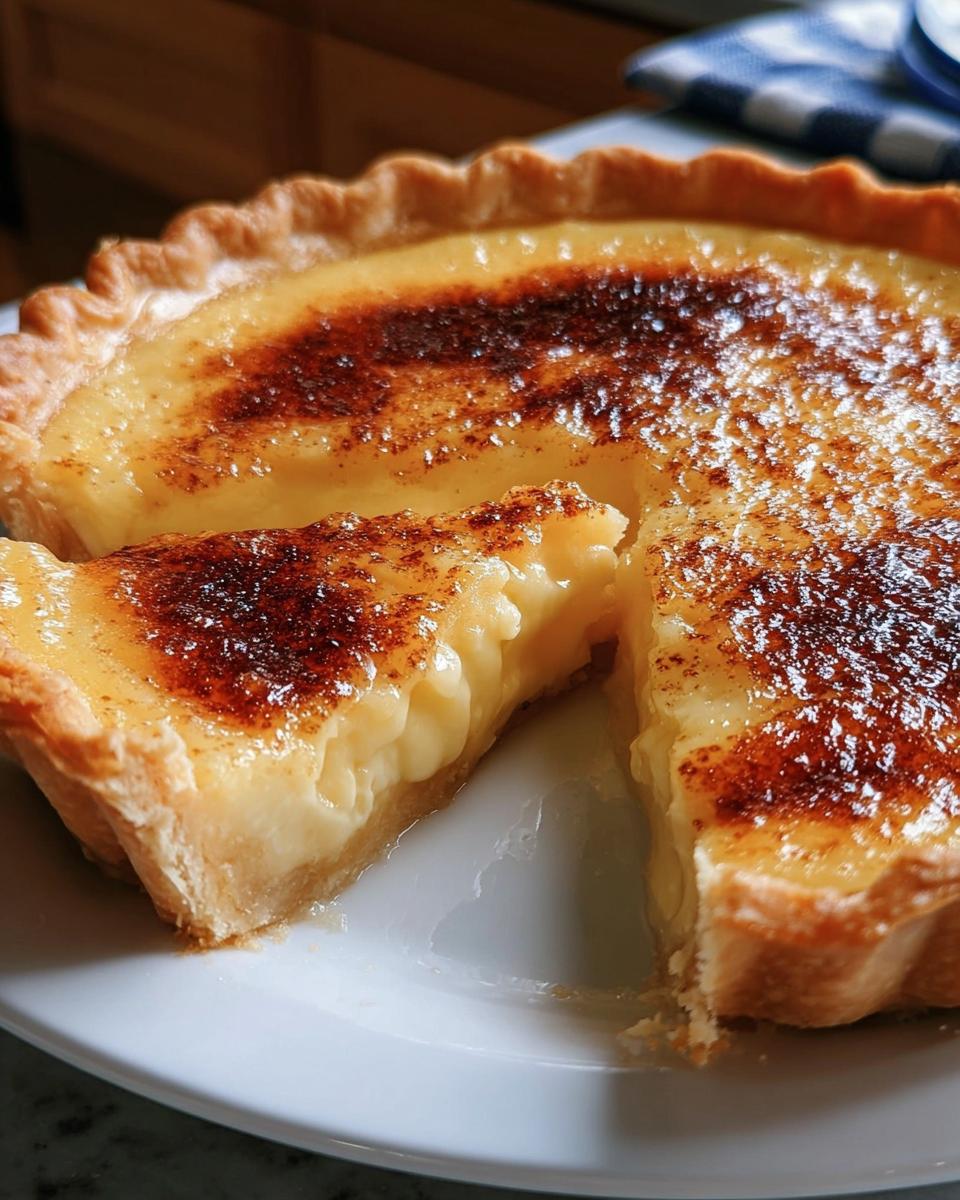
Let me tell you about Hillbilly Pie, or as some folks call it, Poor Man’s Pie. This charmingly simple dessert has a way of warming the soul and making any gathering feel a little more special. I remember my grandmother whipping this up on lazy Sunday afternoons, filling the house with its sweet aroma. It’s a pie that embodies comfort and nostalgia, using just a handful of everyday ingredients that you probably already have in your pantry. Perfect for those moments when you want something sweet without all the fuss, Hillbilly Pie is an absolute crowd-pleaser, and trust me, everyone will be coming back for seconds!
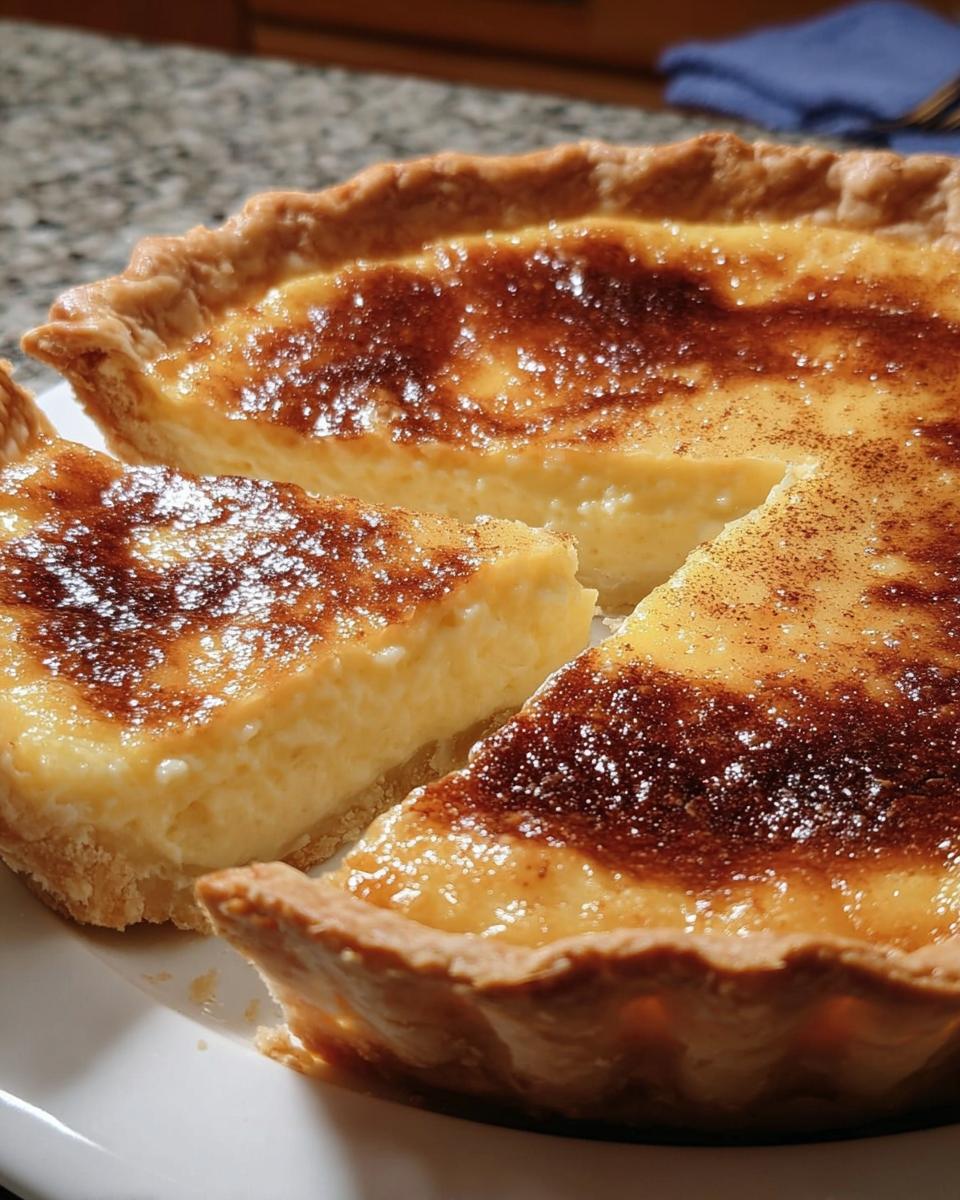
What makes it even better? It’s incredibly easy to make! Whether you’re a seasoned baker or just starting out, you’ll find that this pie comes together in a cinch. With a creamy, custardy filling nestled in a flaky crust, each bite is a delightful reminder that sometimes, simplicity really is the ultimate sophistication. So, roll up your sleeves and let’s dive into this delightful recipe that brings joy and sweet satisfaction with every slice!
Why You’ll Love Hillbilly Pie
Oh, where do I even start with why Hillbilly Pie is just the best? First off, it’s all about simplicity. You don’t need a ton of fancy ingredients or complicated techniques to whip this up. It’s made with things you likely already have on hand, making it the perfect go-to dessert for those last-minute gatherings or cozy nights in. Plus, the flavor? Wow! It’s rich and creamy, with just the right hint of sweetness that makes it utterly irresistible.
But let’s not forget the nostalgia factor! This pie brings back memories of family dinners and holidays spent around the table, laughing and sharing stories. It’s the kind of dessert that feels like a warm hug, and trust me, it never fails to impress. And since it requires just a little bit of time to prepare, you can easily fit it into your busy schedule. So, whether you’re baking for a special occasion or simply craving something sweet, Hillbilly Pie is sure to become a beloved staple in your home!
Ingredients You’ll Need
- 1 unbaked 9-inch pie crust (store-bought or homemade): This forms the base of your pie, so choose your favorite! A flaky crust complements the creamy filling perfectly.
- 1 1/2 cups granulated sugar: This adds that delightful sweetness. Don’t worry if you feel like it’s a lot; it balances beautifully with the other flavors!
- 1/4 cup all-purpose flour: This helps to thicken the filling while baking. Make sure to spoon it into your measuring cup and level it off for accuracy.
- 1/4 teaspoon salt: A little salt enhances the sweetness and rounds out the flavors. Just a pinch is all you need!
- 1 cup whole milk: This gives the pie its creamy texture. If you’re in a pinch, you can substitute with 2% milk, but whole milk really makes it rich.
- 2 large eggs, lightly beaten: These are the binding agents that help set the filling. You want them well-beaten for an even consistency.
- 1 teaspoon vanilla extract: Use pure vanilla extract if you can—it adds a warm, inviting flavor that makes this pie irresistible.
- 1/2 cup unsalted butter, melted: This brings richness and depth to the filling. Just make sure it’s melted but not too hot when you mix it in!
- 1/4 teaspoon ground nutmeg or cinnamon (optional): Sprinkle this on top if you want to add a warm spice note; it’s a lovely touch for special occasions!
Step-by-Step Instructions
Preheat the Oven
First things first, we need to preheat that oven! Set it to 350°F (175°C). Preheating is super important because it helps the pie bake evenly, giving you that perfectly set custard filling. You want your oven to be nice and hot when the pie goes in, ensuring it rises beautifully and doesn’t end up soggy. Trust me, it makes all the difference!
Mix the Dry Ingredients
Now, let’s tackle those dry ingredients. In a large mixing bowl, combine the granulated sugar, all-purpose flour, and salt. Give it a good whisk until everything’s well blended. This step is crucial because it ensures that there are no clumps of flour or sugar in your pie filling. You’re aiming for a smooth consistency here, so take your time with this part!
Combine Wet Ingredients
Next up, it’s time to mix in the wet ingredients. Add the whole milk, lightly beaten eggs, and vanilla extract to the dry mixture. Grab a whisk and mix it all together until it’s nice and smooth. Don’t worry if it looks a bit runny; that’s perfectly normal! The magic happens when it bakes. Just be sure everything is combined really well for a silky filling.
Assemble the Pie
Now comes the fun part—assembling your pie! Carefully pour that luscious filling into your unbaked pie crust. Take your time to spread it evenly. If you’re feeling adventurous, sprinkle a little nutmeg or cinnamon on top for that extra flair. It’s a delightful touch that adds warmth and a hint of spice!
Bake the Pie
Alright, pop your pie into the preheated oven and set a timer for 45 to 50 minutes. You’ll want to keep an eye on it as it bakes. Look for that golden-brown color and a slight jiggle in the center—this means it’s perfectly set. Once it’s done, take it out and let it cool before slicing into it. The waiting can be tough, but trust me, it’ll be worth it when you take that first bite!
Variations
If you’re feeling adventurous, there are so many fun ways to mix up your Hillbilly Pie! For a fruity twist, try adding fresh berries or sliced peaches to the filling before baking. Just toss them in with a little sugar to enhance their sweetness. If you want to spice things up, consider swapping out the vanilla extract for almond extract or adding a hint of lemon zest for a bright, fresh flavor.
And don’t forget about the toppings! A dollop of whipped cream or a scoop of vanilla ice cream on top can take this pie to another level of deliciousness. You can even sprinkle some toasted nuts or chocolate chips for added texture. The possibilities are endless, and that’s what makes this pie so special—it’s a blank canvas for your creativity!
Serving and Storage Tips
When it comes to serving Hillbilly Pie, I love to enjoy it slightly warm or at room temperature. It’s perfect on its own, but if you want to elevate it, top each slice with a dollop of whipped cream or a scoop of vanilla ice cream—yum! This pie is delightful for family dinners, potlucks, or even just a cozy night in.
Now, about storage: if you happen to have leftovers (though I doubt it!), just cover the pie with plastic wrap or foil and pop it in the fridge. It’ll last for about 3-4 days. You can also freeze it, but I recommend slicing it first for easy servings later on. Just wrap individual slices tightly in plastic wrap and then place them in a freezer-safe bag. When you’re ready to indulge, let a slice thaw in the fridge overnight, or pop it in the microwave for a few seconds to warm it up. Enjoy every last crumb!
Helpful Notes
Here are a few extra tips to make your Hillbilly Pie even more delightful! First, serving it warm is a real treat, but it’s also delicious at room temperature—perfect for those potluck gatherings. If you’re looking for a lighter version, you can substitute half of the sugar with a sugar alternative like stevia or monk fruit sweetener, just make sure to check the conversion ratio on the package. For more information on sugar substitutes, you can check out resources on sugar substitutes.
For a gluten-free option, you can use a gluten-free pie crust and substitute the all-purpose flour with a gluten-free flour blend. It’s a great way to accommodate guests with dietary restrictions without sacrificing flavor. And if you want to add some richness, consider folding in a bit of cream cheese with your wet ingredients for a tangy twist. Whatever variations you choose, remember to have fun with it—this pie is all about making it your own!
Frequently Asked Questions
1. Can I freeze Hillbilly Pie?
Yes, you can absolutely freeze Hillbilly Pie! Just make sure to slice it first for easy serving later. Wrap each slice tightly in plastic wrap and then place them in a freezer-safe bag. When you’re ready to enjoy, let a slice thaw in the fridge overnight or warm it up in the microwave for a few seconds.
2. What if I don’t have whole milk?
If you find yourself without whole milk, don’t worry! You can substitute it with 2% milk or even almond milk for a dairy-free option. Just keep in mind that using a lower-fat milk might slightly change the creaminess of the filling, but it will still be delicious!
3. Can I make this pie gluten-free?
Absolutely! To make Hillbilly Pie gluten-free, simply use a gluten-free pie crust and substitute the all-purpose flour with a gluten-free flour blend. It’s a great way to accommodate guests with dietary restrictions while still enjoying this comforting dessert.
4. Is there a way to reduce the sugar?
Yes! You can reduce the sugar by substituting half of it with a sugar alternative like stevia or monk fruit sweetener. Just check the package for the proper conversion ratio to ensure the right sweetness level.
5. Can I add fruits or nuts to the filling?
Definitely! Feel free to get creative with your Hillbilly Pie. Adding fresh berries, sliced peaches, or even chopped nuts can give your pie a delightful twist. Just toss the fruits with a bit of sugar before mixing them into the filling for added sweetness!
Final Thoughts
So there you have it—Hillbilly Pie, or Poor Man’s Pie, is a delightful dessert that’s not only easy to make but also brings a whole lot of love into your kitchen. I truly believe that the best recipes are the ones that come together with simple ingredients and a dash of nostalgia, and this pie embodies that perfectly. Whether you’re baking it for a family gathering, a cozy night in, or just because you’re craving something sweet, it’s sure to bring smiles all around.
Don’t hesitate to try your hand at this recipe! I promise, once you take that first bite of creamy, sweet goodness, you’ll understand why it’s a cherished favorite. So grab your ingredients, preheat that oven, and get ready to create a delicious memory with Hillbilly Pie. Happy baking!
Print
Hillbilly Pie (Poor Man’s Pie)
- Total Time: 1 hour 5 minutes
- Yield: 8 servings 1x
- Diet: Vegetarian
Description
Hillbilly Pie, also known as Poor Man’s Pie, is a simple dessert that combines common ingredients for a delicious treat.
Ingredients
- 1 unbaked 9-inch pie crust (store-bought or homemade)
- 1 1/2 cups granulated sugar
- 1/4 cup all-purpose flour
- 1/4 teaspoon salt
- 1 cup whole milk
- 2 large eggs, lightly beaten
- 1 teaspoon vanilla extract
- 1/2 cup unsalted butter, melted
- 1/4 teaspoon ground nutmeg or cinnamon (optional, for topping)
Instructions
- Preheat your oven to 350°F (175°C).
- In a large bowl, mix sugar, flour, and salt.
- Add milk, eggs, and vanilla extract. Whisk until smooth.
- Stir in melted butter until fully combined.
- Pour the mixture into the unbaked pie crust.
- If desired, sprinkle nutmeg or cinnamon on top.
- Bake for 45-50 minutes or until the pie is set and golden.
- Let it cool before serving.
Notes
- This pie is best served warm or at room temperature.
- Store leftovers in the refrigerator.
- Prep Time: 15 minutes
- Cook Time: 50 minutes
- Category: Dessert
- Method: Baking
- Cuisine: American
Nutrition
- Serving Size: 1 slice
- Calories: 250
- Sugar: 20g
- Sodium: 150mg
- Fat: 10g
- Saturated Fat: 6g
- Unsaturated Fat: 4g
- Trans Fat: 0g
- Carbohydrates: 35g
- Fiber: 1g
- Protein: 3g
- Cholesterol: 60mg
Keywords: Hillbilly Pie, Poor Man’s Pie, dessert pie, easy dessert
