
Oh my goodness, let me tell you about my absolute favorite holiday treat: Easter Fudge! Ever since I was a kid, Easter meant a flurry of colorful eggs, sweet treats, and of course, this delightful fudge. I remember my mom whipping up a batch each year, filling the kitchen with the heavenly scent of melting chocolate and sweet vanilla. It was the perfect way to celebrate spring and indulge my sweet tooth all at once.
This Easter Fudge is not just a treat; it’s a celebration in every bite. With its vibrant colors and creamy texture, it’s a hit at every gathering! Whether you’re hosting a festive brunch or looking for the perfect dessert to bring to a family gathering, this fudge is sure to bring smiles all around. Trust me, once you try it, you’ll be making it year after year!
Why You’ll Love Easter Fudge
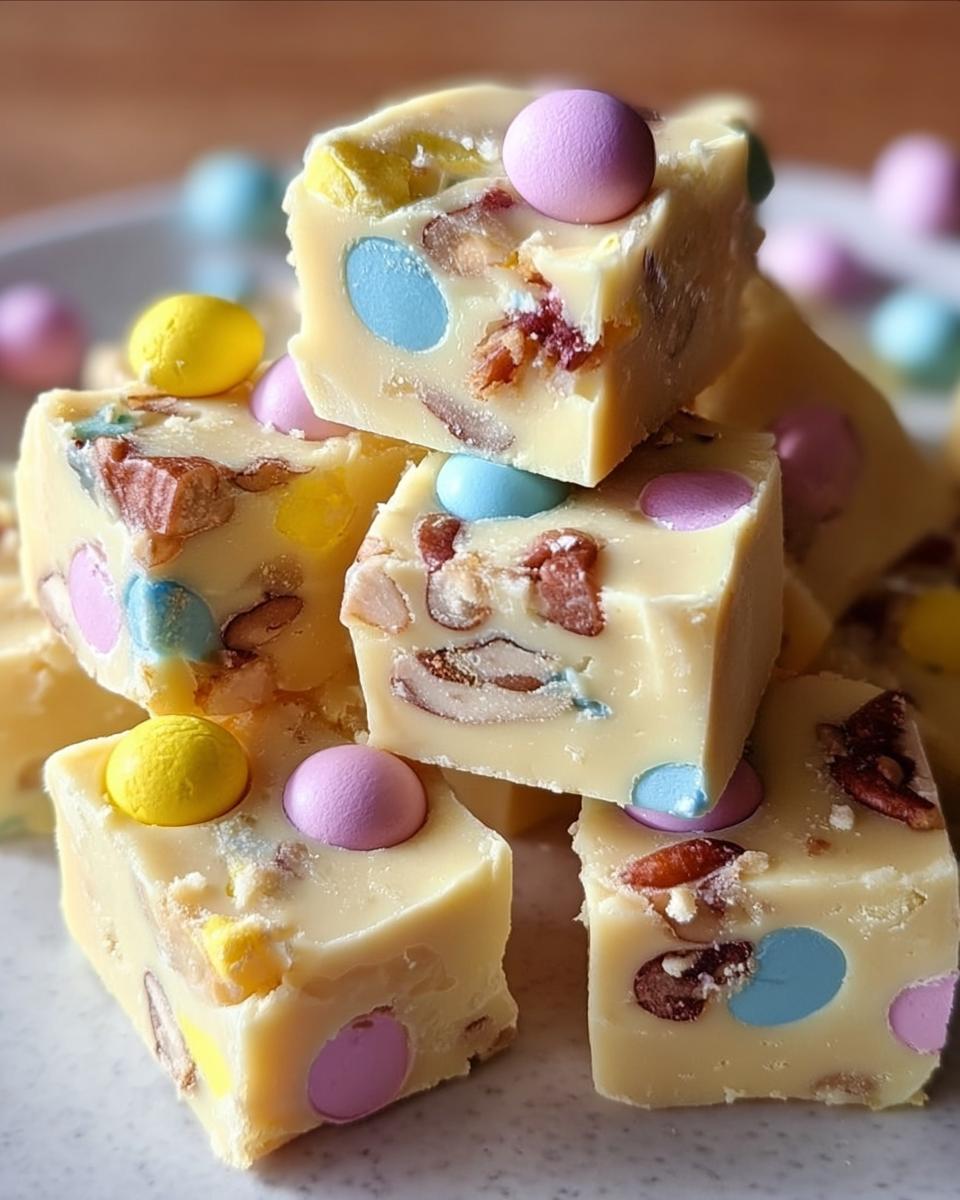
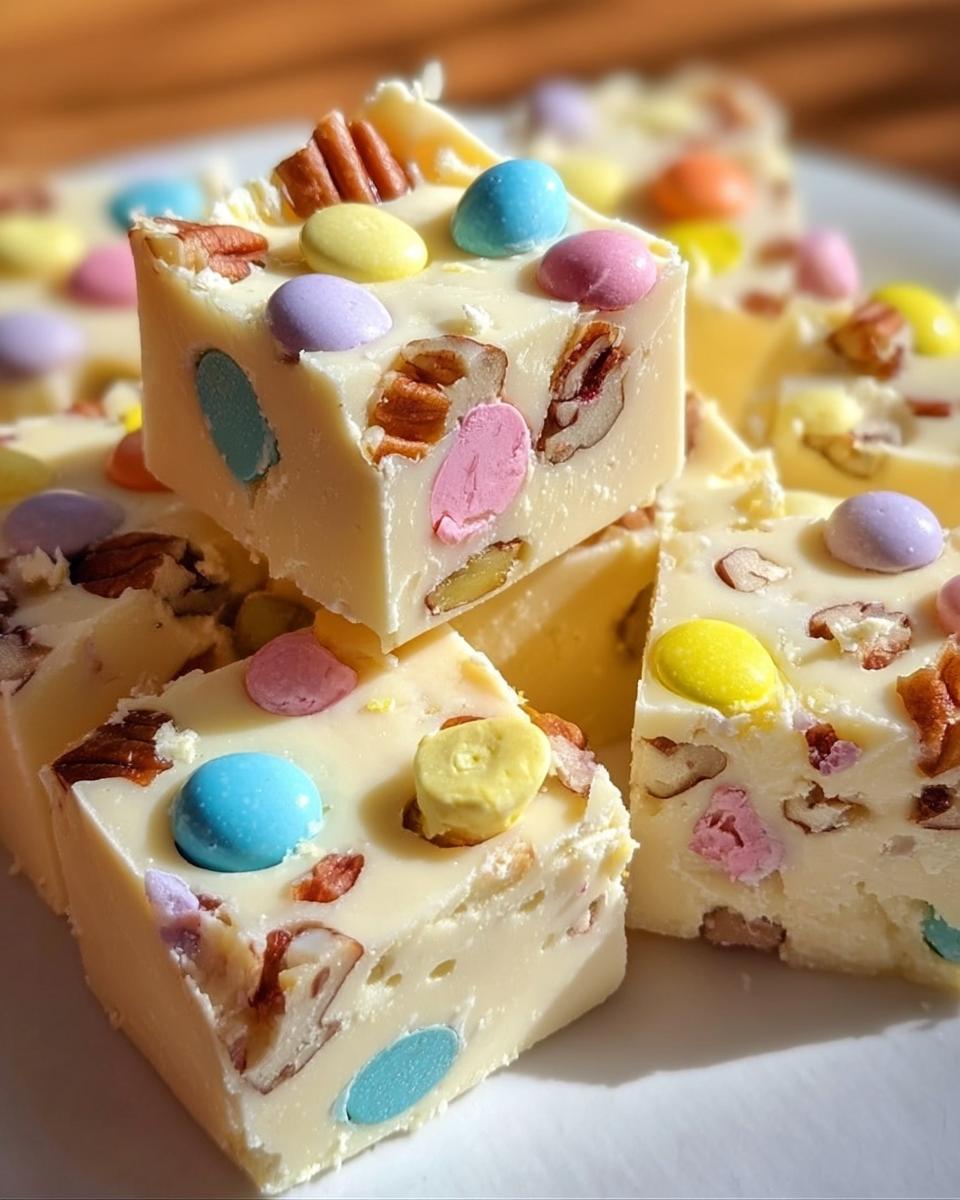
This Easter Fudge is an absolute showstopper! First off, the flavors are just incredible. The sweet, creamy white chocolate pairs perfectly with the crunchy elements of candy-coated chocolate eggs and optional pecans, creating a delightful texture that’s hard to resist. And let’s not forget the vibrant pastel colors! They make this fudge a feast for the eyes as much as for the taste buds, making it the perfect centerpiece for your Easter dessert table.
But what really sets this recipe apart is how easy it is to make. Seriously, if you can melt chocolate, you can whip up this fudge in no time! It’s a great project to get the kids involved in too—trust me, they’ll love chopping up those colorful chocolate eggs. Plus, it’s a versatile treat; whether you’re hosting a big family gathering or just enjoying a cozy day at home, this fudge is sure to please both kids and adults alike. So, gather your ingredients and get ready for some sweet, springtime fun!
Ingredients You’ll Need
Alright, let’s gather our goodies for this fabulous Easter Fudge! Here’s what you’ll need:
- 3 cups white chocolate chips: I love using Ghirardelli or Nestlé—both melt beautifully and create that creamy texture we’re after.
- 1 (14 oz) can sweetened condensed milk: This is the magic ingredient that gives our fudge that rich, melt-in-your-mouth consistency. No substitutes here, please!
- 1/4 cup unsalted butter: Make sure it’s at room temperature for easy blending. I find that unsalted butter lets the sweetness of the fudge shine through without being too salty.
- 1 teaspoon vanilla extract: Go for pure vanilla if you can; it really elevates the flavor. You’ll be amazed at how just a little makes a huge difference!
- 1 cup pastel-colored candy-coated chocolate eggs, chopped: Think of those adorable Cadbury Mini Eggs or similar treats! These will add that festive crunch and burst of color. Make sure to chop them up so they distribute nicely throughout the fudge.
- 1/2 cup chopped pecans (optional): If you’re a fan of a little nutty flavor, toss these in! They add a nice texture but can easily be omitted if you prefer a nut-free version.
- Pinch of salt: Just a little sprinkle enhances all those sweet flavors, so don’t skip this step!
So, gather these ingredients, and let’s get ready to create some delightful Easter Fudge magic!
Step-by-Step Instructions
Alright, it’s time to get our hands a little sticky and create some delicious Easter Fudge! Trust me, this part is super fun and pretty simple. Just follow these steps, and you’ll have a sweet treat in no time!
Preparing the Mixture
First things first, grab a medium saucepan and toss in your 3 cups of white chocolate chips, 1 can of sweetened condensed milk, and 1/4 cup of unsalted butter. You’ll want to heat this over medium-low heat. Keep it nice and gentle—this isn’t a race! Stir frequently with a spatula or wooden spoon until everything is melted and smooth. It should take about 5-7 minutes. The smell will be divine, I promise! If you see any bits of chocolate that aren’t melting, just keep stirring. We want a silky-smooth mixture here!
Adding Flavor and Texture
Once everything is melted and combined, remove the saucepan from the heat. Now, it’s time to add in 1 teaspoon of vanilla extract and a pinch of salt. Stir these in to enhance that sweet, creamy flavor. Then, fold in your chopped pastel-colored candy-coated chocolate eggs and optional chopped pecans. Be gentle here; you want to keep the mixture smooth but ensure those colorful eggs are evenly distributed throughout the fudge. Don’t be afraid to get in there and really mix it well so every bite has that lovely crunch!
Setting the Fudge
Now comes the exciting part! Line a 9×9-inch baking dish with parchment paper—this makes it super easy to lift the fudge out later. Pour your luscious mixture into the dish, using a spatula to spread it evenly. Once it’s all in there, pop it in the fridge for at least 2 hours. This step is crucial; it’s what gives our fudge that perfect, firm texture. Just picture yourself waiting with anticipation as it chills, knowing that soon you’ll be enjoying the sweet reward of your labor. Once it’s set, cut it into squares, and voila! You’ve got yourself some fabulous Easter Fudge to share (or not!).
Variations
One of the best things about Easter Fudge is how versatile it is! You can switch things up to keep your taste buds excited and make each batch feel special. For starters, if you’re a dark chocolate lover, feel free to swap out the white chocolate chips for dark or milk chocolate ones. The rich flavor will create a totally different, yet equally delicious, experience!
Another fun idea is to play with your mix-ins. Instead of candy-coated chocolate eggs, consider using mini marshmallows or dried fruits like cranberries or apricots for a chewy texture. You can even sprinkle in some crushed graham crackers for a s’mores-inspired twist! And if you’re feeling adventurous, try adding a bit of orange or mint extract instead of vanilla for a refreshing flavor boost.
Oh, and don’t forget about toppings! Drizzle some melted chocolate over the fudge before chilling it, or sprinkle some colorful sprinkles or edible glitter on top to really make it festive. The possibilities are endless, and that’s what makes this recipe so much fun. So get creative, and let your imagination run wild with your Easter Fudge!
Serving and Storage Tips
Now that you’ve made this delightful Easter Fudge, let’s talk about how to serve and store it! When serving, cut the fudge into bite-sized squares—about 1 inch is perfect. This way, it’s easy for everyone to grab a piece or two without overindulging (though who could blame them?). You can plate it beautifully on a festive platter or simply arrange it in a mason jar for a charming presentation!
As for storage, keep your fudge in an airtight container in the refrigerator. It’ll stay fresh for about 1-2 weeks, but I doubt it’ll last that long once your friends and family get a taste! If you want to keep it for longer, you can freeze the fudge. Just wrap it tightly in plastic wrap and then place it in a freezer-safe container. It should last for up to 3 months. When ready to enjoy, let it thaw in the fridge overnight. Trust me, this fudge is just as delicious after freezing!
Helpful Notes
Before you dive into making your Easter Fudge, here are a few helpful notes to ensure your fudge turns out perfectly every time! If you’re looking to lighten it up a bit, you can use sugar-free white chocolate chips and low-fat sweetened condensed milk. Just keep in mind that the texture might be slightly different, but it’ll still be delicious!
For those with allergies, feel free to substitute the butter with a dairy-free alternative or coconut oil for a similar texture. If you want to make this fudge gluten-free, you’re already in luck—just make sure your chocolate eggs are certified gluten-free. And remember, for that ultra-smooth fudge, stir thoroughly and don’t rush the melting process; patience is key for that perfect consistency!
Lastly, if you want to experiment with flavors, consider adding a touch of almond extract or even a swirl of peanut butter for an exciting twist. Enjoy the process and have fun making it your own!
Frequently Asked Questions
1. Can I freeze this Easter Fudge?
Absolutely! Just wrap it tightly in plastic wrap and place it in an airtight container. It can last in the freezer for up to 3 months. When you’re ready to enjoy, let it thaw in the fridge overnight.
2. What if I don’t have white chocolate chips?
No worries! You can substitute them with dark or milk chocolate chips. Just keep in mind that the flavor and color will change a bit, but it’ll still be yummy!
3. Can I make this fudge dairy-free?
Yes! Use dairy-free chocolate chips and substitute the butter with coconut oil or a dairy-free butter alternative. It’ll be just as delicious!
4. How long does the fudge last in the fridge?
Stored in an airtight container, your Easter Fudge will stay fresh for about 1-2 weeks. But let’s be real—it might not last that long!
5. What can I do if my fudge is too soft?
If your fudge doesn’t set properly, it may need more chilling time. If it’s still too soft after that, you can try melting it down again, adding a bit more white chocolate, and then letting it set again. Just don’t lose hope!
Final Thoughts
So there you have it—my beloved Easter Fudge recipe! I hope you’re feeling inspired to whip up a batch and fill your home with that incredible aroma of melting chocolate. Honestly, making this fudge brings back such sweet memories from my childhood, and I can’t wait to pass this tradition on to my own family. It’s a simple, joyful treat that brings everyone together during the holiday season.
Once you try it, I’d love to hear how your fudge turns out! Did you add any fun twists or variations? Don’t hesitate to share your experiences or any creative ideas you come up with. Let’s spread the joy of this delicious Easter Fudge far and wide! Happy baking!
Print
Easter Fudge
- Total Time: 2 hours 25 minutes
- Yield: 24 squares 1x
- Diet: Vegetarian
Description
Easter Fudge is a sweet and colorful treat perfect for the holiday.
Ingredients
- 3 cups white chocolate chips
- 1 (14 oz) can sweetened condensed milk
- 1/4 cup unsalted butter
- 1 teaspoon vanilla extract
- 1 cup pastel-colored candy-coated chocolate eggs, chopped
- 1/2 cup chopped pecans (optional)
- Pinch of salt
Instructions
- In a saucepan, combine white chocolate chips, sweetened condensed milk, and unsalted butter.
- Heat over medium-low heat, stirring until melted and smooth.
- Remove from heat and stir in vanilla extract and salt.
- Fold in chopped candy-coated chocolate eggs and pecans, if using.
- Pour the mixture into a lined 9×9-inch baking dish.
- Refrigerate for at least 2 hours until firm.
- Cut into squares and serve.
Notes
- Store in an airtight container in the refrigerator.
- This fudge can be customized with any type of candy.
- Make sure to chop the chocolate eggs for even distribution.
- Prep Time: 15 minutes
- Cook Time: 10 minutes
- Category: Dessert
- Method: Stovetop
- Cuisine: American
Nutrition
- Serving Size: 1 square
- Calories: 150
- Sugar: 14g
- Sodium: 25mg
- Fat: 7g
- Saturated Fat: 4g
- Unsaturated Fat: 2g
- Trans Fat: 0g
- Carbohydrates: 20g
- Fiber: 1g
- Protein: 2g
- Cholesterol: 10mg
Keywords: Easter Fudge, Easter dessert, candy
