
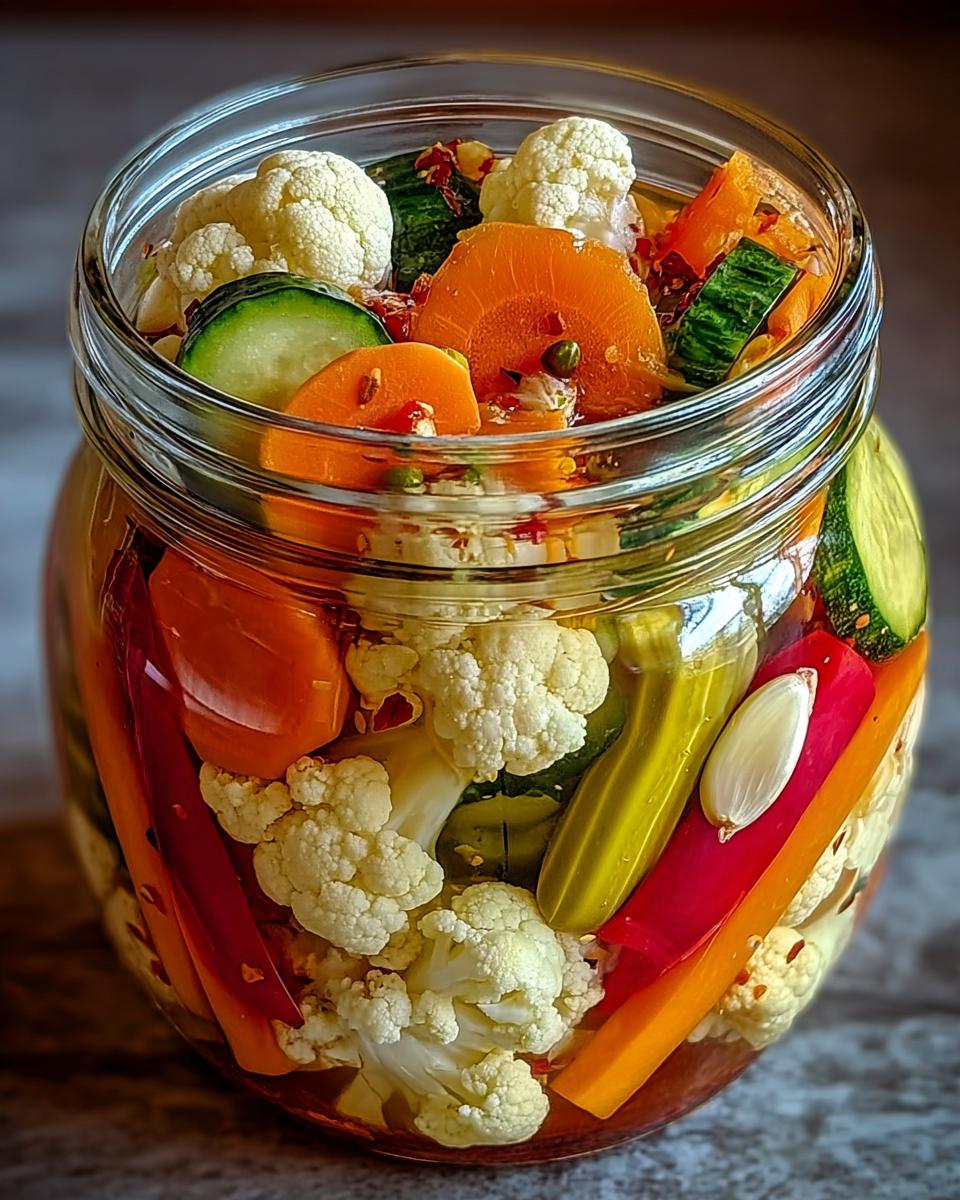
Oh, let me tell you about my obsession with these Crunchy Tangy Refrigerator Pickled Vegetables! I remember the first time I made them on a lazy Sunday afternoon. My kitchen was filled with the bright colors of fresh veggies, and the aroma of vinegar and spices danced through the air. It was like a celebration of flavor right in my own home! These pickles are not just vibrant and zesty; they’re also super quick and easy to make, which is perfect for busy weeknights or when you want to impress guests without spending hours in the kitchen.
Every bite is a burst of freshness, and they’re just so versatile! You can pile them on a sandwich, toss them into salads, or just munch on them straight from the jar. Trust me, once you try making these at home, you’ll never want to reach for store-bought again. So grab your veggies, and let’s dive into this delightful pickling adventure!
Why You’ll Love Crunchy Tangy Refrigerator Pickled Vegetables
First off, let’s talk about flavor. These Crunchy Tangy Refrigerator Pickled Vegetables pack a zesty punch that’ll make your taste buds do a happy dance! Each crunchy bite is a mix of tanginess from the vinegar, sweetness from the sugar, and a hint of spice from the mustard seeds. What’s not to love?
But it gets better! These pickles are incredibly versatile. You can toss them into salads, layer them on sandwiches, or even serve them as a crisp side dish at your next barbecue. And let’s not forget the health benefits—loaded with fiber and vitamins, they’re a guilt-free way to add some crunch to your meals. Plus, they’re low in calories, so you can enjoy them without a second thought. Trust me, once you start making these, they’ll become a staple in your fridge!
Ingredients You’ll Need
Fresh Vegetables
- 2 cups cauliflower florets: Cut into small, bite-sized pieces so they soak up the pickling liquid easily. Freshness is key; I love using organic cauliflower whenever I can!
- 1 cup sliced carrots: You can slice them into thin rounds or julienne them for a fun twist. Either way, vibrant orange carrots add a beautiful color and crunch.
- 1 cup sliced cucumbers: I usually go for Persian or Kirby cucumbers as they’re crispier and have fewer seeds. Slice them into rounds or wedges, depending on your preference!
- 1 red bell pepper, sliced into strips: The sweetness of the bell pepper complements the tangy pickling beautifully. Plus, those red strips make the jars look so cheerful!
- 1 cup green beans, trimmed: Make sure to snap off the ends. I love the crunch they bring, and they pickle really well. You can also cut them in half if they’re too long for your jars.
- 3 cloves garlic, minced: Fresh garlic adds a wonderful punch of flavor. You can adjust the amount based on your love for garlic—more is always better in my book!
Pickling Liquid Components
- 2 cups white vinegar: This is the base of our pickling liquid, providing that zesty tang! I prefer using distilled white vinegar for its clean flavor, but apple cider vinegar can add a nice twist if you’re feeling adventurous.
- 2 cups water: This helps dilute the vinegar and balances the flavors. Using filtered water can enhance the taste, but tap water works just fine too.
- 2 tablespoons salt: I like to use kosher salt for pickling because it dissolves easily and gives a great flavor. Just avoid iodized salt, as it can affect the pickling process.
- 1 tablespoon sugar: This little bit of sweetness helps mellow out the acidity of the vinegar. You can use granulated sugar, or if you’re looking for a healthier option, try honey or agave syrup.
- 2 teaspoons mustard seeds: These little seeds add a nice crunch and a hint of spice. You can also experiment with different spices, like dill seeds or coriander seeds, if you’re feeling creative.
- 1 teaspoon black peppercorns: They bring a warm spiciness to the mix. Feel free to adjust the amount based on how much heat you prefer.
- 1/2 teaspoon red pepper flakes (optional for heat): If you like a little kick, toss in some red pepper flakes! They’re optional, but I think they add a fun zing to the pickles.
Step-by-Step Instructions
Preparing the Vegetables
First things first, let’s get those veggies ready! Start by washing everything thoroughly under cold water. I like to give them a good rinse to remove any dirt or residue. Next, grab your cutting board and a sharp knife. Cut the cauliflower into small florets—bite-sized is perfect, so they pickle nicely. For the carrots, you can slice them into thin rounds or julienne them; either way, they’ll look beautiful and colorful in the jar.
Now, onto the cucumbers! If you’re using Persian or Kirby cucumbers, just slice them into rounds or wedges, depending on how you like them. For the red bell pepper, slice it into strips. And don’t forget the green beans! Just trim off the ends and cut them in half if they’re too long for your jars. Oh, and make sure to mince those garlic cloves; they’ll add a lovely depth of flavor to your pickles!
Making the Pickling Liquid
Now that your veggies are prepped, it’s time to make that magical pickling liquid! In a medium pot, combine the 2 cups of white vinegar, 2 cups of water, 2 tablespoons of salt, and 1 tablespoon of sugar. Add in the mustard seeds, black peppercorns, and red pepper flakes if you’re using them. Give it a little stir to mix everything together.
Place the pot over medium heat and bring the mixture to a boil. You’ll want to keep stirring occasionally until the salt and sugar fully dissolve—this usually takes just a few minutes. Once it’s boiling and fragrant (seriously, it smells amazing!), remove it from the heat and let it cool slightly. Don’t worry if it looks a bit cloudy; that’s just the spices mingling together!
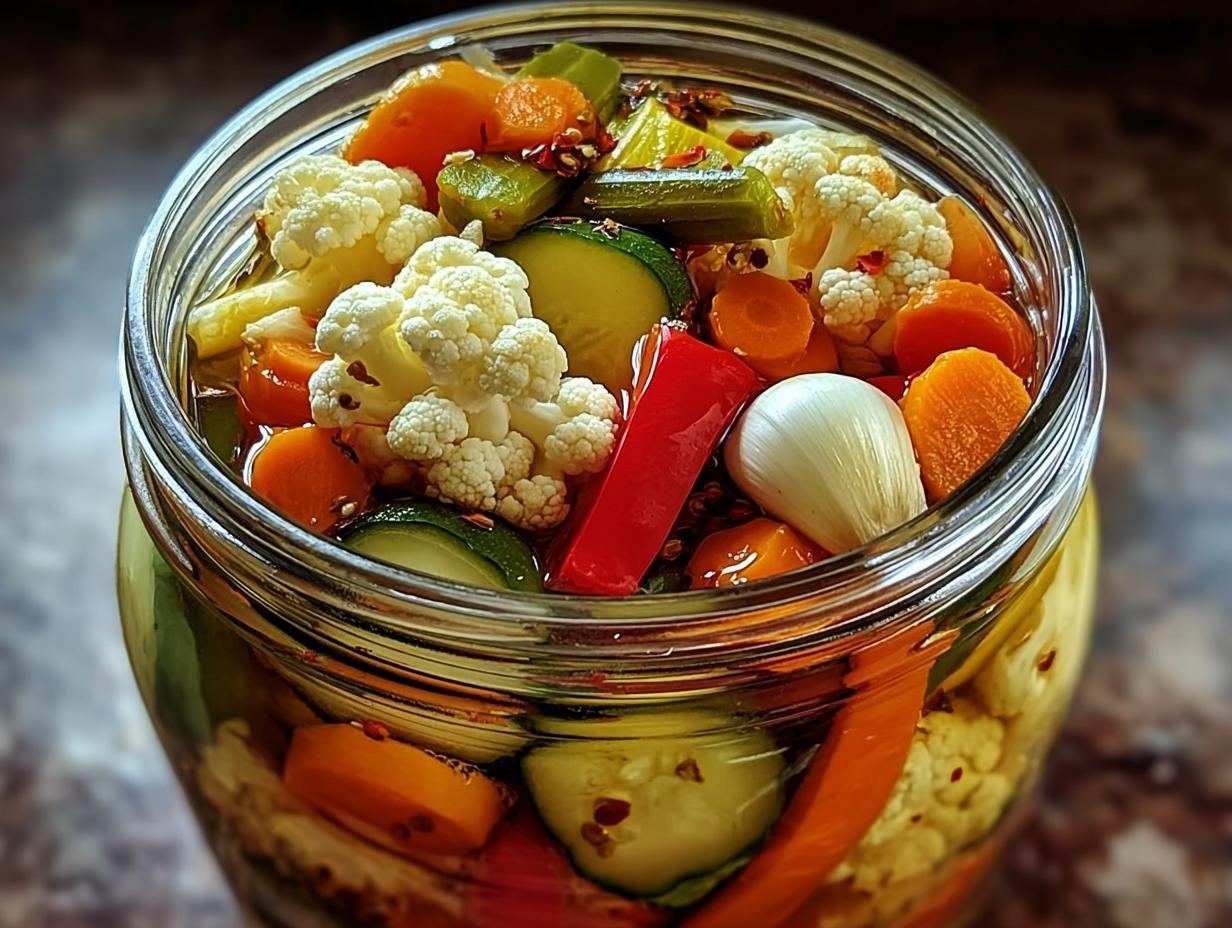
Packing and Storing
Now comes the fun part—packing those veggies into jars! Grab some clean, dry jars (I love using mason jars for this). Start by packing the vegetables tightly, layering them as you go. It’s like creating a colorful veggie masterpiece! Pour the warm pickling liquid over the vegetables, ensuring they’re fully submerged. You may want to leave a little headspace at the top of the jars, about half an inch is perfect.
Once you’ve filled the jars, seal them tightly with the lids. Now, pop them in the refrigerator! You’ll want to let them pickle for at least 24 hours before diving in—this allows all those flavors to develop and deepen. Trust me, the wait is so worth it! After that, you can enjoy your crunchy, tangy refrigerator pickled vegetables whenever you want. They’ll last for weeks in the fridge, so you’ll always have a delicious, healthy snack on hand!
Variations
The beauty of these Crunchy Tangy Refrigerator Pickled Vegetables is that you can really make them your own! Feel free to swap in different vegetables based on your preferences or what you have on hand. For a colorful twist, try adding sliced radishes for a peppery bite, or some thinly sliced red onions for a touch of sweetness. You could even throw in some asparagus or zucchini during the summer months when they’re at their peak!
If you’re feeling adventurous with spices, consider adding dill seeds for a classic pickle flavor or coriander seeds for a hint of citrus. You can also experiment with fresh herbs like dill or thyme, which can really elevate the taste. Remember, pickling is all about personal expression, so don’t be afraid to play around and find your favorite combination!
Serving and Storage Tips
When it comes to serving your Crunchy Tangy Refrigerator Pickled Vegetables, the possibilities are endless! They make a fantastic addition to sandwiches, adding that perfect crunch and zing. You can also toss them into salads for a refreshing kick, or serve them alongside grilled meats as a vibrant side dish. I love to present them in a colorful bowl at gatherings; they always steal the show!
As for storage, these pickles keep beautifully in the refrigerator for up to 2-3 weeks. Make sure to keep them sealed tightly in their jars to retain that crunchiness and flavor. If you notice the vegetables starting to lose their crispness, don’t worry! Just give them a good shake or stir to redistribute the pickling liquid. Trust me, the longer they sit, the more flavorful they become, so don’t rush to finish them all at once!
Helpful Notes
Here are a few practical tips to make your pickling experience even better! If you’re looking to lighten things up, feel free to reduce the amount of sugar or replace it with a natural sweetener like stevia or agave syrup. Just keep in mind that this might slightly alter the flavor profile, but it can still be delicious!
If you want to customize the spice levels, you can easily adjust the red pepper flakes to suit your taste. A little goes a long way, so start with a small amount and add more if you’re feeling bold! And for those with dietary restrictions, these pickles are vegetarian and can easily be made vegan by ensuring the sweetener you choose is plant-based.
Lastly, don’t hesitate to explore different herbs and spices to amp up the flavor. Fresh dill, cilantro, or even a bay leaf can add unique twists to your pickles. Happy pickling! You can find more delicious recipes here.
Frequently Asked Questions
1. Can I freeze these pickles?
No, it’s not recommended to freeze refrigerator pickles. Freezing can change their texture and make them mushy. They’re best enjoyed fresh from the fridge!
2. What if I don’t have a specific vegetable?
No problem at all! You can easily swap out any vegetable you don’t have for another. Think of what you enjoy or what’s in season—get creative!
3. How long do they last in the fridge?
These Crunchy Tangy Refrigerator Pickled Vegetables can last for up to 2-3 weeks in the refrigerator. Just keep them sealed tightly, and they’ll stay crunchy and flavorful!
4. Can I adjust the spice level?
Absolutely! If you prefer milder pickles, simply reduce the amount of red pepper flakes or leave them out altogether. You can always ramp up the heat next time!
5. Is there a way to make these pickles less tangy?
Yes! If you want a less tangy flavor, try adding a bit more sugar to the pickling liquid or using apple cider vinegar instead of white vinegar for a sweeter taste.
Final Thoughts
Making these Crunchy Tangy Refrigerator Pickled Vegetables is truly one of the simplest joys in the kitchen. With just a handful of fresh ingredients and a little bit of time, you can create a vibrant, flavorful addition to your meals that’ll have everyone asking for more. I love how versatile these pickles are, and the way they can elevate any dish with their zesty crunch. So, whether you’re enjoying them on a summer picnic or as a quick snack, they’re bound to bring a smile to your face!
I can’t wait to hear about your pickling adventures! Feel free to share your variations and experiences in the comments below. Happy pickling, and enjoy every delicious bite! You might also enjoy our Sweet Chili Air Fryer Brussels Sprouts for another great vegetable side dish.
Print
Crunchy Tangy Refrigerator Pickled Vegetables
- Total Time: 25 minutes
- Yield: 4 servings 1x
- Diet: Vegetarian
Description
Enjoy a burst of flavor with our Crunchy Tangy Refrigerator Pickled Vegetables. Fresh, crisp, and zesty pickles made effortlessly at home in no time!
Ingredients
- 2 cups cauliflower florets
- 1 cup sliced carrots
- 1 cup sliced cucumbers
- 1 red bell pepper, sliced into strips
- 1 cup green beans, trimmed
- 3 cloves garlic, minced
- 2 cups white vinegar
- 2 cups water
- 2 tablespoons salt
- 1 tablespoon sugar
- 2 teaspoons mustard seeds
- 1 teaspoon black peppercorns
- 1/2 teaspoon red pepper flakes (optional for heat)
Instructions
- Prepare the vegetables by washing and cutting them as indicated.
- In a pot, combine the white vinegar, water, salt, sugar, mustard seeds, black peppercorns, and red pepper flakes.
- Bring the mixture to a boil over medium heat, stirring until the salt and sugar dissolve.
- Remove the pot from heat and let it cool slightly.
- Pack the prepared vegetables into clean jars.
- Pour the pickling liquid over the vegetables, ensuring they are fully submerged.
- Seal the jars and place them in the refrigerator.
- Allow the vegetables to pickle for at least 24 hours before enjoying.
Notes
- These pickles can last for weeks in the refrigerator.
- Feel free to add other vegetables according to your preference.
- Adjust the spice level by modifying the amount of red pepper flakes.
- Prep Time: 15 minutes
- Cook Time: 10 minutes
- Category: Side Dish
- Method: Refrigerator Pickling
- Cuisine: American
Nutrition
- Serving Size: 1/2 cup
- Calories: 50
- Sugar: 1g
- Sodium: 800mg
- Fat: 0g
- Saturated Fat: 0g
- Unsaturated Fat: 0g
- Trans Fat: 0g
- Carbohydrates: 12g
- Fiber: 3g
- Protein: 2g
- Cholesterol: 0mg
Keywords: Crunchy Tangy Refrigerator Pickled Vegetables, Pickles, Refrigerator Pickles, Quick Pickles
