
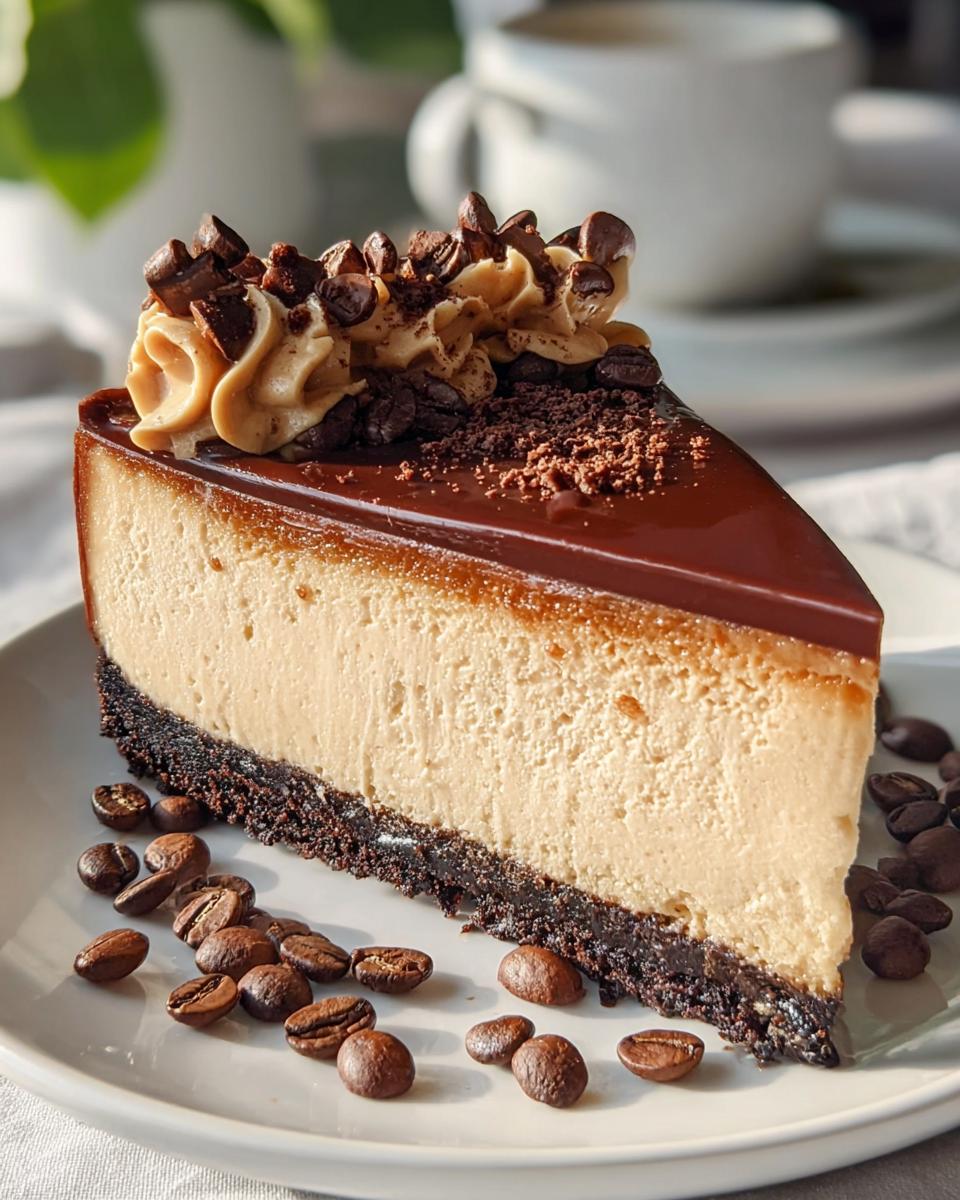
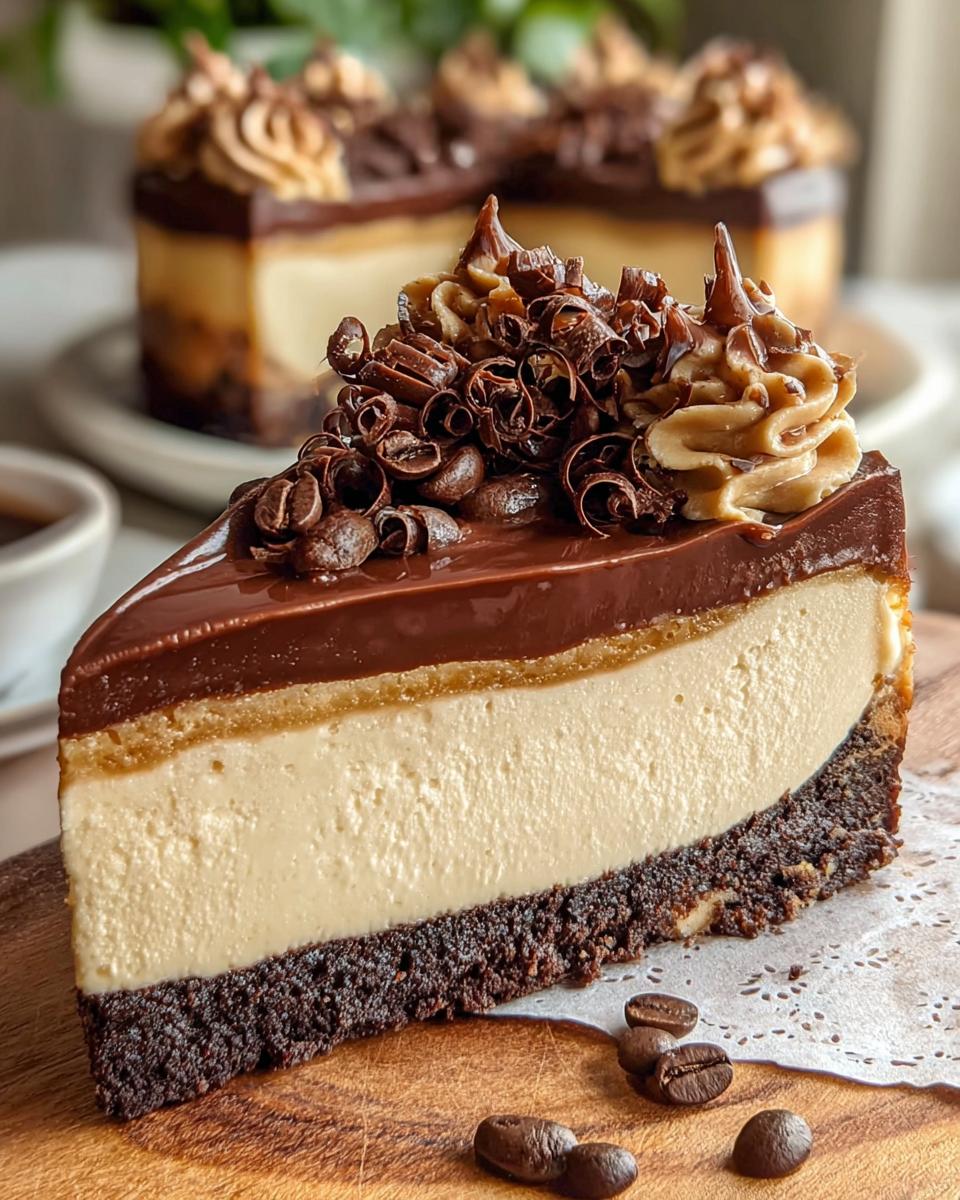
Let me tell you about my absolute favorite dessert: Coffee Cheesecake! This luscious treat combines the rich, velvety texture of cheesecake with the bold, comforting flavors of coffee and a hint of chocolate. I remember the first time I made this for a gathering; the moment I took a slice, I was instantly transported to a cozy café, sipping on a perfect cup of joe. It’s the kind of dessert that delights your senses and warms your heart.
This Coffee Cheesecake is perfect for any occasion, whether it’s a weekend family dinner, a holiday celebration, or just a sweet treat to elevate your day. Trust me, once you taste that creamy, dreamy slice topped with chocolate ganache, you’ll be hooked! Let’s dive into this delicious recipe together!
Why You’ll Love Coffee Cheesecake
You’re gonna adore this Coffee Cheesecake for so many reasons! First off, the combination of rich cream cheese, bold coffee, and decadent chocolate is pure magic. It’s like a hug in dessert form! This cheesecake not only satisfies your sweet tooth but also gives you that little caffeine kick, making it perfect for coffee lovers like me.
Plus, it’s versatile! Whether you’re hosting a dinner party, celebrating a birthday, or just treating yourself on a cozy evening, this dessert fits right in. And the best part? It’s a crowd-pleaser! Everyone will be asking for seconds (and possibly thirds!). So, get ready to impress your friends and family with a slice of this heavenly delight! They won’t forget it, I promise!
Ingredients You’ll Need
- 24 cookies Oreos, crushed (You can use any chocolate sandwich cookies if you’re in a pinch!)
- 6 tablespoons salted butter, melted (This adds a rich flavor to the crust.)
- 1 tablespoon espresso powder (Optional, but it intensifies the coffee flavor. Trust me, it’s worth it!)
- 16 ounces full-fat cream cheese, softened (Make sure it’s at room temperature for a smooth filling.)
- 3/4 cup granulated sugar (This balances the richness of the cheese and coffee.)
- 1 teaspoon coffee extract (For that extra coffee punch! You can also use vanilla if you don’t have it.)
- 3 large eggs, room temperature (This helps the filling mix together beautifully.)
- 1 cup heavy cream or non-dairy alternative (Either works, just make sure it’s cream!)
- 1/2 cup cold brew coffee or strong brewed coffee (This is where the magic happens!)
- 1 tablespoon lemon juice or vinegar (Just a little acidity to balance everything out.)
- 1/4 teaspoon salt (Don’t skip this; it enhances all the flavors!)
- 1/4 cup all-purpose flour (Optional; you can leave this out for a gluten-free version.)
- 8 ounces bittersweet chocolate, chopped (Chop it nice and small for easy melting.)
- 1 cup heavy cream or non-dairy alternative (For the ganache; it brings everything together.)
- 1 cup powdered sugar (Optional, but it makes the ganache extra sweet and silky.)
- 1 teaspoon vanilla extract (Optional; adds a lovely flavor to the ganache.)
- Chocolate curls or sprinkles, to taste (Because who doesn’t love a little extra flair?)
- Chocolate-covered espresso beans, to taste (For that delightful crunch on top!)
- 1 packet instant cheesecake pudding mix (Optional; this gives it a delightful creaminess.)
Step-by-Step Instructions
Making this Coffee Cheesecake is a delightful journey, and I promise you it’ll be worth every moment! Let’s break it down step by step, so you can create this masterpiece without any fuss.
Preparing the Crust
First things first, preheat your oven to 325°F (163°C). Now, grab those crushed Oreos and put them in a mixing bowl. Pour in the melted salted butter and, if you’re using it, the espresso powder. Mix it all together until the crumbs are nicely coated and it resembles wet sand. This is where the magic starts! Next, take a 9-inch springform pan and press the mixture firmly into the bottom. I like to use the bottom of a measuring cup to get it nice and even. This crust is going to be the perfect base for our luscious cheesecake, so make sure it’s compact. Once that’s done, pop it in the oven for about 10 minutes to set while we get started on the filling!
Making the Cheesecake Filling
In a large mixing bowl, combine the softened cream cheese and granulated sugar. Beat them together until you achieve a smooth, creamy texture—no lumps allowed! I usually use a hand mixer for this, but a stand mixer works wonders too. Next, add in the coffee extract and the eggs, one at a time. Make sure to mix well after each addition. Then, slowly pour in the heavy cream, cold brew coffee, lemon juice, salt, and flour if you’re using it. Mix until everything is just combined; you don’t want to overdo it! Trust me, the filling should be rich and smooth, like a coffee-infused cloud. Once that’s done, it’s time to pour this heavenly mixture over your crust!
Baking and Cooling the Cheesecake
Carefully pour the cheesecake filling into the prepared crust, spreading it evenly. Now, it’s time to bake! Place the springform pan in the oven and let it bake for about 50-60 minutes. You’ll know it’s done when the edges are set but the center still has a slight jiggle. This is perfect because it’ll firm up as it cools! Once you take it out, let it cool at room temperature for about an hour. Then, pop it in the fridge for at least 4 hours (or overnight if you can wait!). Chilling is crucial; it helps deepen all those delicious flavors and gives you that creamy texture we all love.
Preparing the Ganache
Now, let’s make the ganache to drape over our beautiful cheesecake! In a small saucepan, heat the heavy cream over medium heat until it’s steaming but not boiling. Remove it from the heat and pour it over the chopped bittersweet chocolate in a bowl. Let it sit for a minute, then stir until it’s smooth and glossy. If you’re adding powdered sugar and vanilla extract, do it now! This ganache is going to add a luscious touch to your cheesecake. Once the cheesecake has completely cooled, pour the ganache over the top and let it set for a bit. You’re almost there!
Variations
The beauty of this Coffee Cheesecake is that it’s super adaptable! If you’re looking for a gluten-free option, simply skip the all-purpose flour and make sure your Oreos are gluten-free too. You can also get creative with the toppings! Instead of chocolate curls, try fresh berries for a delightful contrast or drizzle some caramel sauce for an extra layer of sweetness.
Feeling adventurous? Swap out the cold brew coffee for flavored coffee, like hazelnut or mocha, to give the cheesecake a unique twist. You could even mix in some crushed chocolate-covered espresso beans directly into the filling for an added crunch and burst of flavor. The possibilities are endless, so don’t hesitate to make this recipe your own!
Serving and Storage Tips
When it comes to serving your Coffee Cheesecake, I recommend cutting it into nice, generous slices because let’s be honest, everyone will want more than just one! You can serve it chilled straight from the fridge, or if you prefer a softer texture, let it sit at room temperature for about 15-20 minutes before slicing. It pairs wonderfully with a hot cup of coffee or tea, making it a perfect after-dinner treat.
As for leftovers (if there are any!), store them in an airtight container in the fridge for up to 5 days. If you want to keep it longer, you can freeze individual slices wrapped tightly in plastic wrap and then in foil for up to 2 months. Just thaw them overnight in the fridge when you’re ready to indulge again. Trust me, it’s just as delicious when frozen, so don’t hesitate to save some for later!
Helpful Notes
To really nail this Coffee Cheesecake, here are a few extra tips that I swear by! First, always use room temperature ingredients, especially the cream cheese and eggs. This helps create a smoother filling without lumps, and who wants a lumpy cheesecake? Not me!
Also, if you can, let your cheesecake chill overnight in the fridge. This extra time allows the flavors to mingle beautifully, and you’ll be rewarded with an even more delicious dessert. Believe me, the wait is worth it! And don’t forget, if you’re using any optional ingredients like the espresso powder or instant cheesecake pudding mix, they can really enhance the texture and flavor, so consider adding them for that extra special touch.
Lastly, if you’re feeling adventurous, feel free to experiment with different flavor extracts or even a splash of liqueur for an adult twist. Happy baking!
Frequently Asked Questions
1. Can I freeze this Coffee Cheesecake?
Absolutely! You can freeze individual slices wrapped tightly in plastic wrap and then in foil for up to 2 months. Just be sure to let them thaw overnight in the fridge before enjoying. They taste just as delicious!
2. What if I don’t have cold brew coffee?
No worries! You can use strong brewed coffee instead. Just let it cool down before adding it to the filling. It’ll work perfectly!
3. Can I substitute the cream cheese?
Sure! If you want a lighter option, you can use Neufchâtel cheese, which has less fat. Just keep in mind that it may change the texture slightly, but it’ll still taste amazing!
4. Is there a way to make this dairy-free?
Definitely! Use a dairy-free cream cheese and a non-dairy heavy cream alternative. It’ll still be rich and delicious!
5. How can I tell when the cheesecake is done baking?
Look for the edges to be set while the center still has a slight jiggle. It will firm up as it cools, so don’t worry if it looks a bit soft in the middle!
Final Thoughts
Making this Coffee Cheesecake is more than just baking; it’s about creating something truly special to share with those you love. Each slice is a delightful experience, combining the richness of cream cheese with the bold flavors of coffee and chocolate. I can’t tell you how many smiles this dessert has brought to my table!
So, whether it’s a casual family dinner or a big celebration, I encourage you to give this recipe a try. I promise you won’t regret it! And don’t forget to share your results; I’d love to hear how your cheesecake turns out. Happy baking, and enjoy every delicious bite of your Coffee Cheesecake!
Print
Coffee Cheesecake
- Total Time: 4 hours 30 minutes
- Yield: 12 servings 1x
- Diet: Vegetarian
Description
This Coffee Cheesecake combines rich flavors of coffee and chocolate for a delicious dessert.
Ingredients
- 24 cookies Oreos Crushed
- 6 tablespoons Salted Butter Melted
- 1 tablespoon Espresso Powder Optional
- 16 ounces Cream Cheese Full-fat and softened
- 3/4 cup Granulated Sugar
- 1 teaspoon Coffee Extract
- 3 large Eggs Room temperature
- 1 cup Heavy Cream Or non-dairy alternative
- 1/2 cup Cold Brew Coffee Or strong brewed coffee
- 1 tablespoon Lemon Juice Or vinegar
- 1/4 teaspoon Salt
- 1/4 cup All-Purpose Flour Optional for gluten-free
- 8 ounces Bittersweet Chocolate Chopped
- 1 cup Heavy Cream Or non-dairy alternative
- 1 cup Powdered Sugar Optional
- 1 teaspoon Vanilla Extract Optional
- to taste Chocolate Curls/Sprinkles
- to taste Chocolate-Covered Espresso Beans
- 1 packet Instant Cheesecake Pudding Mix Optional
Instructions
- Preheat the oven to 325°F (163°C).
- Mix crushed Oreos with melted butter and espresso powder.
- Press the mixture into the bottom of a springform pan.
- In a bowl, beat cream cheese and sugar until smooth.
- Add coffee extract and eggs, mixing well.
- Incorporate heavy cream, cold brew coffee, lemon juice, salt, and flour.
- Pour filling into the crust.
- Bake for 50-60 minutes until set.
- Let cool, then refrigerate for at least 4 hours.
- Prepare ganache by heating heavy cream and pouring over chopped chocolate.
- Stir until smooth and pour over the chilled cheesecake.
- Top with chocolate curls and espresso beans if desired.
Notes
- Use room temperature ingredients for best results.
- For a gluten-free version, omit the all-purpose flour.
- Let the cheesecake chill overnight for improved flavor.
- Prep Time: 30 minutes
- Cook Time: 60 minutes
- Category: Dessert
- Method: Baking
- Cuisine: American
Nutrition
- Serving Size: 1 slice
- Calories: 450
- Sugar: 30g
- Sodium: 250mg
- Fat: 30g
- Saturated Fat: 15g
- Unsaturated Fat: 10g
- Trans Fat: 0g
- Carbohydrates: 40g
- Fiber: 2g
- Protein: 6g
- Cholesterol: 100mg
Keywords: Coffee Cheesecake, Dessert, Cheesecake, Coffee
