
Let me tell you about the first time I tasted dulce de leche – it was love at first bite! I was visiting a friend’s abuela in Buenos Aires, and she handed me a spoonful of this golden, caramel-like magic. “This,” she whispered with a wink, “is what makes desserts special.” That moment sparked my obsession with creating the perfect dulce de leche cheesecake bars – rich, creamy, and with that unforgettable caramelized milk flavor that makes your taste buds dance.
After testing dozens of versions (my neighbors became very willing taste testers), I’ve perfected these bars that combine the silkiness of New York cheesecake with that distinctive dulce de leche sweetness. What makes them truly special? The graham cracker crust gives that perfect crunch, while the filling stays luxuriously smooth – no fancy techniques required. Trust me, these disappear faster than you can say “¡qué rico!” at any gathering.
Why You’ll Love These Dulce de Leche Cheesecake Bars
Oh, where do I even begin? These bars are my go-to when I need something that wows without the stress. Let me count the ways they’ll steal your heart:
- Creamy dreamy texture – That perfect balance between rich cheesecake and the silkiness of dulce de leche that melts on your tongue
- Foolproof to make – No water baths or fancy techniques, just straightforward mixing and baking (even my 12-year-old niece nailed these!)
- Instant crowd-pleaser – I’ve brought these to every potluck since 2018, and people still beg me for the recipe
- Better the next day – The flavors deepen overnight, so you can (theoretically) bake ahead… if they last that long!
Seriously, one bite and you’ll understand why these never last more than a day in my house.
Ingredients for Dulce de Leche Cheesecake Bars
Gather these simple ingredients – quality matters here, especially for the dulce de leche! I learned the hard way that store-brand cream cheese just doesn’t give that same luxurious texture. Trust me, splurge on the good stuff:
For the crust (that perfect crunchy base):
- 1 ½ cups graham cracker crumbs (about 12 full sheets crushed)
- ½ cup unsalted butter, melted (and slightly cooled)
- ¼ cup granulated sugar
- 1 teaspoon vanilla extract (the real stuff, please!)
For the dreamy filling:
- 16 oz cream cheese, softened (leave out for 2 hours – no shortcuts!)
- 1 cup dulce de leche (my secret? Use the canned kind from the Latin aisle)
- ½ cup granulated sugar
- 2 large eggs (room temperature prevents lumps)
- 1 teaspoon vanilla extract
- 1 tablespoon all-purpose flour (just enough to stabilize without drying)
For that gorgeous finish:
- ½ cup dulce de leche (for drizzling – warm it slightly for perfect ribbons)
- Whipped cream (optional, but who are we kidding? Always add whipped cream!)
- Chocolate shavings or cocoa powder (my husband insists on both)
Equipment You’ll Need
Don’t worry – you won’t need any fancy gadgets for these bars! Just grab:
- An 8×8-inch baking pan (my trusty metal one works best)
- Parchment paper (lifesaver for easy removal!)
- Hand mixer or stand mixer (though I’ve used a whisk in a pinch)
- Basic measuring cups and spoons
- Rubber spatula (for scraping every last bit of that delicious batter)
That’s it – now let’s get baking!
How to Make Dulce de Leche Cheesecake Bars
Okay, let’s dive into the fun part – making these dreamy bars! I promise it’s easier than you think, but I’ll walk you through each step like I’m right there in the kitchen with you (wearing my favorite flour-dusted apron, of course).
Step 1: Prepare the Crust
First things first – preheat that oven to 350°F (175°C) and line your 8×8-inch pan with parchment paper, leaving some overhang on the sides. This little trick will save you so much frustration later when removing the bars!
Now, mix those graham cracker crumbs with melted butter, sugar, and vanilla until it looks like wet sand. Here’s my secret: press the mixture firmly into the pan using the bottom of a measuring cup. I mean really pack it in – this creates that perfect sturdy base that won’t crumble when you slice the bars. Pop it in the oven for 10 minutes until it’s lightly golden, then let it cool slightly while you make the filling.

Step 2: Make the Cheesecake Filling
This is where patience pays off! Make sure your cream cheese is truly softened (I leave mine out for 2 hours – no cheating with the microwave!). Beat it with the dulce de leche and sugar until completely smooth, scraping down the bowl often. If you see any lumps now, you’ll definitely taste them later!
Add the eggs one at a time, mixing just until combined – overbeating introduces too much air and can cause cracks. Finally, stir in the vanilla and flour. The batter should be velvety smooth and pour like thick cream. If it’s looking grainy, don’t panic! Just keep mixing gently until it comes together.
Step 3: Bake and Chill
Pour that luscious filling over your pre-baked crust and smooth the top. Bake for 30-35 minutes – the edges should be set but the center will still have a slight jiggle (like Jell-O, not liquid). Here’s my doneness test: gently shake the pan. If the middle wobbles as one cohesive mass rather than looking soupy, it’s done!
Now the hardest part – let it cool completely at room temperature (about 1 hour), then refrigerate for at least 4 hours, preferably overnight. I know it’s tempting, but cutting into warm cheesecake is a recipe for disaster! The wait makes all the difference for that perfect clean slice.
Tips for Perfect Dulce de Leche Cheesecake Bars
After making these bars more times than I can count (okay fine, my jeans can count them), I’ve picked up some foolproof tricks:
- Chill like you mean it – I know it’s painful to wait, but those 4 hours in the fridge make all the difference for clean slices
- Warm your knife – Dip it in hot water and wipe dry between cuts for professional-looking bars
- Quality dulce de leche matters – The canned Latin American brands have that perfect caramelized depth store brands lack
- Room temp is key – Cold cream cheese will betray you with lumps, so plan ahead!
Follow these, and you’ll be the dulce de leche hero at your next gathering.
Ingredient Substitutions and Variations
Listen, I’m all about sticking to the original recipe, but life happens! Here are my tried-and-true swaps when pantry emergencies strike:
- Gluten-free? Use gluten-free graham crackers – they work just as well for the crust
- Out of dulce de leche? Caramel sauce makes a decent stand-in, though the flavor won’t be quite as rich
- Want extra crunch? Add ¼ cup chopped toasted pecans to the crust mixture
- Feeling fancy? Swirl in 2 tablespoons of espresso powder with the filling for a mocha twist
The beauty of these bars? They’re forgiving – just don’t tell my abuela I said that!
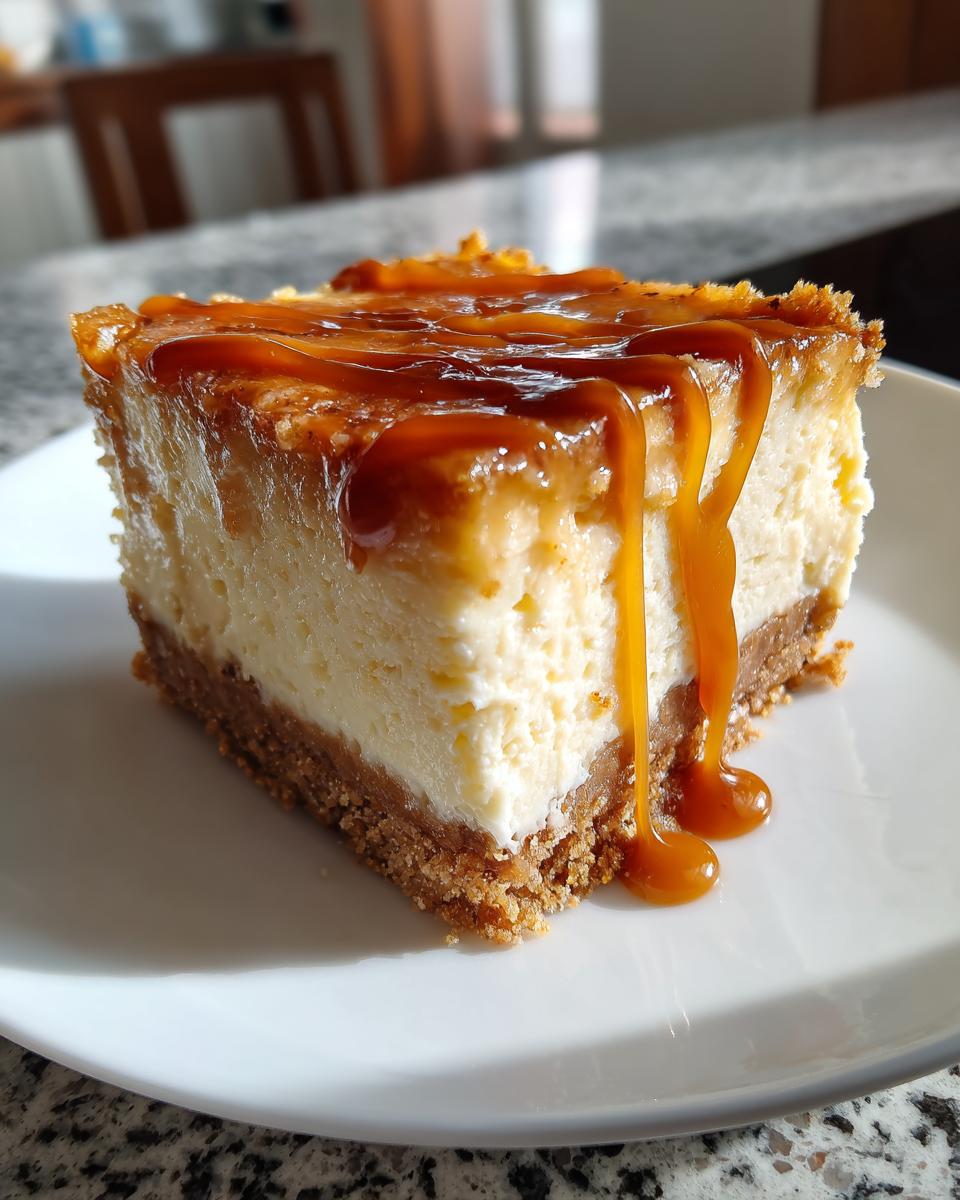
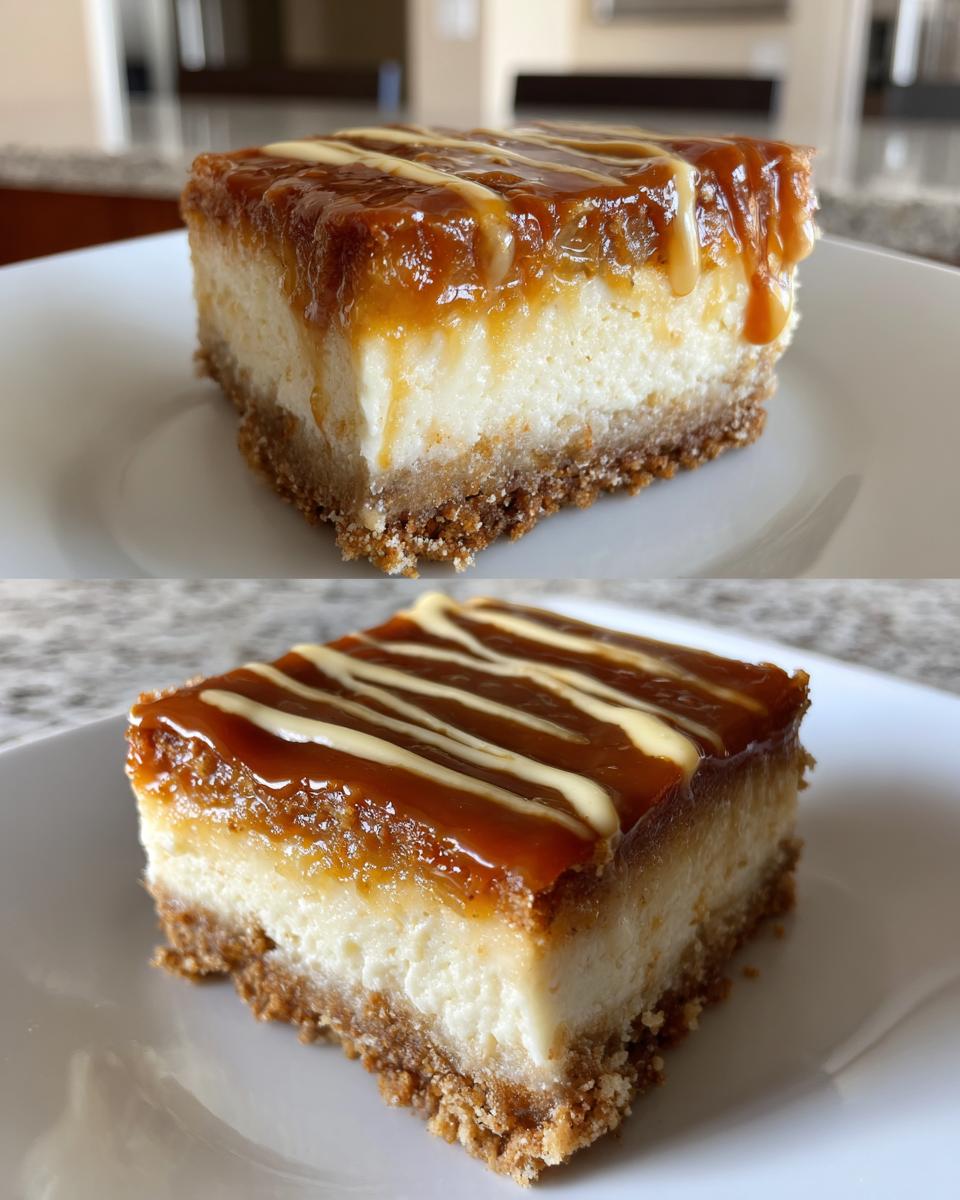
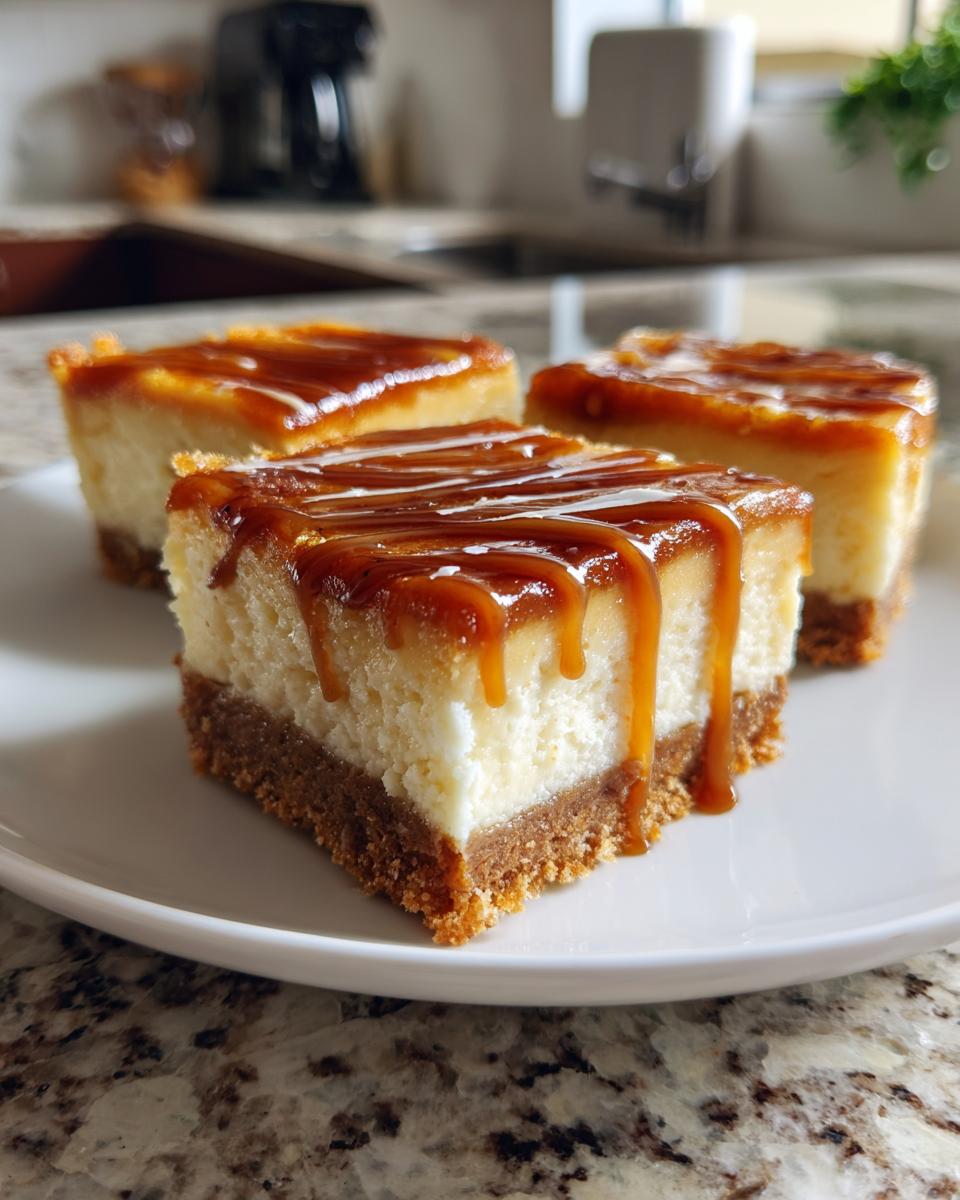
Serving and Storing Dulce de Leche Cheesecake Bars
Now for the best part – showing off your masterpiece! I love serving these bars slightly chilled with a drizzle of warm dulce de leche (just microwave it for 10 seconds to make it pourable). A dollop of fresh whipped cream and chocolate shavings take them over the top. For storage, keep them covered in the fridge for up to 5 days – if they last that long! Pro tip: separate layers with parchment paper if stacking. These bars freeze beautifully too – just wrap individual portions tightly and thaw overnight in the fridge. No reheating needed, unless you want to briefly warm them for that just-baked feel!
Nutritional Information
Here’s the scoop on what’s in these indulgent bars (per serving): 280 calories, 18g fat, 26g carbs, and 4g protein. Remember, nutritional values are estimates and vary by ingredients/brands – but let’s be real, you’re here for the taste, not the numbers!
Frequently Asked Questions
Q1. Can I freeze dulce de leche cheesecake bars?
Absolutely! These freeze like a dream. Just wrap individual bars tightly in plastic wrap, then foil. They’ll keep for up to 2 months. Thaw overnight in the fridge – no microwave shortcuts or you’ll get weepy bars!
Q2. How do I prevent cracks in my cheesecake bars?
Three secrets: Don’t overmix after adding eggs, bake until just set (that slight jiggle is good!), and cool gradually. I leave mine in the turned-off oven with the door cracked for 30 minutes before moving to the counter. Works every time!
Q3. Can I use homemade dulce de leche?
Of course! If you’ve got the patience to simmer milk and sugar for hours, homemade dulce de leche adds amazing depth. Just make sure it’s thick like canned dulce de leche – runny versions will throw off the texture.
Q4. Why did my bars turn out grainy?
Ah, the dreaded graininess! This usually happens when the cream cheese wasn’t fully softened or got overmixed when cold. Next time, let your cream cheese sit out longer and mix gently just until smooth. Cold eggs can also cause this – room temp everything is key!
Q5. How far ahead can I make these?
These bars actually taste better after 24 hours! The flavors meld beautifully. You can bake them up to 3 days before serving – just wait to add the dulce de leche drizzle until right before serving for that fresh, glossy look.
Share Your Experience
Did you make these dreamy bars? I’d love to hear how they turned out! Leave a comment below or snap a photo – nothing makes me happier than seeing your dulce de leche creations.
Print
Irresistible Dulce de Leche Cheesecake Bars Recipe
- Total Time: 4 hours 55 minutes
- Yield: 16 bars 1x
- Diet: Vegetarian
Description
Rich and creamy Dulce de Leche Cheesecake Bars with a graham cracker crust and a sweet dulce de leche topping.
Ingredients
- For the crust:
- 1 ½ cups graham cracker crumbs
- ½ cup unsalted butter, melted
- ¼ cup granulated sugar
- 1 teaspoon vanilla extract
- For the cheesecake filling:
- 16 oz cream cheese, softened
- 1 cup dulce de leche
- ½ cup granulated sugar
- 2 large eggs
- 1 teaspoon vanilla extract
- 1 tablespoon all-purpose flour
- For the topping:
- ½ cup dulce de leche (for drizzling)
- Whipped cream (optional, for serving)
- Chocolate shavings or cocoa powder (optional, for garnish)
Instructions
- Preheat your oven to 350°F. Line an 8×8-inch baking pan with parchment paper.
- Make the crust: Mix graham cracker crumbs, melted butter, sugar, and vanilla in a bowl. Press firmly into the pan. Bake for 10 minutes, then cool slightly.
- Prepare the filling: Beat cream cheese, dulce de leche, and sugar until smooth. Add eggs one at a time, then mix in vanilla and flour.
- Pour the filling over the crust. Bake for 30-35 minutes until set. Cool completely, then refrigerate for at least 4 hours.
- Drizzle with dulce de leche before serving. Add whipped cream or chocolate shavings if desired.
Notes
- Use room-temperature cream cheese for a smoother filling.
- Chill the bars thoroughly before cutting for clean slices.
- Store leftovers in the refrigerator for up to 5 days.
- Prep Time: 20 minutes
- Cook Time: 35 minutes
- Category: Dessert
- Method: Baking
- Cuisine: American
Nutrition
- Serving Size: 1 bar
- Calories: 280
- Sugar: 22g
- Sodium: 180mg
- Fat: 18g
- Saturated Fat: 10g
- Unsaturated Fat: 6g
- Trans Fat: 0g
- Carbohydrates: 26g
- Fiber: 0g
- Protein: 4g
- Cholesterol: 75mg
Keywords: dulce de leche, cheesecake bars, dessert, easy baking
