
Oh, let me tell you about my absolute favorite holiday treat: Christmas Cherry Bars! These delightful little squares are the epitome of festive cheer, and they remind me of the cozy afternoons spent baking with my grandmother, who always had a knack for making the kitchen smell like pure magic. The sweet, tart flavor of cherries combined with the buttery softness of the bars makes them irresistible. Whether it’s for a holiday gathering, a cozy family night, or just to brighten up a chilly winter day, these bars are sure to bring smiles and warmth to your home.
They’re not just delicious; they’re also super easy to whip up! With just a handful of ingredients, you’ll have a festive dessert that’s perfect for sharing or even hoarding all to yourself (no judgment here!). So grab your apron, and let’s dive into the wonderful world of Christmas Cherry Bars!
What Are Christmas Cherry Bars?
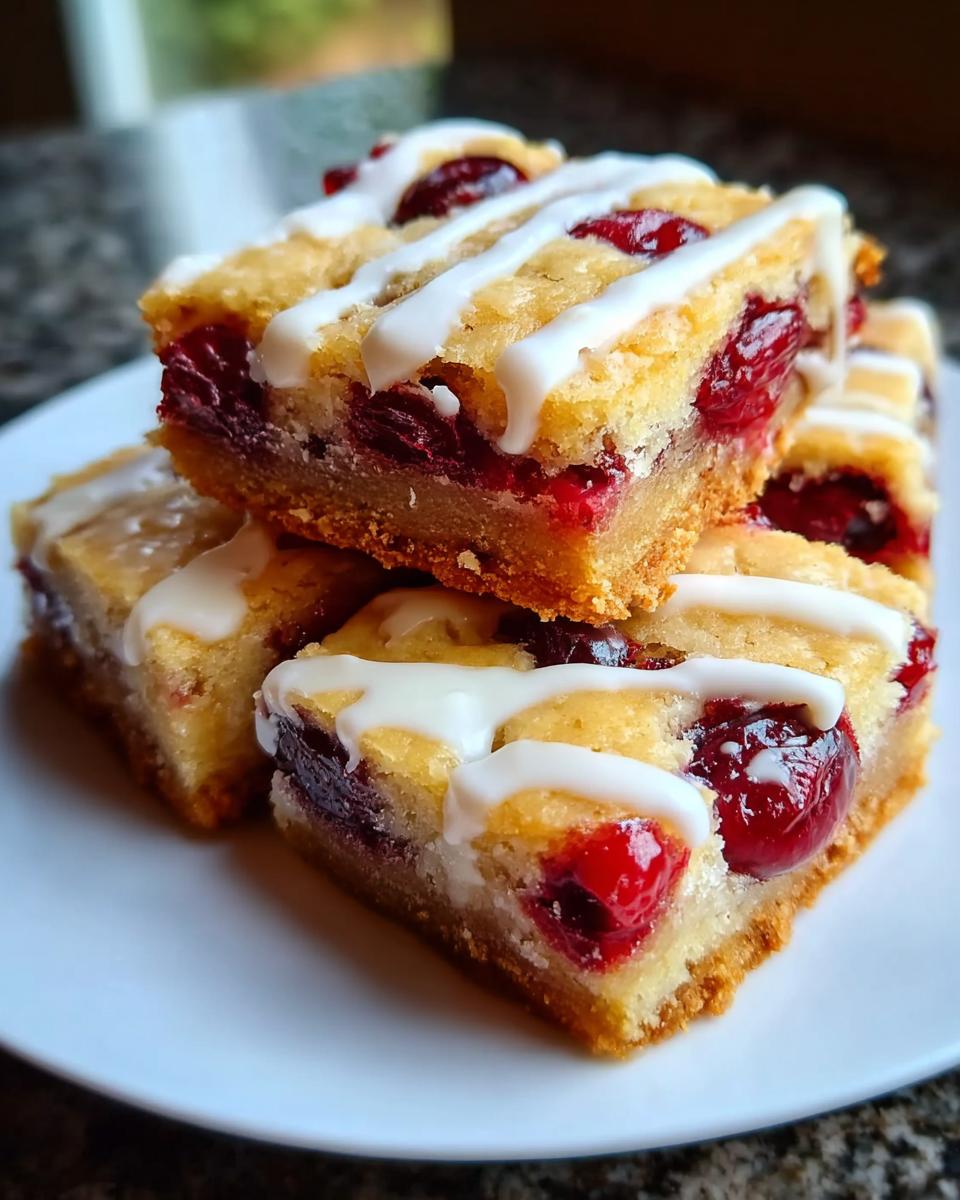
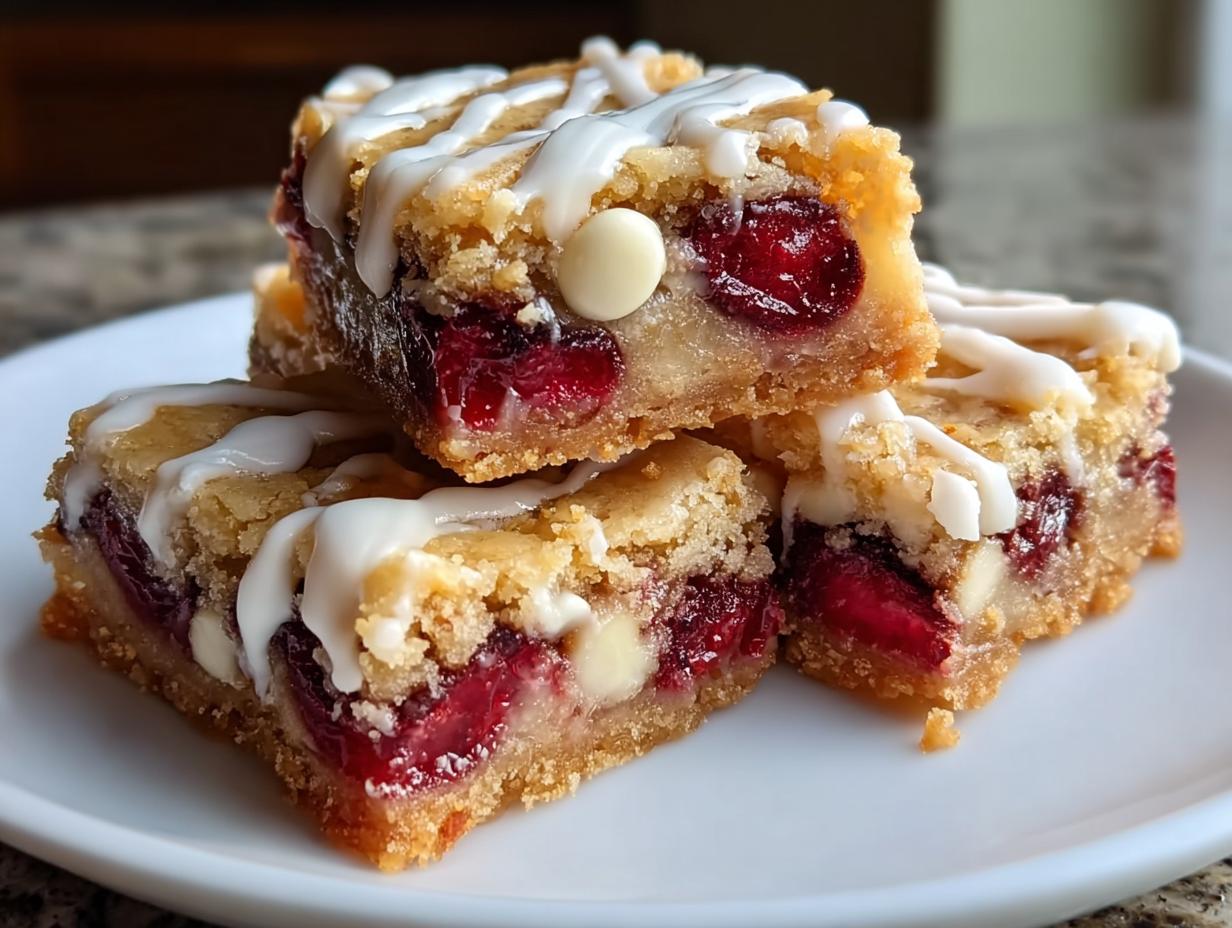
Christmas Cherry Bars are a scrumptious dessert that perfectly captures the essence of the holiday season. Imagine a rich, buttery base layered with luscious cherry pie filling, all topped off with a light sprinkle of sweetness. They’re soft, chewy, and oh-so-satisfying, making them the ideal treat to bring to holiday parties or cozy family gatherings. Plus, they look gorgeous on a dessert table, adding a pop of color that’s just as festive as the season itself. Trust me, these bars will become a cherished part of your holiday traditions!
Why You’ll Love Christmas Cherry Bars
Let me tell you, these Christmas Cherry Bars are a true delight that you won’t want to miss out on this holiday season! First off, they have that incredible balance of sweet and tart from the cherry filling that makes every bite a burst of joy. Seriously, it’s like a little party in your mouth!
What’s more, they’re super simple to make! With just a handful of ingredients and minimal fuss, you can have a dessert that looks and tastes like you spent all day in the kitchen. Perfect for those of us who want to impress without the stress, right? Plus, they’re adaptable! You can easily swap out the cherry filling for other fruits if you’re feeling adventurous or add some nuts for that extra crunch. And let’s not forget about how they keep well—great for making ahead of time to enjoy during busy holiday weeks! You can even freeze them for last-minute sweet cravings. Trust me, once you try these bars, they’ll be a staple in your holiday baking repertoire!
Ingredients You’ll Need
Ready to gather everything you need for these delightful Christmas Cherry Bars? Let’s make sure you have all the essentials! You’ll find that these ingredients are pretty straightforward and likely to be in your pantry. Let’s dive in!
Key Ingredients
- 1 cup of softened butter: This is the base of our bars, making them rich and buttery. Don’t skimp on this; let it sit out for a bit to soften, so it creams nicely!
- 4 large eggs: These help bind everything together and add moisture. I always use large eggs for the best results.
- 2 cups of sugar: This gives our bars that sweet, delectable flavor that balances out the tart cherries.
- 1 teaspoon of vanilla powder: A must for that warm, comforting aroma. You can also use vanilla extract if you have it on hand!
- 3 cups of all-purpose flour: This forms the bulk of our batter, helping create that chewy texture we all love.
- 1 teaspoon of salt: Just a pinch to enhance the flavors; trust me, it makes a difference!
- One can of cherry pie filling: The star of our show! It adds that lovely burst of flavor and sweetness.
Optional Ingredients for the Glaze
- 1 cup of powdered sugar: This is for our sweet glaze that can drizzle beautifully over the bars.
- 1/2 cup of milk: To mix with the powdered sugar for a smooth glaze; adjust based on your desired consistency!
- 1/2 teaspoon of vanilla powder: Optional, but it adds an extra layer of flavor to your glaze!
These optional ingredients can elevate your bars to the next level, but don’t worry if you skip them—they’re just as delicious on their own!
Step-by-Step Instructions for Christmas Cherry Bars
Preparing the Batter
Alright, let’s get this baking party started! First things first, preheat your oven to 350°F (175°C). This will ensure your bars bake evenly and come out perfectly golden. While that’s heating up, grab a large mixing bowl and cream together the 1 cup of softened butter and 2 cups of sugar until it’s light and fluffy. This step is super important because it helps to incorporate air into the mixture, giving your bars that lovely texture!
Next, add in the 4 large eggs one at a time, mixing well after each addition. Then sprinkle in 1 teaspoon of vanilla powder and give it another good stir. Now, in a separate bowl, whisk together 3 cups of all-purpose flour and 1 teaspoon of salt. This helps to evenly distribute the salt and ensures your bars are flavorful all the way through.
Assembling the Bars
Now comes the fun part! Grab your greased baking pan (I usually use a 9×13 inch one) and spread half of your batter into the bottom. It doesn’t have to be perfect; just make sure it’s evenly distributed. Now, open up that can of cherry pie filling and spread it generously over the batter. Oh, the smell is already heavenly! Then, drop spoonfuls of the remaining batter over the cherries. Don’t worry about covering it completely; those little dollops are going to create a beautiful, rustic look!

Baking and Glazing
Time to pop those bars into the oven! Bake for about 30-35 minutes, or until the top is golden brown and a toothpick inserted in the center comes out clean. While your bars are baking, you can whip up the optional glaze if you’d like! Just mix together 1 cup of powdered sugar, 1/2 cup of milk, and 1/2 teaspoon of vanilla powder until smooth. Once your bars are out of the oven, let them cool for a bit before drizzling the glaze over the top. This will make for a lovely finishing touch! Enjoy the delightful aroma filling your kitchen as your Christmas Cherry Bars cool down—trust me, you’ll be counting down the minutes until they’re ready to devour!
Variations of Christmas Cherry Bars
Now that you’ve got the classic Christmas Cherry Bars down, let’s talk about some fun variations to keep things exciting! These bars are super versatile, and you can easily customize them to suit your tastes or the season.
Nutty Twist
If you’re a fan of a little crunch, consider adding some chopped nuts to your batter! Walnuts or pecans work wonderfully and add a lovely texture that contrasts beautifully with the soft bars. Just fold about 1 cup of chopped nuts into the batter before spreading it in the pan. It’s a simple tweak that brings a delightful flavor and makes your bars even more satisfying!
Different Fruit Fillings
Feeling adventurous? Swap out the cherry pie filling for other fruits! Blueberries, raspberries, or even a mix of apples and cinnamon can create a delightful twist on the original recipe. Just make sure the fruit you choose is sweet enough to balance the batter. You can even get festive with cranberry filling for a tart kick! The possibilities are endless, and each variation brings its own unique charm to your holiday dessert table!
Serving and Storage Tips for Christmas Cherry Bars
How to Serve
When it comes to serving your Christmas Cherry Bars, presentation is key! I love to cut them into neat squares and arrange them on a festive platter, maybe with some holly or peppermint sticks for a holiday touch. They’re perfect for parties, so consider serving them alongside a scoop of vanilla ice cream or a dollop of whipped cream for that extra indulgence. You can also pair them with a warm cup of cocoa or spiced cider to really embrace the cozy holiday spirit. Trust me, they’ll not only taste amazing but look so inviting on your dessert table!
Storage Instructions
To keep your Christmas Cherry Bars fresh and delicious, store them in an airtight container at room temperature for up to 3 days. If you want to keep them longer, you can definitely freeze them! Just wrap each bar tightly in plastic wrap and place them in a freezer-safe container. They’ll last in the freezer for about 2-3 months. When you’re ready to enjoy them, simply let them thaw at room temperature for a couple of hours, or pop them in the microwave for a few seconds to warm them up. Enjoy your sweet treats for as long as possible!
Helpful Notes
Make-Ahead Tips
If you’re planning for a big holiday gathering, you’ll be thrilled to know that these Christmas Cherry Bars can be made ahead of time! You can bake them a day or two in advance, just store them in an airtight container to keep them fresh. If you’re making the glaze, I recommend waiting to drizzle it on until just before serving. This way, your bars stay moist and the glaze looks fresh and beautiful! You can even freeze the baked bars for up to 2-3 months—just wrap them tightly in plastic wrap and pop them in a freezer-safe container. When you’re ready for a sweet treat, let them thaw overnight in the fridge or at room temperature for a few hours.
Nutritional Considerations
These Christmas Cherry Bars are a delightful indulgence, but it’s good to keep in mind their nutritional aspects. Each bar contains about 250 calories, making them a fun but rich treat during the holidays. With 20 grams of sugar, they’re sweet enough to satisfy your cravings! If you’re looking to lighten things up a bit, consider swapping out the butter for a healthier fat option or reducing the sugar slightly. Just remember, it’s the holidays—enjoy a bar (or two!) and savor the season!
Frequently Asked Questions
Can I freeze Christmas Cherry Bars?
Absolutely! Freezing Christmas Cherry Bars is a fantastic way to enjoy them later. Just wrap each bar tightly in plastic wrap to prevent freezer burn, and then place them in a freezer-safe container or a zip-top bag. They can be frozen for up to 2-3 months. When you’re ready to indulge, simply let them thaw at room temperature for a couple of hours, or you can warm them up in the microwave for a few seconds. Trust me, nothing beats having these delicious bars on hand for those unexpected sweet cravings!
How long do Christmas Cherry Bars last?
When stored properly, Christmas Cherry Bars will last for about 3 days at room temperature in an airtight container. If you want to keep them longer, freezing is the way to go! Just remember, the longer they sit, the more they might lose that fresh flavor and texture. So, if you can, enjoy them within a few days or freeze them for a later date to keep that delightful taste intact. Happy snacking!
Final Thoughts on Christmas Cherry Bars
Well, there you have it! Your guide to making the most delicious Christmas Cherry Bars that are sure to become a holiday favorite in your home. I really hope you give this recipe a try because trust me, the joy of sinking your teeth into that soft, chewy goodness with a burst of cherry flavor is simply unmatched. Baking these bars not only fills your kitchen with delightful aromas but also creates memories that you’ll cherish for years to come.
So, gather your loved ones, roll up your sleeves, and dive into this festive baking adventure! And please, don’t forget to share your experiences with me. I’d love to hear how your Christmas Cherry Bars turn out and any fun twists you might have added. Happy baking, and may your holidays be filled with sweetness and joy!
Print
Christmas Cherry Bars
- Total Time: 50 minutes
- Yield: 24 bars 1x
- Diet: Vegetarian
Description
Delicious Christmas Cherry Bars perfect for holiday gatherings.
Ingredients
- 1 cup of softened butter
- 4 eggs
- 2 cups of sugar
- 1 teaspoon of vanilla powder
- 3 cups of all-purpose flour
- 1 teaspoon of salt
- One can of cherry pie filling
- Optional Glaze: 1 cup of powdered sugar
- Optional Glaze: 1/2 cup of milk
- Optional Glaze: 1/2 teaspoon of vanilla powder
Instructions
- Preheat oven to 350°F (175°C).
- Cream together the butter and sugar until light and fluffy.
- Add eggs and vanilla powder, mixing well.
- In a separate bowl, combine flour and salt.
- Gradually add the dry ingredients to the wet mixture.
- Spread half of the batter into a greased baking pan.
- Spread the cherry pie filling over the batter.
- Drop the remaining batter by spoonfuls over the cherries.
- Bake for 30-35 minutes or until golden brown.
- If using glaze, mix powdered sugar, milk, and vanilla powder until smooth and drizzle over cooled bars.
Notes
- Store in an airtight container.
- These bars can be made ahead of time.
- Try adding nuts for extra texture.
- Prep Time: 15 minutes
- Cook Time: 35 minutes
- Category: Dessert
- Method: Baking
- Cuisine: American
Nutrition
- Serving Size: 1 bar
- Calories: 250
- Sugar: 20g
- Sodium: 150mg
- Fat: 10g
- Saturated Fat: 5g
- Unsaturated Fat: 3g
- Trans Fat: 0g
- Carbohydrates: 38g
- Fiber: 1g
- Protein: 3g
- Cholesterol: 50mg
Keywords: Christmas Cherry Bars, holiday dessert, cherry bars
