
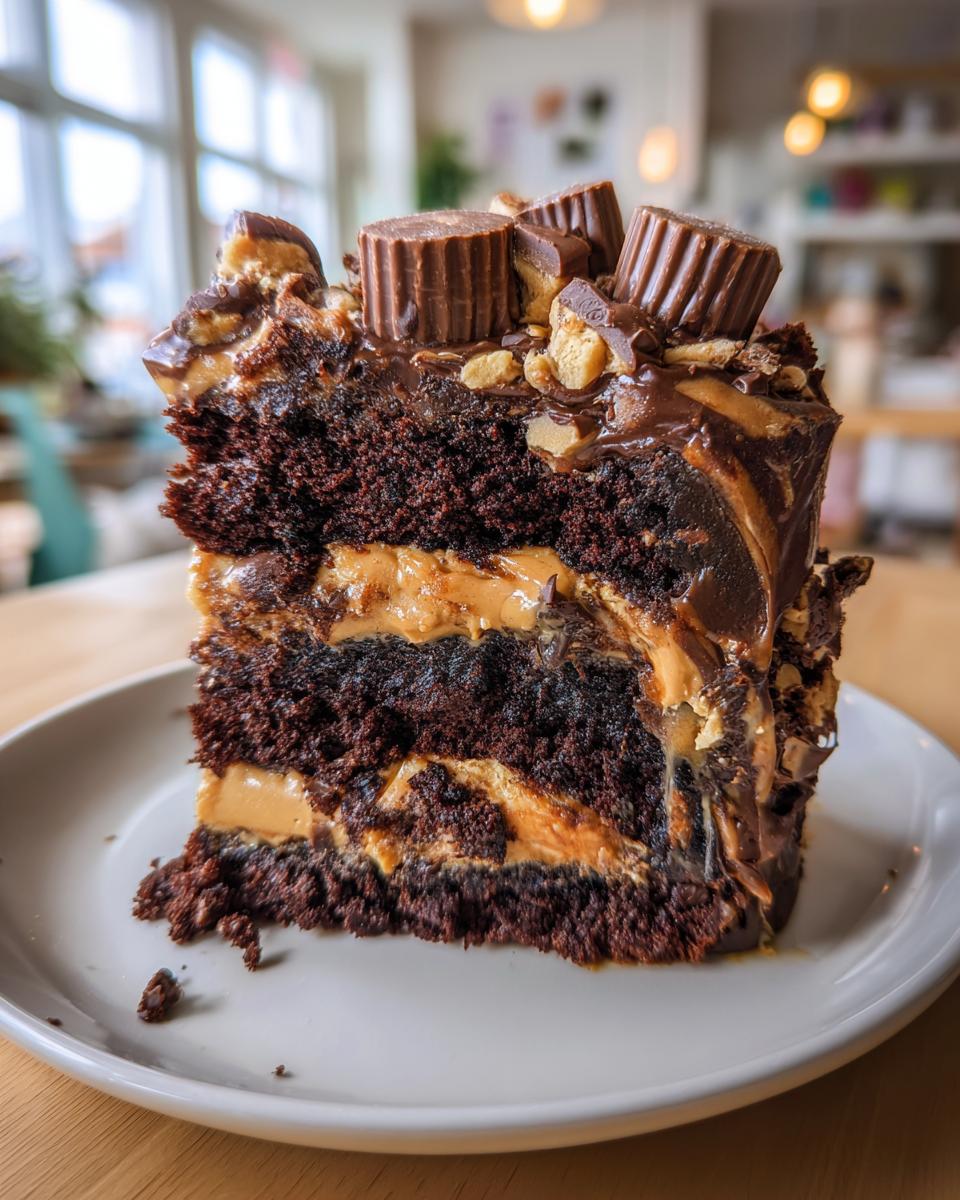
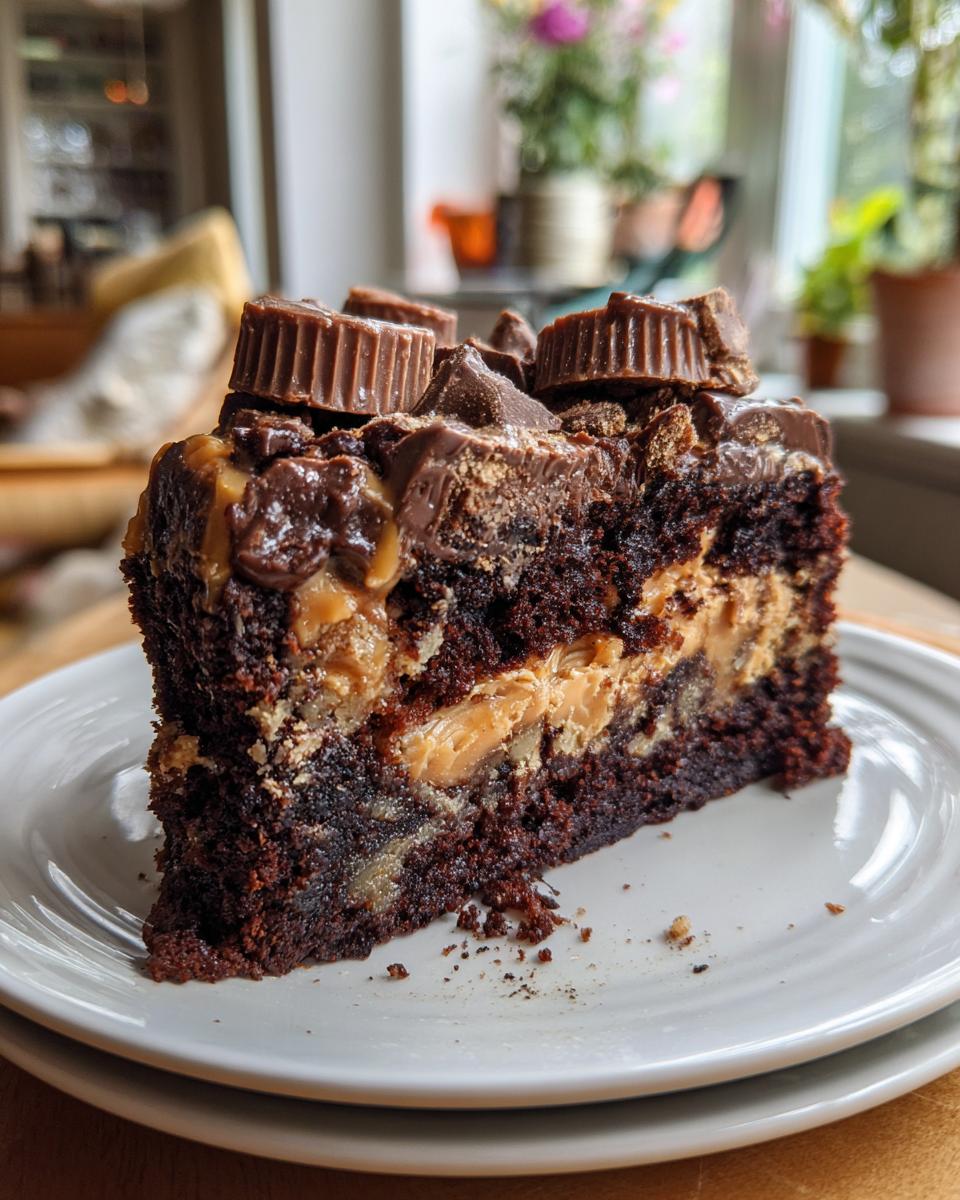
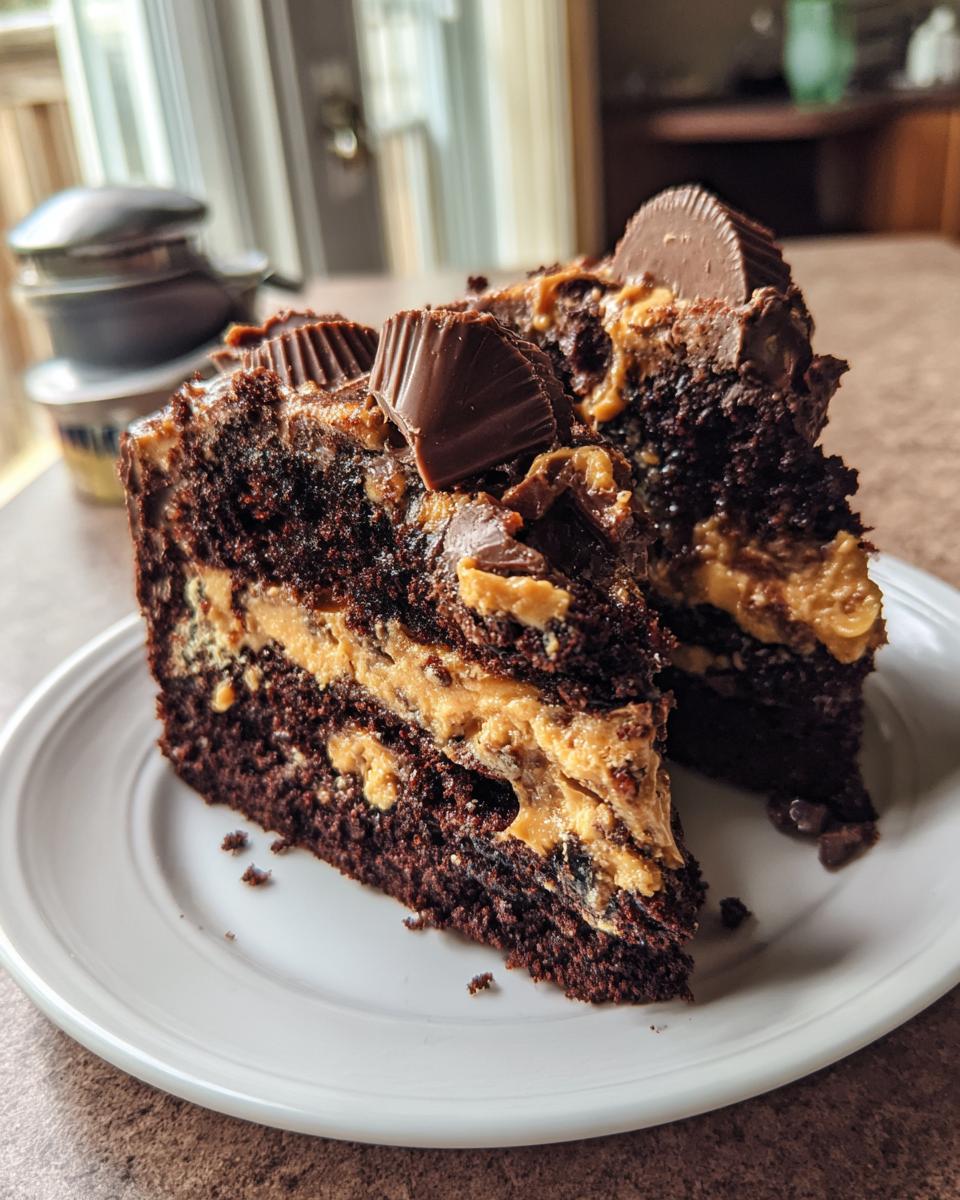
Let me tell you about the most decadent dessert that’s ever come out of my oven—this Reese’s Chocolate Peanut Butter Cup Earthquake Cake is pure magic. Picture rich chocolate cake batter studded with halved Reese’s cups, swirled with creamy peanut butter filling that creates delicious “fault lines” as it bakes. I’ve been perfecting this recipe for years after first tasting a version at a potluck (I may have gone back for thirds!). Trust me, if you love chocolate and peanut butter together, this will become your new obsession.
What makes this cake special isn’t just the outrageous flavor combo—it’s how shockingly easy it is to make. With just a boxed cake mix base and simple peanut butter swirl, you get a dessert that looks and tastes like you spent hours in the kitchen. The “earthquake” effect happens naturally as the peanut butter mixture sinks into the batter while baking, creating gorgeous marbling. Pro tip: always serve it warm with vanilla ice cream melting over the top for maximum indulgence!
Why You’ll Love This Reese’s Chocolate Peanut Butter Cup Earthquake Cake
Let me count the ways this cake will steal your heart:
- Chocolate-Peanut Butter Bliss: The rich combo of dark chocolate cake and creamy peanut butter swirl is downright addictive
- Effortless Elegance: Looks fancy but comes together in minutes with simple ingredients
- Crowd-Pleasing Magic: Guaranteed to disappear fast at potlucks and family gatherings
- Textural Heaven: Warm cake + melty peanut butter cups + slightly crisp edges = perfection
- Ice Cream’s Best Friend: The ultimate base for your favorite scoop of vanilla
Seriously, this earthquake cake might just ruin all other desserts for you!
Ingredients for Reese’s Chocolate Peanut Butter Cup Earthquake Cake
Gather these goodies—I promise every single one plays a crucial role in creating that magical earthquake effect:
- 1 box dark chocolate fudge cake mix (plus whatever ingredients the box calls for—usually eggs, oil, and water)
- 8 oz cream cheese, softened to room temperature (trust me, cold cream cheese will clump!)
- ½ cup unsalted butter, softened (salted works in a pinch, but reduce added salt elsewhere)
- ½ cup creamy peanut butter (the regular kind, not natural—it swirls better)
- 1 tsp pure vanilla extract (the good stuff makes a difference)
- 4 cups powdered sugar (sifted if you’re feeling fancy)
- ½ cup semi-sweet chocolate chips (or go wild with mini chips)
- 1 cup miniature Reese’s peanut butter cups, halved (I use kitchen shears—much easier than a knife!)
Pro tip: Set your butter and cream cheese out about an hour before baking—they’ll blend smoother than a jazz melody.
Equipment You’ll Need
- Large mixing bowls (2)
- 9×13 inch baking dish
- Hand mixer or stand mixer
- Rubber spatula
- Measuring cups and spoons
How to Make Reese’s Chocolate Peanut Butter Cup Earthquake Cake
Okay, let’s get to the fun part—making this glorious mess of chocolate and peanut butter! Don’t worry if it looks chaotic going into the oven—that’s exactly what creates those irresistible “earthquake” cracks and swirls.
Step 1: Prepare the Cake Batter
First things first—preheat your oven to 350°F (175°C). While it’s heating up, grab your 9×13 inch baking dish and give it a good greasing. I like to use butter or nonstick spray, making sure to get into all the corners. Now, mix up that dark chocolate cake batter just like the box says—usually eggs, oil, and water. Pro tip: don’t overmix! Just stir until the lumps disappear, then pour that gorgeous dark batter into your prepared pan.
Step 2: Make the Peanut Butter Swirl
Here’s where the magic happens! In a large bowl, beat together the softened cream cheese and butter until they’re smooth and creamy—no lumps allowed! Then add the peanut butter and vanilla, mixing until it’s all one happy family. Now gradually add the powdered sugar, about a cup at a time, mixing well after each addition. You’ll know it’s ready when the mixture is thick but still spreadable—like the perfect peanut butter frosting.
Step 3: Layer and Bake
Time to create those earthquake fault lines! Drop spoonfuls of the peanut butter mixture all over the chocolate batter—don’t worry about being neat! Then take a butter knife and gently swirl it through the batter just a few times. Now the fun part—sprinkle those halved Reese’s cups and chocolate chips over the top like you’re decorating the world’s most delicious minefield. Pop it in the oven for 35-40 minutes. You’ll know it’s done when the edges pull away from the pan and a toothpick comes out mostly clean (a few moist crumbs are perfect!).
Resist the urge to dig in immediately—let it cool for about 15 minutes. Those molten peanut butter cups are like little lava pits! But seriously, serve it warm with vanilla ice cream melting over the top for the full earthquake experience.
Tips for the Perfect Reese’s Chocolate Peanut Butter Cup Earthquake Cake
Here are my hard-won secrets for earthquake cake success:
- Room temp is key: Cold cream cheese and butter won’t blend smoothly—plan ahead!
- Don’t over-swirl: Just a few knife passes creates beautiful marbling without muddying the flavors
- Watch the clock: Start checking at 35 minutes—overbaked cake loses that magical gooeyness
- Let it rest: 15 minutes of cooling prevents molten peanut butter burns (worth the wait!)
- Customize it: Swap in different candy bars or add a sprinkle of sea salt before baking
Remember—the messier it looks, the more charming it tastes. That’s the earthquake way!
Serving Suggestions
This cake demands a scoop of vanilla ice cream melting over the top—trust me, the warm-cold contrast is heavenly! For parties, I’ll sometimes add whipped cream and extra chopped Reese’s cups for garnish. It’s also amazing with a drizzle of chocolate syrup if you really want to go all out.
Storage and Reheating
This cake keeps beautifully in an airtight container at room temperature for up to 3 days—if it lasts that long! For that just-baked warmth, zap individual slices in the microwave for 10-15 seconds. The peanut butter cups get all melty again, and honestly? Sometimes I think it tastes even better the next day when the flavors have really gotten to know each other.
Nutritional Information
Nutritional values will vary based on specific ingredients used. This indulgent dessert is meant to be enjoyed as an occasional treat—we’re talking chocolate, peanut butter, and happiness in every bite!
FAQ About Reese’s Chocolate Peanut Butter Cup Earthquake Cake
You’ve got questions? I’ve got answers! Here are the most common things people ask me about this glorious mess of chocolate and peanut butter:
1. Can I use natural peanut butter instead of regular?
Honestly? I don’t recommend it. Natural peanut butter tends to separate and doesn’t swirl as beautifully into the batter. The stabilized oils in regular creamy peanut butter give you that perfect marbled effect. If you must use natural, try stirring it really well first and maybe add an extra tablespoon of powdered sugar to help thicken the swirl.
2. How do I freeze this cake?
Freezes like a dream! Let it cool completely, then wrap individual slices tightly in plastic wrap before popping them in a freezer bag. They’ll keep for up to 3 months. To serve, thaw overnight in the fridge or microwave straight from frozen—just add ice cream!
3. Can I double the recipe for a crowd?
Absolutely! Double all ingredients and use two 9×13 pans side by side. You might need to add 5-10 minutes to the bake time—keep an eye on it. This cake disappears fast at potlucks, so doubling is smart!
4. What if I don’t have Reese’s cups?
No peanut butter cups? No problem! Swap in chopped Snickers, peanut butter chips, or even just extra chocolate chips. The peanut butter swirl carries most of the flavor, so it’ll still be delicious. Though I’ll admit—it’s not quite the same without those melty Reese’s centers!
Print
Decadent Reese’s Chocolate Peanut Butter Cup Earthquake Cake Recipe
- Total Time: 55 minutes
- Yield: 12 servings 1x
- Diet: Vegetarian
Description
A rich and decadent chocolate peanut butter cake loaded with Reese’s cups and topped with a creamy peanut butter frosting.
Ingredients
- 1 box dark chocolate fudge cake mix
- 8 oz cream cheese, softened
- 1/2 cup unsalted butter, softened
- 1/2 cup creamy peanut butter
- 1 tsp vanilla extract
- 4 cups powdered sugar
- 1/2 cup chocolate chips
- 1 cup miniature Reese’s peanut butter cups, halved
- vanilla ice cream for serving
Instructions
- Preheat your oven to 350°F (175°C).
- Prepare the chocolate cake mix according to the package instructions.
- Pour the batter into a greased baking dish.
- In a bowl, mix cream cheese, butter, peanut butter, and vanilla until smooth.
- Gradually add powdered sugar and blend until creamy.
- Drop spoonfuls of the peanut butter mixture over the cake batter.
- Sprinkle chocolate chips and Reese’s peanut butter cups on top.
- Bake for 35-40 minutes or until a toothpick comes out clean.
- Let cool slightly before serving with vanilla ice cream.
Notes
- Use room temperature cream cheese and butter for smoother mixing.
- Adjust baking time based on your oven.
- Store leftovers in an airtight container for up to 3 days.
- Prep Time: 15 minutes
- Cook Time: 40 minutes
- Category: Dessert
- Method: Baking
- Cuisine: American
Nutrition
- Serving Size: 1 slice
- Calories: 450
- Sugar: 45g
- Sodium: 300mg
- Fat: 22g
- Saturated Fat: 10g
- Unsaturated Fat: 8g
- Trans Fat: 0g
- Carbohydrates: 60g
- Fiber: 2g
- Protein: 6g
- Cholesterol: 35mg
Keywords: Reese’s chocolate peanut butter cup cake, earthquake cake, chocolate dessert
