
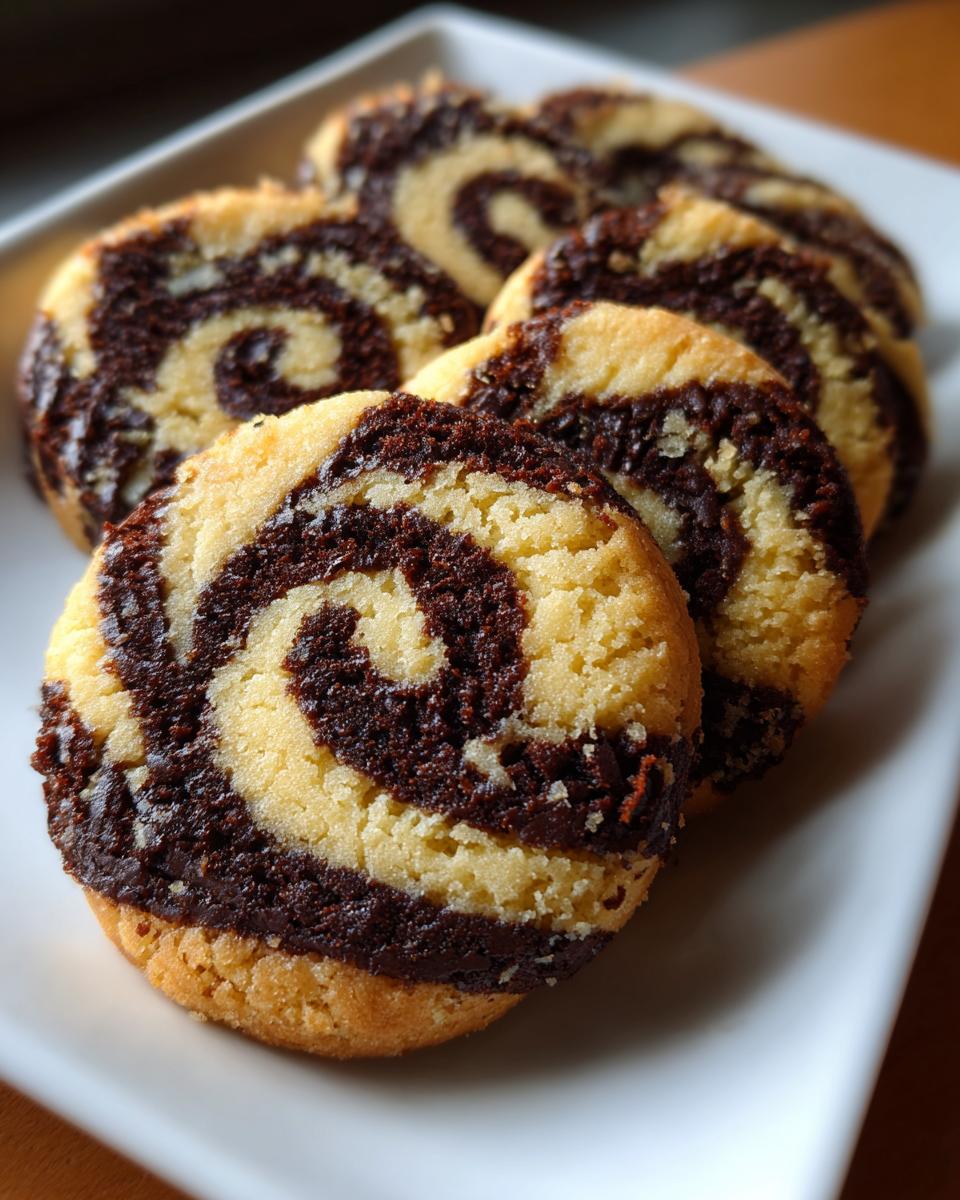
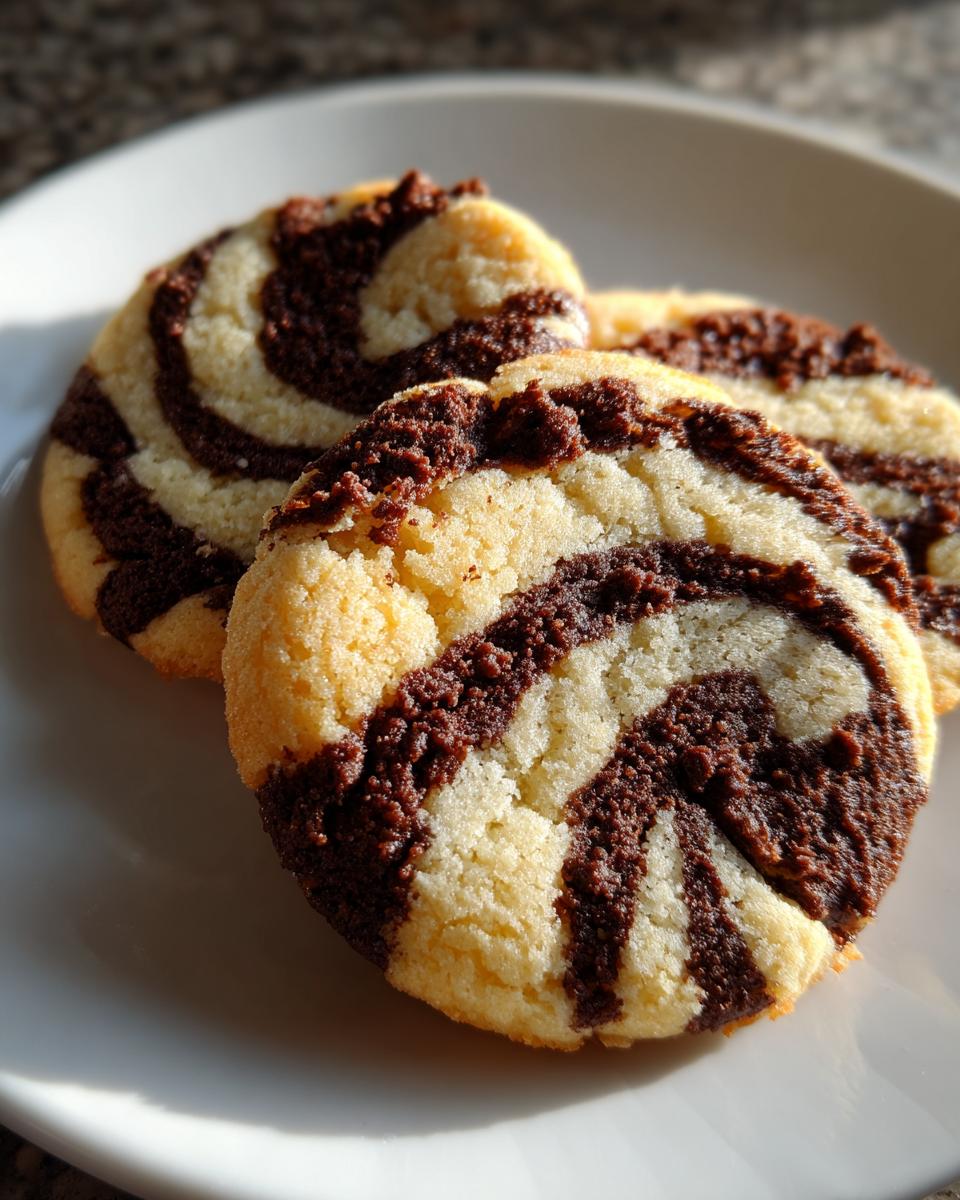
Oh, let me tell you about my absolute favorite cookies to make when I want something that looks fancy but is secretly easy! Zebra Cookies have been my go-to party trick for years—they never fail to get “oohs” and “ahhs” when I bring them out. That striking black-and-white swirl makes them look like they came from a fancy bakery, but trust me, they’re shockingly simple to whip up at home. The magic happens when basic vanilla dough and rich chocolate dough come together in one beautiful rolled log—slice and bake, and suddenly you’ve got these stunning striped treats!
What I love most is how forgiving this recipe is. Whether you’re a nervous beginner or a seasoned baker like me (I’ve probably made these a hundred times for bake sales and birthdays), they turn out great. The contrast between the sweet vanilla and deep cocoa flavors is just perfect with a glass of cold milk. My kids go crazy for them, but honestly? The adults always sneak extra too. Pro tip: The dough is super versatile—you can make thick, bakery-style cookies or thin, crisp ones depending on how you slice them. Just wait till you see people’s faces when you reveal those perfect zebra stripes!
The Perfect Zebra Cookies Ingredients (And Why Each One Matters)
You’d be surprised how simple the ingredient list is for these fancy-looking cookies! Every item plays a special role in creating that perfect zebra stripe effect and delicious taste. Here’s exactly what you’ll need – I’ve learned through trial and error that using the right forms of these ingredients makes all the difference.
- 2½ cups all-purpose flour – Spoon and level it, don’t scoop! This prevents dense cookies. I like to sift mine for extra lightness.
- 1 cup unsalted butter, softened – “Softened” means it should dent slightly when pressed – about 1 hour out of the fridge. Salted butter works too, just skip the added salt.
- 1 cup granulated sugar – Plain white sugar gives the best texture, though you can substitute up to ¼ cup with brown sugar for extra chew.
- 2 large eggs – Room temperature eggs blend better – I just pop them in warm water for 5 minutes if I forget to take them out.
- 1 tsp vanilla extract – The good stuff! Imitation vanilla can make the dough taste artificial.
- ½ cup unsweetened cocoa powder – Dutch-processed gives richer color, but natural works too. Just make sure it’s unsweetened!
- ½ tsp salt – Balances the sweetness. I use fine sea salt.
- 1 tsp baking powder – The leavening agent that gives just the right amount of lift.
See? Nothing too fancy! The magic happens in how we combine them. I always measure everything before starting – it makes the process so much smoother. One quick tip: if your kitchen is warm, chill the butter for just 5 minutes if it gets too soft while you’re prepping other ingredients. You want it pliable but not melty.
How to Make Zebra Cookies
Okay, here’s where the real fun begins! Making zebra cookies is like creating edible magic – that “wow” moment when you slice into the dough and see those perfect stripes never gets old. Follow these steps carefully, and I promise you’ll end up with cookies that look like they came straight from a Parisian patisserie.
- Preheat your oven to 350°F (175°C) – This is crucial for even baking. I always do this first thing so the oven’s perfectly heated when I’m ready. Line your baking sheets with parchment paper – no sticking and easy cleanup!
- Cream the butter and sugar – In a large bowl, beat the softened butter and sugar together for a full 2-3 minutes until light and fluffy. Don’t rush this step! That air you’re incorporating makes the cookies tender. My grandma’s old hand mixer works best for me, but a stand mixer is great too.
- Add eggs and vanilla – Crack in the eggs one at a time, mixing well after each. Then pour in that glorious vanilla. The mixture might look a bit curdled here – totally normal! It’ll come together when you add the dry ingredients.
- Whisk dry ingredients – In another bowl, whisk together the flour, baking powder, and salt. I like to sift them together through a fine mesh strainer – it removes any lumps and makes the cookies extra light.
- Combine wet and dry – Gradually add the dry ingredients to the butter mixture, mixing just until combined. Overmixing makes tough cookies, so I stop when I still see a few flour streaks – they’ll disappear with a couple more gentle strokes.
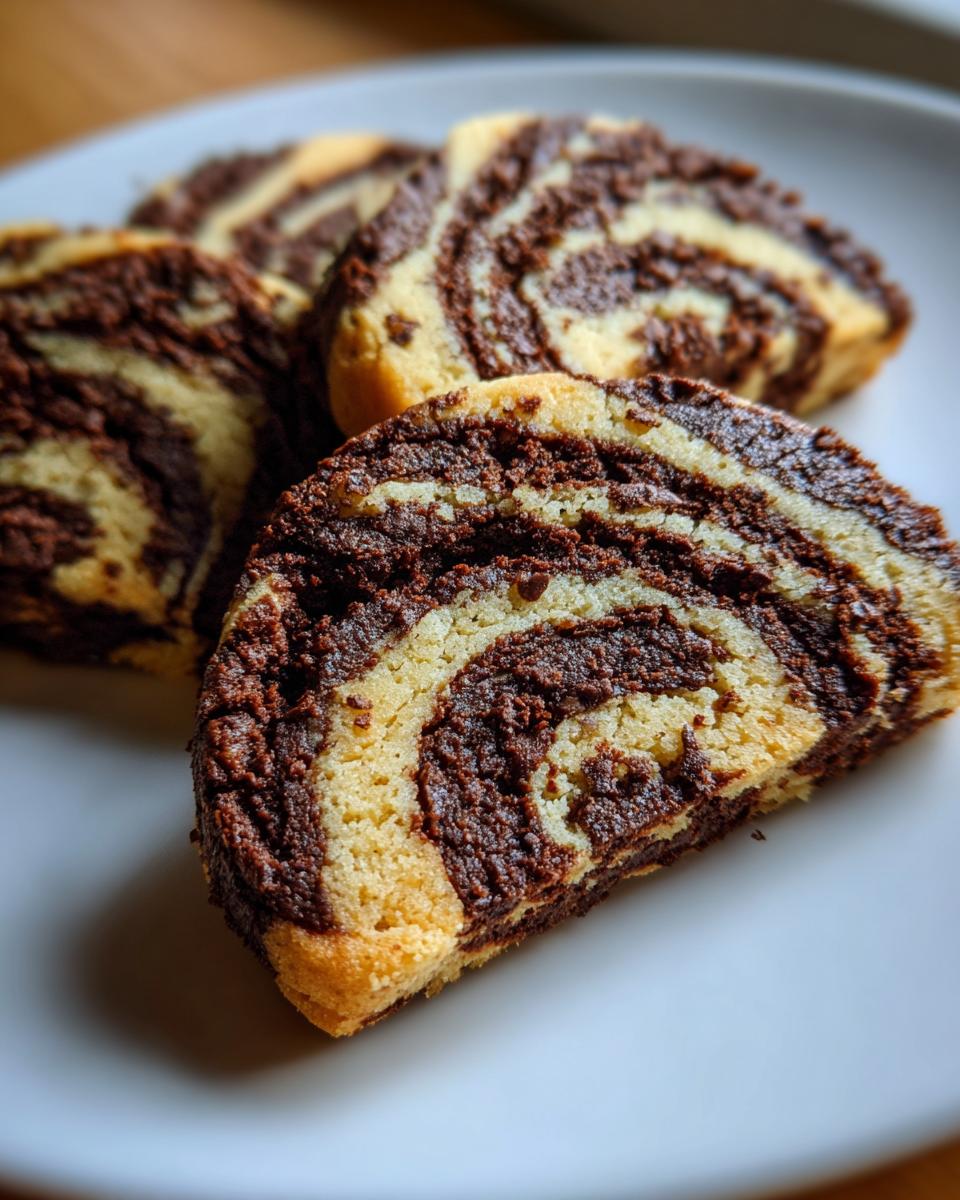
- Create your two doughs – Here’s where the magic happens! Divide the dough in half. In one bowl, knead in the cocoa powder until fully incorporated. You might need to get your hands in there – the chocolate dough should be uniform in color with no white streaks.
- Roll out your dough – Place each dough between two sheets of parchment paper and roll into rectangles of equal size (about ¼ inch thick). The parchment prevents sticking and makes handling so much easier. Pro tip: Use a ruler for precise thickness!
- Stack and roll – Carefully place the vanilla dough on top of the chocolate dough. Starting from one long edge, roll them together tightly into a log, using the parchment to help. Wrap in plastic and chill for 30 minutes if the dough gets too soft.
- Slice and bake – Using a sharp knife, slice the log into ¼-inch rounds. Rotate the log slightly after each cut to maintain round shape. Place on prepared sheets about 2 inches apart. Bake for 10-12 minutes until the edges are just set – they’ll firm up as they cool.
Tips for Perfect Zebra Cookies
After making these countless times (and yes, having a few mishaps along the way), here are my absolute must-know tips:
- Chill before slicing – If your dough feels too soft, pop it in the fridge for 30 minutes. This prevents squished stripes when cutting.
- Use a gentle sawing motion – When slicing, don’t press down hard. A gentle back-and-forth sawing with a sharp knife gives clean cuts.
- Rotate your baking sheets – Halfway through baking, rotate the sheets front-to-back and top-to-bottom for even browning.
- Don’t overbake! – The cookies should look just set at the edges but still soft in the center when you take them out. They’ll continue cooking on the hot sheet.
There you have it – my foolproof method for zebra cookies that’ll impress everyone! The best part? While they look fancy, the process is actually super forgiving. Even if your stripes aren’t perfect the first time, they’ll still taste amazing.
Zebra Cookies Variations (Because Why Stop at Black and White?)
Once you’ve mastered the classic zebra cookie, the fun really begins! I love playing with different flavors and colors – it’s like being a cookie artist. Here are my favorite twists that still keep that gorgeous striped effect while adding new dimensions of flavor.
Flavor Boosters That Take Them To The Next Level
That chocolate dough is just begging for some extra personality! My current obsession is adding 1 teaspoon of espresso powder to the cocoa mixture – it intensifies the chocolate flavor without making the cookies taste like coffee. For holiday baking, I’ll mix in ½ teaspoon of peppermint extract to the vanilla dough – the mint-chocolate combo is irresistible!
Want something more adventurous? Try orange zest in the vanilla dough paired with a pinch of cayenne in the chocolate for a Mexican chocolate vibe. My aunt swears by adding toasted chopped hazelnuts to both doughs before rolling – the crunch is phenomenal.
Colorful Twists on the Classic Stripes
Who says zebras only come in black and white? Using gel food coloring (not liquid – it changes the dough consistency), you can create any color combo you dream up. My daughter loves when we make “unicorn cookies” with pastel pink, purple, and blue stripes. For Valentine’s Day, deep red stripes against the vanilla look stunning.
Pro tip: If you’re doing multiple colors, divide the vanilla dough into separate portions before adding colors. Keep one portion plain white for maximum contrast. The chocolate dough can be tinted too – try black cocoa powder for dramatic dark stripes!
Dietary Swaps That Actually Work
These cookies adapt beautifully to different dietary needs. For gluten-free friends, I use 1-to-1 gluten-free flour blend with great results – just add an extra tablespoon since GF flour absorbs more moisture. Vegan? Substitute the butter with high-quality vegan butter sticks and use flax eggs (1 tbsp ground flax + 3 tbsp water per egg).
For lower sugar versions, you can reduce the sugar by ¼ cup and add 1 tablespoon more butter – the texture changes slightly, but they’re still delicious. And if you’re out of cocoa powder, melted dark chocolate (cooled slightly) works too – just reduce the flour in that portion by 2 tablespoons.
The beauty of zebra cookies is how adaptable they are. Once you understand the basic dough consistency, you can let your creativity run wild. My baking notebook is full of color combinations and flavor experiments – each batch is like a little edible science project that (usually) turns out delicious!
Serving and Storing Zebra Cookies
Now that you’ve baked these beauties, let’s talk about keeping them fresh and serving them up right! Nothing beats a warm zebra cookie fresh from the oven – the chocolate stripes are slightly melty and the vanilla part is just crisp enough. If you can resist eating them all immediately (no judgment if you can’t!), here’s how to keep them tasting their best.
For storage, I swear by airtight containers with a sheet of parchment between layers. At room temperature, they’ll stay perfect for about 5 days – though in my house they rarely last that long! The sugar in the cookies helps preserve them naturally. Just avoid the fridge – it makes them dry out faster. If you need to store them longer, freeze the baked cookies in a single layer first, then transfer to a freezer bag. They’ll keep for 2 months frozen – not that you’ll need them that long!
Want to recapture that fresh-baked magic? Pop day-old cookies in a 350°F oven for 2-3 minutes – it’s like they just came out of the oven! Or microwave one for 10 seconds if you’re impatient like me. The chocolate gets all gooey again – pure bliss.
As for serving, these cookies are stars on their own, but I love pairing them with cold milk for that classic combo. For grown-up gatherings, try them with espresso or a vanilla latte – the flavors complement each other beautifully. They’re also fantastic crumbled over vanilla ice cream (trust me on this one).
Pro tip: If you’re gifting them, stack cookies of similar sizes together with parchment between layers in a cute tin or box. Tie with baker’s twine and include a note about reheating – your friends will think you’re a professional pastry chef!
Zebra Cookies Nutritional Information
Okay, let’s be real – we’re not eating zebra cookies for their health benefits! But I know some of you like to keep track, so here’s the nutritional breakdown per cookie (based on my standard recipe making 24 cookies). Remember, exact numbers can vary slightly depending on your specific ingredients – I’ll explain why below.
- Calories: About 150 per cookie – perfect for a sweet little treat
- Fat: 7g (4g saturated) – that rich butter makes them so tender
- Carbohydrates: 20g – mostly from the flour and sugar
- Fiber: 1g – thank you, cocoa powder!
- Protein: 2g – the eggs and flour contribute this
- Sugar: 8g – just sweet enough without being cloying
- Sodium: 50mg – the pinch of salt balances everything
A quick disclaimer: These numbers are estimates based on standard ingredients. If you use different brands (especially for flour, butter, or cocoa powder), your cookies might have slightly different values. For example, European-style butter has more fat than regular American butter, and some cocoa powders have more fiber than others. I’ve found the calories can vary by about 10-15 calories per cookie depending on these factors.
If you’re watching your sugar intake, you can reduce the granulated sugar by ¼ cup (they’ll be a bit less sweet but still delicious). For lower fat, I’ve had decent results substituting half the butter with unsweetened applesauce – the texture changes slightly, but the stripes still look gorgeous!
At the end of the day, these are meant to be enjoyed in moderation as part of a balanced diet. I usually have one (okay, sometimes two) with my afternoon coffee – that little burst of sweetness keeps me going!
Zebra Cookies FAQs
After years of making these cookies (and fielding countless questions from friends), I’ve rounded up the most common zebra cookie mysteries. Here’s everything you need to know to troubleshoot like a pro!
Q1. Can I freeze zebra cookie dough?
Absolutely! The dough freezes beautifully. Wrap the log tightly in plastic wrap, then aluminum foil – it’ll keep for 3 months in the freezer. When you’re ready to bake, let it thaw slightly in the fridge for about an hour before slicing. No need to adjust baking time – just check for doneness as usual.
Q2. Why did my stripes blend together?
This usually happens if the dough got too warm before baking. Next time, chill the rolled log for 30 minutes before slicing – cold dough holds its shape better. Also, make sure you’re not overmixing when combining the cocoa powder into one portion. Stop as soon as the color is uniform to avoid overworking the dough.
Q3. Can I make these without a stand mixer?
Of course! I actually prefer making these with my hand mixer – it gives me more control over the creaming process. If you’re going old-school with a wooden spoon, just be prepared to put some muscle into creaming that butter and sugar until truly fluffy. The extra effort is worth it for the perfect texture!
Q4. How do I get cleaner slices without squished edges?
Three secrets: First, use a sharp, thin-bladed knife (I like a serrated bread knife). Second, wipe the blade clean between slices. Third, rotate the log a quarter turn after each cut – this prevents flat spots from forming. If the dough sticks to the knife, dip it in flour between slices.
Q5. My cookies spread too much – what went wrong?
This usually means your butter was too soft or the dough wasn’t chilled enough. Next time, make sure your butter is just soft enough to dent when pressed – not melty. If your kitchen is warm, chill the sliced cookies on the baking sheet for 10 minutes before baking. Also, double-check your measurements – too little flour can cause spreading.
Final Thoughts
Alright, friend – you’re officially ready to create some cookie magic! I can’t wait for you to experience that moment when you slice into your first zebra cookie log and see those perfect stripes. It’s the kind of baking win that makes you want to text pictures to everyone you know (go ahead, I do it every time).
What I love most about this recipe is how it turns basic ingredients into something truly special. Whether you’re baking for a party, a school event, or just because it’s Tuesday afternoon, these cookies never fail to brighten someone’s day. My kids still gasp dramatically when I pull a fresh batch from the oven – and they’ve seen me make them dozens of times!
If this is your first try, don’t stress about perfection. My early attempts looked more like abstract art than zebra stripes, but they still tasted amazing. The beauty is in the homemade charm. And when you nail it? Pure baking bliss.
I’d love to hear how yours turn out! Snap a pic of your zebra creations or tell me about your favorite flavor twist in the comments. Baking is always better when we share the joy. Now go preheat that oven – your striped masterpieces are waiting!
Print
Irresistible Zebra Cookies That Will Wow Everyone
- Total Time: 32 minutes
- Yield: 24 cookies 1x
- Diet: Vegetarian
Description
Zebra Cookies are delightful, striped treats combining vanilla and chocolate flavors in a fun pattern.
Ingredients
- 2½ cups all-purpose flour
- 1 cup unsalted butter, softened
- 1 cup granulated sugar
- 2 large eggs
- 1 tsp vanilla extract
- ½ cup unsweetened cocoa powder
- ½ tsp salt
- 1 tsp baking powder
Instructions
- Preheat your oven to 350°F (175°C). Line baking sheets with parchment paper.
- In a bowl, cream together the butter and sugar until light and fluffy.
- Beat in the eggs one at a time, then add the vanilla extract.
- In a separate bowl, whisk together flour, salt, and baking powder.
- Gradually add the dry ingredients to the wet mixture, mixing until just combined.
- Divide the dough into two equal parts. Mix cocoa powder into one half.
- Roll out both dough portions into equal-sized rectangles.
- Stack the vanilla dough on top of the chocolate dough and roll tightly into a log.
- Slice the log into ¼-inch thick rounds and place on prepared baking sheets.
- Bake for 10-12 minutes or until edges are lightly golden. Cool before serving.
Notes
- Chill the dough for 30 minutes before slicing if it’s too soft.
- Store in an airtight container for up to 5 days.
- Prep Time: 20 minutes
- Cook Time: 12 minutes
- Category: Dessert
- Method: Baking
- Cuisine: International
Nutrition
- Serving Size: 1 cookie
- Calories: 150
- Sugar: 8g
- Sodium: 50mg
- Fat: 7g
- Saturated Fat: 4g
- Unsaturated Fat: 2g
- Trans Fat: 0g
- Carbohydrates: 20g
- Fiber: 1g
- Protein: 2g
- Cholesterol: 25mg
Keywords: zebra cookies, striped cookies, chocolate vanilla cookies
