
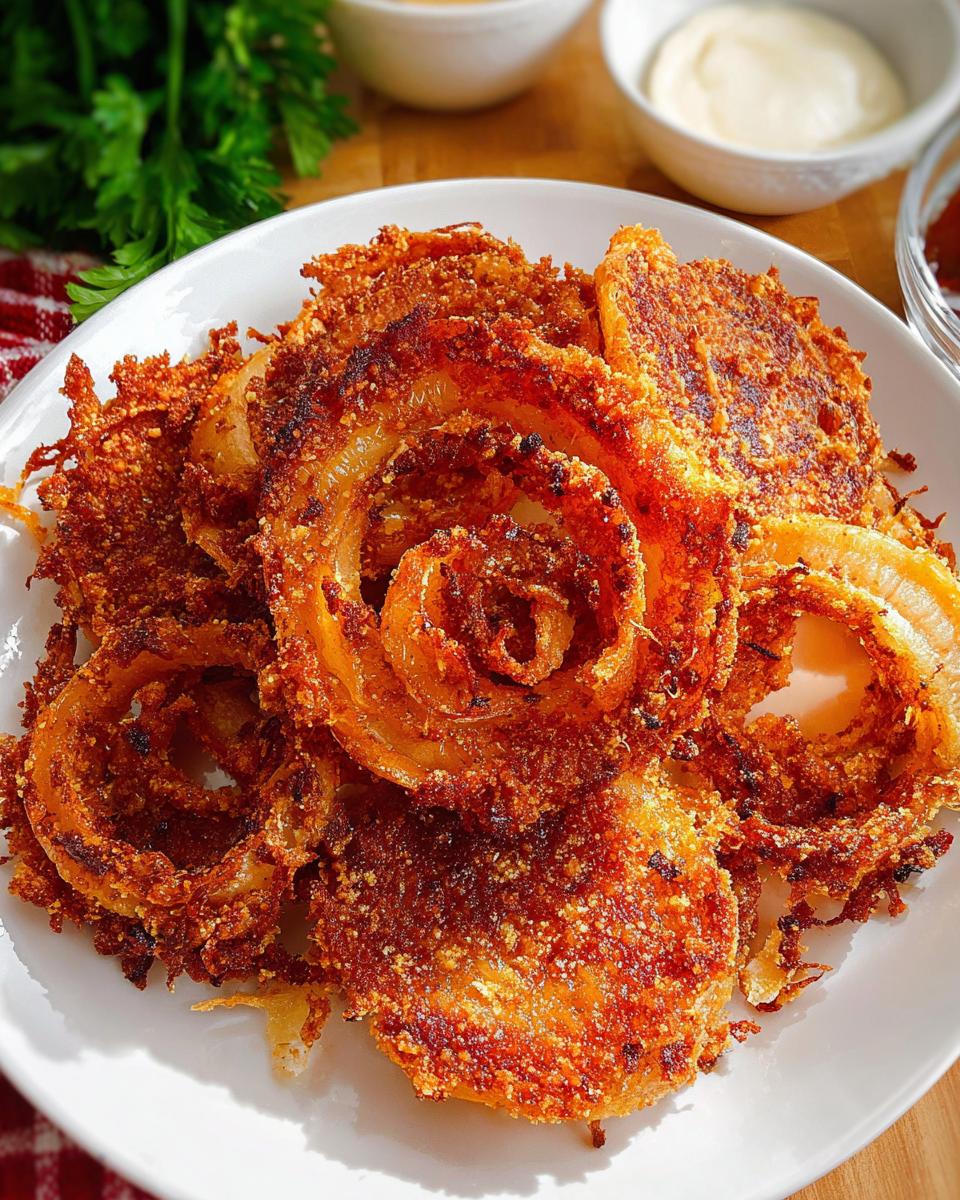
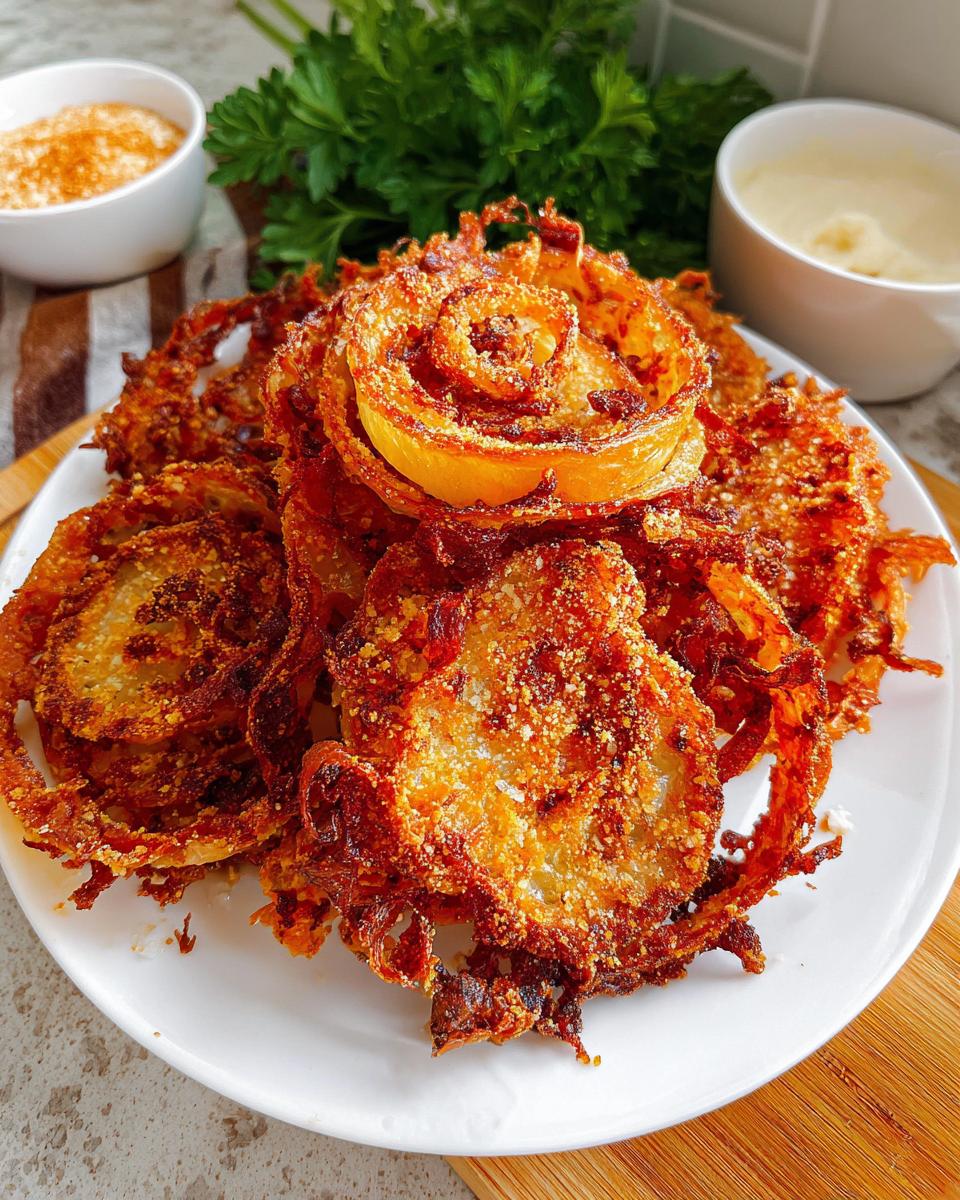
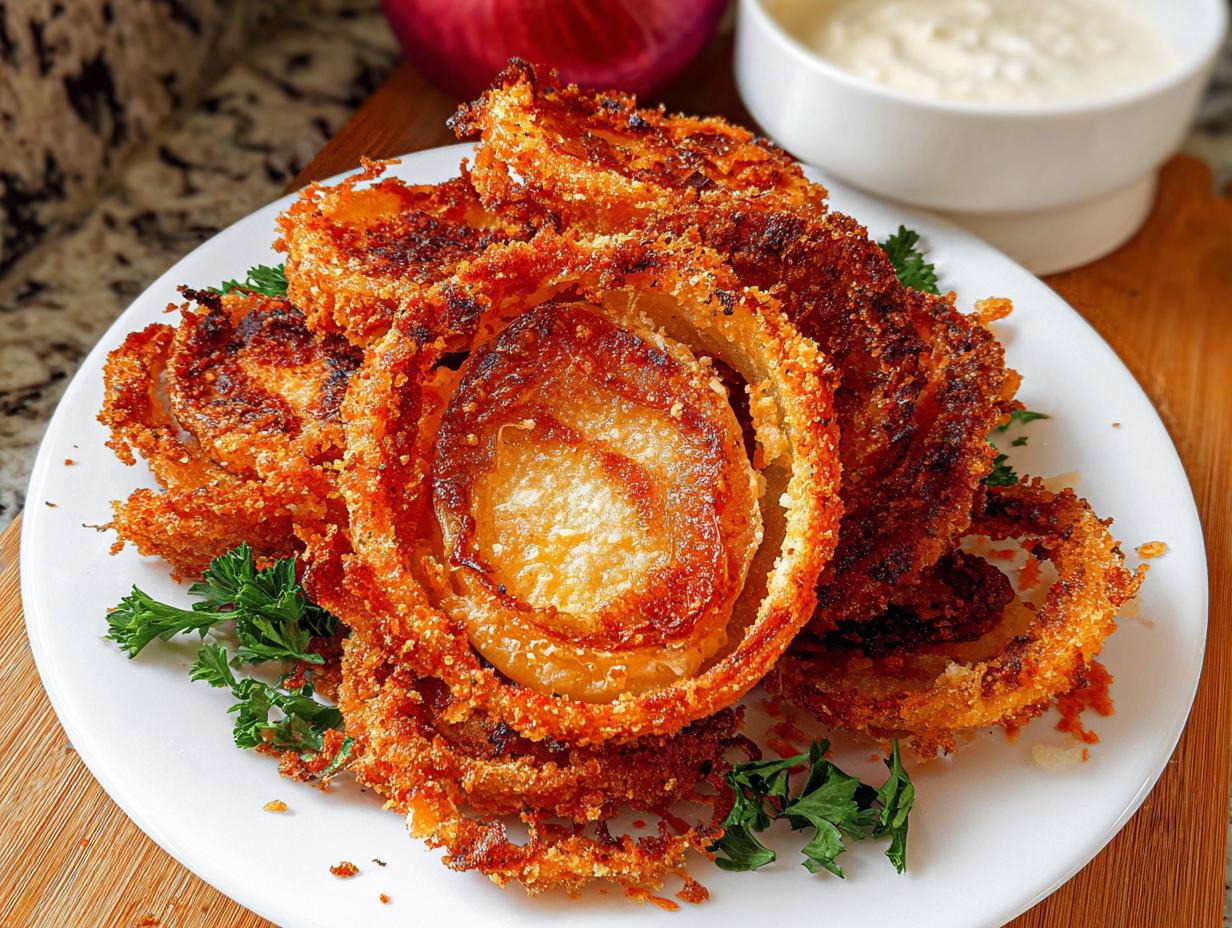
Oh my goodness, let me tell you about these Viral Onion Ring Chips! The first time I made them, I was at home, and the smell of crispy, cheesy goodness filled the air. I couldn’t believe how easy they were to whip up! Seriously, these little bites of heaven are perfect for snacking while binge-watching your favorite show or serving at a party where everyone will rave about them.
What makes these chips so special is their amazing crunch combined with the rich, savory flavor of freshly grated parmesan. They’re gluten-free, quick to make, and absolutely addictive! Once you try these, I promise you’ll want to make them again and again. So, grab those onions and get ready to impress your friends (and yourself) with this delightful, crispy snack!
Why You’ll Love Viral Onion Ring Chips
- Super Crispy: These chips deliver an irresistible crunch that you just can’t resist! Each bite is a satisfying pop of texture.
- Flavor-Packed: The combination of parmesan cheese and spices adds a savory explosion that elevates them above your typical snack.
- Quick and Easy: With only a 10-minute prep time and about 20 minutes in the oven, you’ll have these delicious chips ready in no time!
- Gluten-Free: Perfect for those following a gluten-free diet, these chips let everyone join in on the snacking fun without any worries.
- Versatile: Great as a snack on their own or served alongside dips, burgers, or even salads for a crunchy twist.
- Leftover Friendly: If you manage to have any leftovers, they store well and can be reheated for a quick snack later!
Ingredients You’ll Need
Gathering your ingredients is super easy for these Viral Onion Ring Chips! Here’s what you’ll need to whip up this cheesy goodness:
Parmesan Cheese
First and foremost, you’ll need 8 ounces of freshly grated parmesan cheese. Trust me, using freshly grated cheese is key! It melts beautifully and gives you that rich, nutty flavor that pre-packaged stuff just can’t match. Plus, it’s all about that texture; freshly grated cheese clings perfectly to the onion rings, creating a crispy coating that’s simply irresistible!
Onions
Next up, you’ll need 3 medium yellow onions. I love using yellow onions because they’ve got that perfect balance of sweetness and tang, which really enhances the flavor of the chips. Slice them into thin rings; I like them about ¼ inch thick. This thickness gives you that awesome crunch without making them too flimsy. And don’t worry if your slices aren’t perfect—this is about enjoying the cooking process!
Seasoning and Oils
Now for the fun part—the seasonings! Here’s what else you’ll need:
- 2 tablespoons of avocado oil (you can use olive oil if you prefer, but I love the subtle flavor of avocado oil here)
- 2 teaspoons of paprika (adjust to your taste—smoky paprika can add a nice touch!)
- 1 teaspoon of coarse sea salt (you can add more later if you like it saltier)
- 1 teaspoon of garlic powder (because garlic makes everything better!)
- ½ teaspoon of seasoning salt (this adds a nice little flavor boost)
- ¼ teaspoon of ground black pepper (to give it a slight kick)
These spices create the perfect flavor profile that complements the parmesan and onions. Feel free to tweak them based on what you like! The beauty of this recipe is how customizable it is while still being super delicious.
Step-by-Step Instructions
Prepping the Ingredients
Let’s kick things off! First, preheat your oven to 400°F (200°C). This is super important because you want those chips to bake up crispy and delicious. While that’s heating, grab your onions and slice them into thin rings—about ¼ inch thick is perfect. I like to cut off both ends of the onion first, then peel off the skin before slicing. Don’t stress if some rings are a bit thicker or thinner; they’ll all taste amazing!
Mixing the Coating
Now, let’s make that flavorful coating! In a mixing bowl, combine your freshly grated parmesan cheese, avocado oil, paprika, sea salt, garlic powder, seasoning salt, and black pepper. I usually start with a good stir using a fork until everything is well combined. You want the cheese to be evenly mixed with the spices and oil so every onion ring gets that cheesy, savory goodness!
Coating the Onion Rings
Time to coat those onion rings! Take each ring and dip it into the cheese mixture, making sure it’s well coated on all sides. You can use your hands or a fork—whatever feels more comfortable! Just ensure every ring gets a good amount of that cheesy goodness; this is what makes them so irresistible. Place the coated rings on a baking sheet lined with parchment paper, making sure they’re not touching each other. This helps them bake evenly and get that perfect crunch!
Baking Process
Pop those baking sheets into your preheated oven and set a timer for 15-20 minutes. Keep an eye on them! You’ll know they’re done when they turn golden brown and crispy—yum! If you want to be extra sure, you can peek in and give them a little shake halfway through to help them crisp up evenly. Once they’re out of the oven, let them cool for a few minutes before diving in. Trust me, that little wait is worth it!
Variations
The beauty of these Viral Onion Ring Chips is how easily you can mix things up for a fun twist! Let’s explore some delicious variations that will keep your taste buds dancing.
- Cheese Swaps: While parmesan is a star here, feel free to experiment with other cheeses! Gruyère or cheddar can give a different flavor profile. Just remember, the cheese should be freshly grated for that perfect melt and crisp!
- Spicy Kick: If you love a bit of heat, try adding cayenne pepper or crushed red pepper flakes to the seasoning mix. It’ll give your chips a zesty punch that’s sure to wow your guests!
- Herb Infusion: Chopped fresh herbs like rosemary or thyme can add a lovely aromatic touch. Just sprinkle them into your cheese mixture for a fresh burst of flavor.
- Different Onions: Switch things up with sweet onions or even red onions for a milder taste. Each type brings its own unique sweetness that can change the whole vibe of the chips!
- Seasonal Flavors: During fall, consider adding a pinch of cinnamon or nutmeg for a warm, cozy flavor. Or in the summer, fresh lemon zest can brighten them up beautifully!
Feel free to mix and match these ideas! The versatility of this recipe means you can always create something new and exciting. Enjoy the process of experimenting!
Serving and Storage Tips
Now that you’ve whipped up these amazing Viral Onion Ring Chips, let’s talk about how to serve them and keep any leftovers fresh (if there are any!). These chips are perfect as a standalone snack, but they also shine when paired with your favorite dips. Think creamy ranch, zesty salsa, or even a tangy garlic aioli. They’re fantastic for game day, movie nights, or just when you need a little crunch in your life!
As for storage, if you happen to have any leftovers (which is a big if!), allow the chips to cool completely before transferring them to an airtight container. They’ll keep in the fridge for about 2-3 days. Just a quick heads up: their crispiness may diminish over time, so to revive that crunchy texture, pop them back in the oven at 350°F (175°C) for about 5-10 minutes. This little trick works wonders! Enjoy your chips fresh and crispy, and don’t forget to share (or not!)—they’re that good!
Helpful Notes
Here are a few extra tips to ensure your Viral Onion Ring Chips turn out perfectly every time! First, if you want an extra crispy texture, consider broiling them for the last 2-3 minutes of baking. Just keep an eye on them because they can go from perfectly golden to burnt in a flash—yikes!
Also, if you have any dietary preferences, this recipe is super adaptable. You can easily make it dairy-free by using a plant-based cheese alternative that melts well. And if you need to tweak the spices, feel free to adjust based on your taste. Want more garlic flavor? Go for it! A little extra seasoning salt can really kick things up a notch too.
Lastly, if you’re looking to make a larger batch, just double the ingredients and bake them in batches to ensure they stay crisp. Happy cooking!
Frequently Asked Questions
Got questions about these delicious Viral Onion Ring Chips? I’ve got you covered! Here are some common queries that pop up:
- 1. Can I freeze these onion ring chips?
Absolutely! If you want to make a big batch, you can freeze the unbaked, coated onion rings. Just lay them out on a baking sheet until they freeze solid, then transfer them to an airtight container or freezer bag. When you’re ready to bake, you can cook them straight from the freezer—just add a couple of extra minutes to the baking time! - 2. What if I don’t have avocado oil?
No problem at all! You can easily substitute avocado oil with olive oil or even melted coconut oil. Each will give a slightly different flavor, but they’ll still work beautifully for coating those onion rings. - 3. Can I use pre-grated parmesan cheese?
While you can use pre-grated cheese in a pinch, I highly recommend freshly grating your parmesan. It melts and adheres better to the onion rings, providing that amazing crunchy texture we’re after. Trust me; it’s worth the extra few minutes! - 4. How do I make these onion ring chips more flavorful?
If you want to amp up the flavor, consider adding more spices or experimenting with different herbs. You could also try incorporating a splash of hot sauce into the coating mixture for a spicy twist. The possibilities are endless! - 5. Can I bake them in an air fryer?
Absolutely! If you have an air fryer, you can make these chips even crispier! Just place the coated onion rings in a single layer in the air fryer basket and cook them at 375°F (190°C) for about 10-12 minutes, shaking the basket halfway through to ensure even cooking.
I hope these answers help you make the best Viral Onion Ring Chips ever! If you have more questions, don’t hesitate to reach out. Happy cooking!
Final Thoughts
There you have it! Your guide to making the most mouthwatering Viral Onion Ring Chips that are sure to become a staple in your kitchen. I can’t wait for you to try these out and experience that delightful crunch and cheesy flavor for yourself. Whether it’s for a cozy night in or a lively gathering with friends, these chips are bound to impress. So, roll up your sleeves, grab those onions, and get cooking!
And hey, if you give this recipe a go, I’d love to hear how yours turned out! Share your thoughts, any fun variations you tried, or even a photo of your delicious creations. Happy snacking, and enjoy every crispy bite!
Print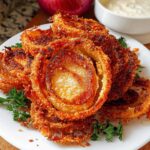
Viral Onion Ring Chips: Addictive Crunch
- Total Time: 30 minutes
- Yield: 4 servings 1x
- Diet: Gluten Free
Description
Crispy and flavorful onion ring chips made with parmesan cheese.
Ingredients
- 8 ounces parmesan cheese, freshly grated
- 3 yellow onions, medium
- 2 tablespoons avocado oil
- 2 teaspoons paprika, or to taste
- 1 teaspoon coarse sea salt, or to taste
- 1 teaspoon garlic powder, or to taste
- ½ teaspoon seasoning salt, or to taste
- ¼ teaspoon ground black pepper, or to taste
Instructions
- Preheat the oven to 400°F (200°C).
- Slice the onions into thin rings.
- In a bowl, mix parmesan cheese, avocado oil, paprika, sea salt, garlic powder, seasoning salt, and black pepper.
- Coat the onion rings with the cheese mixture.
- Place the coated rings on a baking sheet lined with parchment paper.
- Bake for 15-20 minutes until golden and crispy.
- Remove from oven and let cool slightly before serving.
Notes
- Adjust spices according to your preference.
- Store leftovers in an airtight container.
- Prep Time: 10 minutes
- Cook Time: 20 minutes
- Category: Snack
- Method: Baking
- Cuisine: American
Nutrition
- Serving Size: 1 serving
- Calories: 250
- Sugar: 2g
- Sodium: 600mg
- Fat: 18g
- Saturated Fat: 8g
- Unsaturated Fat: 10g
- Trans Fat: 0g
- Carbohydrates: 10g
- Fiber: 1g
- Protein: 15g
- Cholesterol: 30mg
Keywords: Viral Onion Ring Chips, onion chips, parmesan chips, crispy snack
