
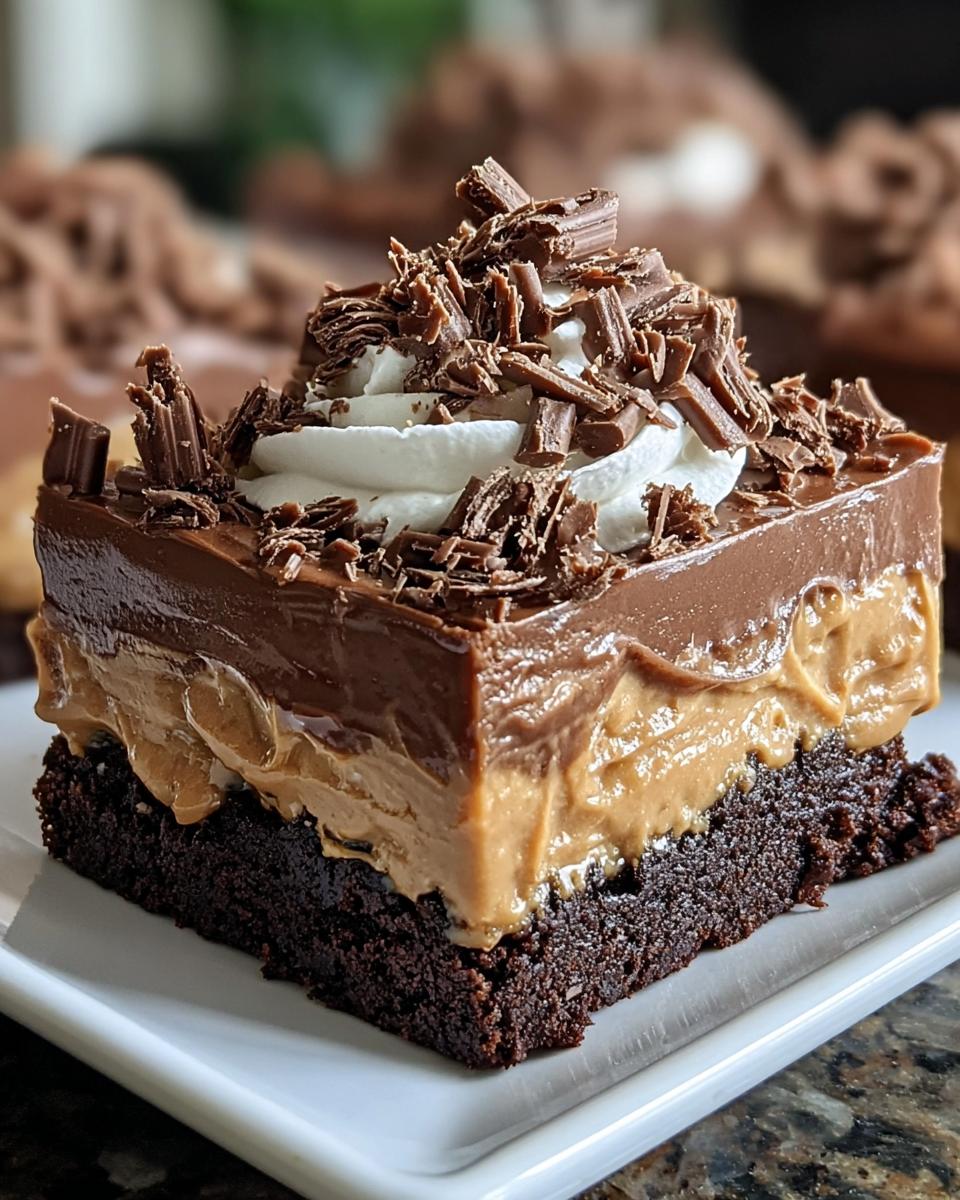
Oh my goodness, you guys, let me tell you about my absolute favorite dessert: Chocolate Peanut Butter Dream Bars! I remember the first time I made these little beauties for a family gathering. The moment I took them out of the fridge, the air filled with that irresistible combination of chocolate and peanut butter. You could practically hear the gasps of delight! Trust me, if you’re looking for a dessert that will wow your friends and family, this one is it.
These bars are the perfect blend of rich, creamy peanut butter and luscious chocolate, layered to create a dream that you can’t help but indulge in. Plus, they’re no-bake, which means you can whip them up in no time! They’re absolutely perfect for summer gatherings, potlucks, or any occasion where you want to impress. You’ll find that they disappear faster than you can say “delicious!” So grab your ingredients, and let’s get started on creating this sweet, delightful treat that will have everyone begging for the recipe!
Why You’ll Love Chocolate Peanut Butter Dream Bars
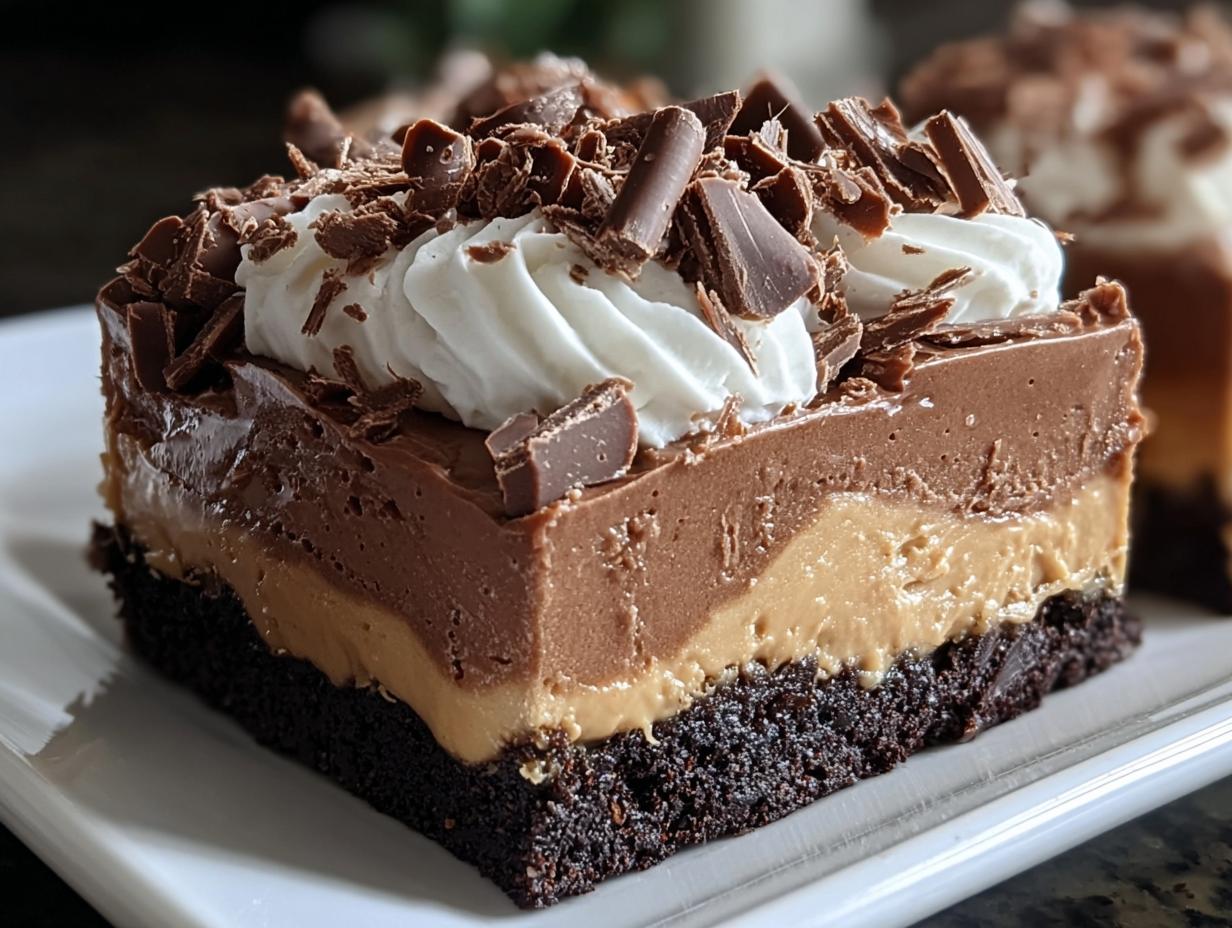
Let me tell you, these Chocolate Peanut Butter Dream Bars are nothing short of a heavenly experience! The moment you take a bite, you’re greeted with the creamy richness of peanut butter, perfectly complemented by a luscious layer of chocolate. It’s like a party in your mouth! Seriously, the combination of these two flavors is a match made in dessert heaven.
What I love most about these bars is how effortlessly they come together. There’s no baking involved, which means less time fussing in the kitchen and more time indulging in this scrumptious treat. They’re quick to prepare, making them a fantastic option for last-minute gatherings or when you just need a sweet fix. Plus, they’re a total crowd-pleaser; I’ve yet to meet anyone who can resist them! These bars are perfect for summer picnics, holiday parties, or just a cozy night in. Trust me, once you make these, they’ll become a staple in your dessert rotation. You’ll be the hero of every party!
Ingredients You’ll Need
- 1 package (16 oz) chocolate sandwich cookies, crushed – Any brand will do, but I love using Oreos for that classic flavor!
- ½ cup unsalted butter, melted – This helps bind the cookie crust together for that perfect texture.
- 1 cup creamy peanut butter – Go for the good stuff! Creamy peanut butter gives the bars that dreamy consistency.
- 1 package (8 oz) cream cheese, softened – Make sure it’s softened for easy mixing; it adds a wonderful richness.
- 1 cup powdered sugar – This sweetens the peanut butter layer and balances the flavors beautifully.
- 1 container (8 oz) whipped topping, thawed – This adds a light and fluffy texture that complements the denser layers.
- 1 package (3.9 oz) instant chocolate pudding mix – This is what brings that rich chocolate flavor into the mix.
- 1½ cups milk – Use whole milk for the creamiest results, but you can swap it out for any milk you prefer!
- Extra whipped topping & chocolate curls (for garnish) – Because who doesn’t love a little extra flair on their dessert?
Step-by-Step Instructions
Alright, let’s dive into making these incredible Chocolate Peanut Butter Dream Bars! I promise you, the process is just as delightful as the end result. Just follow these steps, and you’ll be on your way to dessert heaven!
Prepping the Crust
First things first, preheat your oven to 350°F (175°C). Even though we’re not actually baking the bars, we want to make sure our ingredients are ready to roll! In a large bowl, combine your crushed chocolate sandwich cookies and melted butter. I like to use a fork to mix them together until they’re well combined and crumbly. It should feel like damp sand! Once you’ve mixed it up, grab a 9×13 inch baking dish and press the cookie mixture firmly into the bottom. Don’t be shy—make sure it’s packed down evenly. This crust is the foundation of your bars, so you want it nice and solid!
Making the Peanut Butter Layer
Now, let’s whip up that dreamy peanut butter layer! In a separate bowl, beat together the creamy peanut butter, softened cream cheese, and powdered sugar. I usually use an electric mixer for this—trust me, it’s so much easier! Mix until everything is smooth and creamy, with no lumps. It should be thick and spreadable but still light enough to layer! Once that’s done, gently fold in the thawed whipped topping until it’s all incorporated. This adds a lovely fluffiness to your peanut butter layer. It’s okay if it’s a little swirly—that just adds to the charm!
Assembling the Bars
Alright, it’s assembly time! Spread the peanut butter mixture evenly over your cookie crust. Don’t rush this part; take your time to make sure it’s nice and level. Next, in another bowl, whisk together the instant chocolate pudding mix and milk until it thickens. You want it to be thick enough to spread but still pourable. Carefully spread the chocolate pudding over the peanut butter layer, making sure to cover it completely. Finally, add another layer of whipped topping on top of the pudding, smoothing it out with a spatula. You can even decorate it with chocolate curls if you’re feeling fancy!
Chilling for Perfection
Now comes the hardest part—waiting! Cover your baking dish with plastic wrap and pop it in the refrigerator for at least 2 hours. This chilling time is crucial; it helps the layers set and meld together into that perfect bite. I always find it helpful to make these bars a day ahead of time when I can. Trust me, the flavors develop even more overnight! When you’re ready to serve, just slice them into squares, and prepare for the compliments to roll in!
Variations
One of the best things about these Chocolate Peanut Butter Dream Bars is how easy they are to customize! If you’re feeling adventurous, try swapping out the chocolate sandwich cookies for graham crackers or even vanilla wafers for a different flavor profile. You can also mix things up by using crunchy peanut butter instead of creamy, which adds a delightful texture!
Feeling festive? Top your bars with crushed candy canes during the holidays or sprinkle some mini chocolate chips on top for extra chocolatey goodness. You can even experiment with flavored pudding mixes, like butterscotch or vanilla, for a fun twist! The possibilities are endless, and that’s what makes these bars so much fun to make!
Serving and Storage Tips
When it comes to serving your Chocolate Peanut Butter Dream Bars, presentation is key! I love to slice them into squares and serve them on a beautiful platter, maybe with a sprinkle of chocolate curls on top for that extra touch. They’re perfect for parties, potlucks, or just a cozy dessert night at home. You might want to pair them with a scoop of vanilla ice cream or fresh berries for a delightful contrast!
As for storage, you’ll want to keep these bars in the refrigerator to maintain their texture and flavor. Just cover them tightly with plastic wrap or store them in an airtight container. They should last about 5 days in the fridge, but I can guarantee they won’t last that long! If you happen to have leftovers, you can also freeze them for up to a month—just make sure to separate layers with parchment paper so they don’t stick together. When you’re ready to enjoy them again, just let them thaw in the fridge overnight!
Helpful Notes
Here are some extra tips to ensure your Chocolate Peanut Butter Dream Bars turn out perfectly every time! If you need to make them gluten-free, simply swap the chocolate sandwich cookies for gluten-free varieties. There are some fantastic options out there that taste just as delicious!
For those watching their sugar intake, you can use sugar-free pudding mix and a sugar substitute for the powdered sugar in the peanut butter layer. It won’t change the creamy texture too much and still delivers on flavor.
Don’t hesitate to get creative with add-ins! Chopped nuts, like peanuts or walnuts, can give your bars a nice crunch. And if you want to make them extra special, drizzle some melted chocolate on top before serving. Your guests will be so impressed!
Frequently Asked Questions
1. Can I freeze these Chocolate Peanut Butter Dream Bars?
Absolutely! These bars freeze beautifully. Just cut them into squares, layer them with parchment paper in an airtight container, and pop them in the freezer. They can last up to a month, and when you’re ready to enjoy, just let them thaw in the fridge overnight!
2. What if I don’t have chocolate sandwich cookies?
No problem at all! You can use graham crackers, vanilla wafers, or even Oreo thins for a lighter crust. Just crush them up the same way and follow the recipe as usual. It’s a great way to mix things up!
3. Can I use natural peanut butter instead of creamy peanut butter?
Yes, you can! Just keep in mind that natural peanut butter might be a bit runnier, so you might want to add a touch more powdered sugar to help thicken the mixture. It’ll still taste amazing!
4. How long do these bars last in the fridge?
These bars will stay fresh in the refrigerator for about 5 days, but trust me, they’re usually gone before then! Just make sure they’re covered well so they don’t absorb any other flavors from your fridge.
5. What can I use instead of cream cheese?
If you want to skip the cream cheese, you can use mascarpone cheese or even a dairy-free cream cheese substitute. Just make sure it’s softened to get that lovely creamy texture we’re after!
Final Thoughts
So there you have it, my friends! Chocolate Peanut Butter Dream Bars are not just a dessert; they’re an experience that you absolutely *must* try. I can’t wait for you to whip up this delightful treat and share it with your loved ones. Trust me, the smiles on their faces will be worth every minute spent in the kitchen!
Remember, these bars are super versatile, so don’t hesitate to make them your own! Experiment with flavors and toppings, and let your creativity shine. I’d love to hear about your variations or any tips you discover along the way. So grab those ingredients, get mixing, and prepare for the sweet delight that is about to unfold. Happy baking (or should I say, assembling)!
Print
Chocolate Peanut Butter Dream Bars
- Total Time: 2 hours 20 minutes
- Yield: 12 servings 1x
- Diet: Vegetarian
Description
Decadent bars with layers of chocolate and peanut butter flavors.
Ingredients
- 1 package (16 oz) chocolate sandwich cookies, crushed
- ½ cup unsalted butter, melted
- 1 cup creamy peanut butter
- 1 package (8 oz) cream cheese, softened
- 1 cup powdered sugar
- 1 container (8 oz) whipped topping, thawed
- 1 package (3.9 oz) instant chocolate pudding mix
- 1½ cups milk
- Extra whipped topping & chocolate curls (for garnish)
Instructions
- Preheat oven to 350°F (175°C).
- Combine crushed cookies and melted butter in a bowl.
- Press mixture into the bottom of a 9×13 inch baking dish.
- In another bowl, beat together peanut butter, cream cheese, and powdered sugar until smooth.
- Spread peanut butter mixture over the cookie crust.
- Fold whipped topping into the peanut butter mixture.
- In a separate bowl, whisk together chocolate pudding mix and milk until thick.
- Spread pudding over the peanut butter layer.
- Top with extra whipped topping and chocolate curls.
- Chill in the refrigerator for at least 2 hours before serving.
Notes
- Store leftovers in the refrigerator.
- Allow bars to chill for best flavor.
- Use gluten-free cookies for a gluten-free option.
- Prep Time: 20 minutes
- Cook Time: 0 minutes
- Category: Dessert
- Method: No-Bake
- Cuisine: American
Nutrition
- Serving Size: 1 bar
- Calories: 350
- Sugar: 25g
- Sodium: 200mg
- Fat: 22g
- Saturated Fat: 10g
- Unsaturated Fat: 8g
- Trans Fat: 0g
- Carbohydrates: 30g
- Fiber: 2g
- Protein: 6g
- Cholesterol: 15mg
Keywords: Chocolate Peanut Butter Dream Bars, dessert, no-bake, chocolate, peanut butter
