
Oh my gosh, let me tell you about these Butterfinger Caramel Crunch Cookies! They’re like a little piece of heaven in every bite, and they take me right back to my childhood. I remember the first time I made them for a bake sale at school. I was so nervous, but the moment I pulled them out of the oven, the warm, sweet aroma filled the kitchen, and I knew I had something special on my hands. They were an absolute hit!
These cookies are perfect for any occasion, whether it’s a cozy family night, a festive gathering, or just a sweet treat for yourself. With the rich flavors of buttery cookies, crunchy Butterfinger bits, and that gooey caramel drizzle, they’ll have everyone coming back for more. Trust me; once you try these, you won’t want to share!

Why You’ll Love Butterfinger Caramel Crunch Cookies
Oh boy, where do I even start? First off, the flavor explosion in these cookies is just phenomenal! You’ve got that rich, buttery base that practically melts in your mouth, then you bite into the crunchy Butterfinger pieces that add an irresistible texture. And let’s not forget the caramel bits – they bring that sweet, gooey goodness that makes every cookie feel like a little celebration.
But it’s not just about the taste; it’s about the experience too! Picture this: you’re pulling these cookies from the oven, and the warm, sweet scent fills your home. It’s like a hug in the kitchen! Plus, they’re super easy to whip up, making them perfect for a last-minute treat or a fun baking day with the kids. And if you’re anything like me, you’ll love how versatile they are; these cookies are sure to impress at parties or just satisfy that sweet tooth after a long day. Seriously, you’re going to want to keep this recipe on hand forever!
Ingredients You’ll Need
Alright, let’s gather everything you’ll need to make these scrumptious Butterfinger Caramel Crunch Cookies! I promise, you won’t be running around the store looking for random ingredients. Here’s a straightforward list:
- 2 ½ cups all-purpose flour: This is your base. It gives the cookies structure and a nice chewy texture.
- 1 teaspoon baking soda: This helps the cookies rise and gives them that perfect soft bite.
- ½ teaspoon baking powder: Just a little boost to help the cookies puff up nicely!
- ½ teaspoon salt: It enhances the sweetness, making every bite more flavorful.
- 1 cup (2 sticks) unsalted butter, softened: Make sure it’s soft but not melted – this is key for that rich, buttery flavor.
- 1 cup brown sugar, packed: This gives the cookies a deeper sweetness and a lovely chewy texture.
- ½ cup granulated sugar: For a little extra sweetness and a slight crunch.
- 2 large eggs, room temperature: Using room temperature eggs helps everything mix together smoothly!
- 2 teaspoons pure vanilla extract: Trust me, this is what makes your cookies taste like they came from a bakery!
- 1 cup crushed Butterfinger candy bars (about 4 standard-size bars): The star of the show! These add that crunchy, chocolaty goodness.
- ¾ cup caramel bits (or chopped soft caramels): This is where the gooeyness comes from! You can find these in the baking aisle.
- 1 cup semi-sweet chocolate chips (optional but recommended): If you’re a chocolate lover like me, you definitely want to add these!
- ½ cup caramel sauce (homemade or store-bought): This is for drizzling on top – the more, the merrier!
- ½ cup crushed Butterfinger pieces for garnish: Sprinkle these on top right before serving for an extra crunch!
Make sure you have everything ready to go, and you’ll be on your way to cookie bliss in no time! Happy baking!
Step-by-Step Instructions
Prepping the Dough
Let’s dive into the fun part—making the dough! First, you’ll want to preheat your oven to 350°F (175°C). This step is super important because you want those cookies to bake perfectly as soon as you’re done mixing. While the oven heats up, grab a medium bowl and mix together your dry ingredients: the flour, baking soda, baking powder, and salt. Just whisk them together until they’re well combined. This helps distribute the leavening agents evenly, so your cookies rise beautifully.
Now, in a large mixing bowl, it’s time to cream together the unsalted butter, brown sugar, and granulated sugar. I love using an electric mixer for this part, but if you’re feeling strong, a whisk works too! Mix until it’s light and fluffy—about 2-3 minutes. This is where all that rich flavor comes from! Next, add in your eggs and vanilla extract. Mix it all together until it’s smooth and creamy. Don’t worry if it looks a little odd at first; it’ll come together as you mix!
Now, gradually add your dry mixture to the wet ingredients. I like to do this in batches to avoid a flour cloud explosion! Stir until just combined. You don’t want to overmix it; a few lumps are totally okay. Finally, gently fold in the crushed Butterfingers, caramel bits, and chocolate chips if you’re using them. Your dough should be thick and slightly sticky—just perfect for cookies!
Shaping and Baking the Cookies
Alright, it’s cookie-shaping time! Grab a baking sheet and line it with parchment paper for easy cleanup. Using a tablespoon or a cookie scoop (my favorite tool!), drop heaping spoonfuls of dough onto the baking sheet. Make sure you leave some space between each dollop—about 2 inches apart—because they’ll spread a bit while baking.
Pop those babies into your preheated oven and bake for 10-12 minutes. You’re looking for the edges to be lightly golden, while the centers still look a little soft. Trust me on this; they’ll firm up as they cool. If you want them chewy and delicious, don’t overbake! When the timer goes off, take a peek—if they look just right, pull them out and let them sit on the baking sheet for a few minutes before transferring them to a wire rack. This is crucial because they need that little time to set up!

Finishing Touches
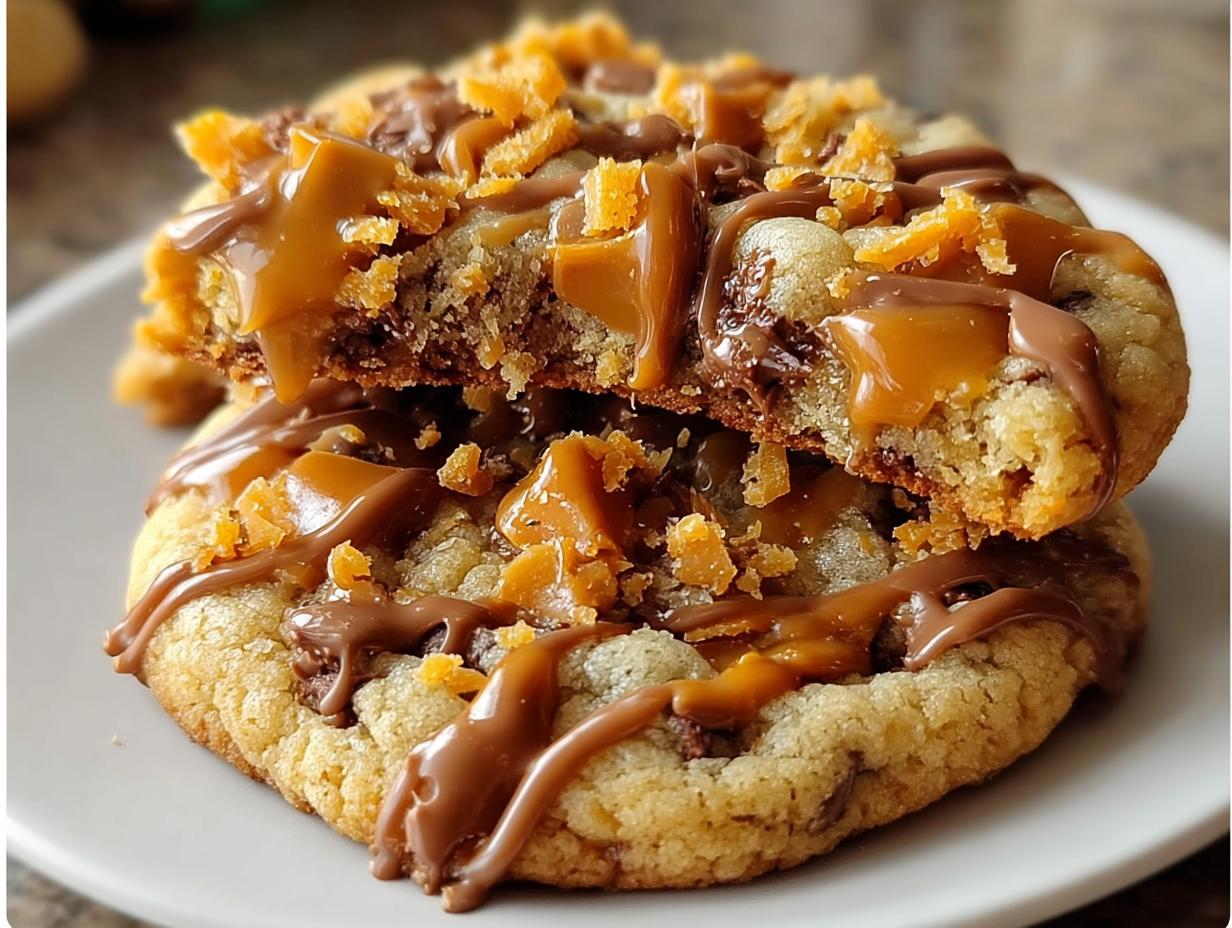
Now for the fun part—finishing your delightful cookies! Once they’re cool enough to handle, it’s time to drizzle that luscious caramel sauce on top. You can use store-bought or make your own if you’re feeling adventurous. Just grab a spoon and drizzle generously over each cookie. Ooh, it’s going to look so good!
Finally, sprinkle some crushed Butterfinger pieces on top for that extra crunch and a pop of color. It’s like the cherry on top, except way better! Now, step back and admire your creation. The smell, the look—everything about these Butterfinger Caramel Crunch Cookies is just perfect. Enjoy the process and get ready for compliments from everyone who tries them! You’ve earned it!
Variations
Now, if you’re feeling a little adventurous and want to switch things up, there are plenty of fun variations to try with these Butterfinger Caramel Crunch Cookies! For starters, why not swap out the Butterfinger for your favorite candy bars? Snickers, Milky Way, or even Reese’s would add a delicious twist. You can also experiment with different types of chocolate chips—dark chocolate or white chocolate could offer a whole new flavor profile!
If you’re looking to make these cookies a bit more seasonal, try adding some pumpkin spice or cinnamon for a cozy fall vibe. And for those who are nut lovers, tossing in some chopped pecans or walnuts can add an extra crunch and richness. Don’t hesitate to have fun with it; these cookies are super adaptable, and you can make them your own! Just remember, no matter how you change them up, they’re sure to be a hit!
Serving and Storage Tips
When it comes to serving your Butterfinger Caramel Crunch Cookies, the options are endless! They’re perfect for sharing at parties, school events, or simply enjoyed with a cup of coffee or milk at home. I love to serve them warm, with the caramel still gooey and inviting. If you want to make them extra special, try pairing them with a scoop of vanilla ice cream—trust me, it’s a match made in heaven!
As for storage, you’ll want to keep these cookies in an airtight container at room temperature. They stay fresh for about 4-5 days, but I doubt they’ll last that long! If you want to keep them for a longer period, you can freeze them. Just make sure to layer them with parchment paper to prevent sticking, and they’ll last up to 3 months in the freezer. When you’re ready to enjoy them, simply thaw at room temperature or pop them in the microwave for a few seconds for that fresh-out-of-the-oven taste. Enjoy every last crumb!
Helpful Notes
Before you dive in, here are some tips to make your baking experience even better! If you’re looking for a gluten-free option, you can easily substitute the all-purpose flour with a gluten-free flour blend. Just make sure it’s a 1:1 ratio blend for best results. And for those who are dairy-free, you can use a plant-based butter and dairy-free chocolate chips to keep things creamy and delicious!
Also, if you prefer a softer cookie, try reducing the baking time by a minute or two. Remember, the cookies will continue to cook a bit after you take them out of the oven, so don’t worry if they seem slightly underbaked. Lastly, feel free to add in some chopped nuts or a touch of sea salt on top for an extra flavor boost. Enjoy experimenting and making this recipe your own!
Frequently Asked Questions
1. Can I freeze these cookies?
Absolutely! These Butterfinger Caramel Crunch Cookies freeze wonderfully. Just place them in an airtight container with parchment paper in between layers to prevent sticking. They’ll be good for about 3 months!
2. What if I don’t have Butterfinger candy bars?
No problem! You can swap them out for any chocolate bar you love, like Snickers or Milky Way. Just make sure to crush them up to keep that delightful crunch!
3. Can I make the dough ahead of time?
Yes! You can make the dough and refrigerate it for up to 48 hours before baking. Just cover it tightly with plastic wrap, and when you’re ready to bake, scoop and bake as usual.
4. How do I know when the cookies are done baking?
Look for lightly golden edges and a soft center. They’ll continue to set as they cool, so try not to overbake them!
5. Can I use salted butter instead of unsalted?
Sure thing! Just reduce the added salt in the recipe to about ¼ teaspoon. This will help balance the flavors perfectly!
Final Thoughts
So there you have it—my beloved Butterfinger Caramel Crunch Cookies! I can’t stress enough how much joy these little delights bring not just to me but to everyone who gets to enjoy them. Baking is such a beautiful way to express love and creativity, and I hope you feel that same excitement when you whip up a batch. Don’t worry about making them perfect; just have fun with the process and savor every moment. And trust me, the smiles and happy faces when you share these cookies will be absolutely worth it!
Whether it’s a cozy evening at home or a gathering with friends, these cookies will surely steal the show. So roll up your sleeves, put on your apron, and let’s make some cookie magic happen! Happy baking!
Print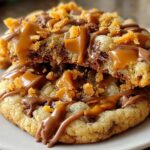
Butterfinger Caramel Crunch Cookies
- Total Time: 32 minutes
- Yield: 24 cookies 1x
- Diet: Vegetarian
Description
Delicious Butterfinger Caramel Crunch Cookies with a rich flavor.
Ingredients
- 2 ½ cups all-purpose flour
- 1 teaspoon baking soda
- ½ teaspoon baking powder
- ½ teaspoon salt
- 1 cup (2 sticks) unsalted butter, softened
- 1 cup brown sugar, packed
- ½ cup granulated sugar
- 2 large eggs, room temperature
- 2 teaspoons pure vanilla extract
- 1 cup crushed Butterfinger candy bars (about 4 standard-size bars)
- ¾ cup caramel bits (or chopped soft caramels)
- 1 cup semi-sweet chocolate chips (optional but recommended)
- ½ cup caramel sauce (homemade or store-bought)
- ½ cup crushed Butterfinger pieces for garnish
Instructions
- Preheat your oven to 350°F (175°C).
- In a bowl, mix dry ingredients: flour, baking soda, baking powder, and salt.
- In another bowl, cream together butter, brown sugar, and granulated sugar.
- Add eggs and vanilla extract to the butter mixture. Mix well.
- Gradually add the dry ingredients to the wet mixture. Stir until combined.
- Fold in crushed Butterfinger, caramel bits, and chocolate chips if using.
- Drop tablespoonfuls of dough onto a baking sheet, spacing them apart.
- Bake for 10-12 minutes or until edges are lightly golden.
- Let cookies cool before drizzling with caramel sauce and sprinkling crushed Butterfinger on top.
Notes
- Store cookies in an airtight container.
- Use room temperature eggs for better mixing.
- Adjust baking time for desired softness.
- Prep Time: 20 minutes
- Cook Time: 12 minutes
- Category: Dessert
- Method: Baking
- Cuisine: American
Nutrition
- Serving Size: 1 cookie
- Calories: 180
- Sugar: 15g
- Sodium: 100mg
- Fat: 8g
- Saturated Fat: 5g
- Unsaturated Fat: 3g
- Trans Fat: 0g
- Carbohydrates: 24g
- Fiber: 1g
- Protein: 2g
- Cholesterol: 30mg
Keywords: Butterfinger Caramel Crunch Cookies
